Terra Cotta: My musings on...and resulting actions with.

I’m REALLY glad i dug this up to assess...

Lower levels of “surrounding insulating soil”.. were composed of HEAVILY vegetable rootballs, clay hunks, twigs, and burnt hunks of log. Not ideal.

There was also patchwork necessary all around as the slabs superheated and.. “exploded” the rear wall...

This is AFTER I patched/rebuilt the back corners.

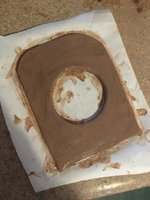
My work with earthenwares LATELY has shown me the importance, at least in MY technique, of brushed-on non-glaze slips.... I really DESIRED to apply the extra “shell layer” using THIS method.. for better coverage/sealing.. so I attempted a test section.. and observed it drying in the sun.... and it worked! I am quite pleased...

I WILL be applying my new outer shell this way.. it’ll take about 3 days... TOTALLY worth it...

(after 1st coat... still wet) 🤓
2FD17B3A-58AA-4D2A-B3D9-81A84760629C.jpeg
 
Third coat drying... it seems like after the FIFTH .. I wooooould be comfortable”burying it” ....

Then a thought occurred to me.... after 10-12... I probably wouldn’t NEED to bury it..

Thoughts? I have some time.. as, like I said, we are only on number three.

🤓92459615-87DC-44F9-B5A8-BD89004097BF.jpeg
 
Progress..

30C62487-216F-42BE-9D63-1484FB2EA7F2.jpeg
Uuuhg.. that angle makes it look like the igloo door is pointing slightly downward.... it is not.
 
I don't think it would suck if it was...

Speaking of suck though...

Remember to make adjustable secondary air ports.

Sorce
1618704819081.jpeg

COULD i make a “baffle device” for the lower edge?.. or wait until dry and drill?
 
COULD i make a “baffle device” for the lower edge?

Not sure what you mean.

wait until dry and drill?

You done it before?

If that the entire length you'll be alright...

Oh yeah.... "baffle'...I think I get it....

I keep thinking of a longer tunnel, I think the whole thing is bigger than I think

Sorce
 
Seems ok, I don't think you'll have to drill.

If you can pack the side cracks to smoothen There and maybe carve out that top drop down, you'll get more continuous airflow, which will allow for more efficiency directly, then also when it keeps adjustments from "stepping" like the valve.
The odd turbulence will change your adjustments more unpredictability, where a smooth constant Airflow will make it easier to read what adjustments change.

I think you can permanently baffle most of that, but have blocks to block it further of necessary.
Capture+_2021-04-18-07-52-44.png


This tube is essentially heating your secondary air, same as the design of a smokeless fire pit.


How you feeling?

I'm feeling good!

Sorce
 
I was gonna ask about smoothing the flow out... got thinking of those air-induction “horns” on those beefy drag cars.

🤣
 
Seems ok, I don't think you'll have to drill.

If you can pack the side cracks to smoothen There and maybe carve out that top drop down, you'll get more continuous airflow, which will allow for more efficiency directly, then also when it keeps adjustments from "stepping" like the valve.
The odd turbulence will change your adjustments more unpredictability, where a smooth constant Airflow will make it easier to read what adjustments change.

I think you can permanently baffle most of that, but have blocks to block it further of necessary.
View attachment 368806


This tube is essentially heating your secondary air, same as the design of a smokeless fire pit.


How you feeling?

I'm feeling good!

Sorce
So the brown to be filled in COMPLETELY, or is that a wall at the front..?

Wall at the front, aiming for “green (in your ‘sketch’) hole? Then “smooth out” that inner chamber?

Ooor “continuous tube”?....
 
Green burner position.
Trans Brown permanent wall.
Black moveable wall.

? Yeah?

Sorce
 
Sounds good, friend! My (Tool/kiln) clay isn’t ready yet. 🤣

Actually part “big boy” clay! Figured SOME ratio of MUCH-higher maturing clay bodies for a piece that will be taking that much constant heat would not hurt.
 
Waiting for that 3rd coat to dry/crack completely.. then gonna focus 4th and 5th on filling the cracks.. then back to overall shape/coverage/thickness..

The clay will be ready today... so i can make my “door” and “make-smooth” some harsher edges within the “chamber”

In the meantime, I was talking to someone, earlier in this thread about sand...

Here are the two sizes I “use” out of collected/cleaned beach sand.. i call THIS sand, before “processing” 50/50 Sand.. looks half white, half black... after all “the nitty gritty” takes Place... I’m left with these two usable sizes.
8162EED9-A859-4B33-A235-049F6A2055EB.jpegCE4F19FA-62BC-46CF-934F-3A0B4C114C19.jpeg
 
Finishing up the door/wall..

The burner I will be using most has an inner diameter of 1.25”... so Ideally I would WANT 3.25”.. buuut I decided to air SLIGHTLY on the cautious side and went JUST over 3.5”
 

Attachments

  • 409AEE52-F596-42E5-9A12-1867DC208447.jpeg
    409AEE52-F596-42E5-9A12-1867DC208447.jpeg
    137.2 KB · Views: 2
Back
Top Bottom