Kintsugi Pot Repair

lieuz

Chumono
Messages
757
Reaction score
1,336
Location
Fairfax, Virginia
USDA Zone
7
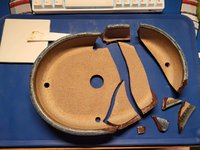
Another pot on the path to repair is this Nick Lenz pot from a study group mate. Devastated it broke, I offered to repair it for him and he was very excited to have it put back together. Not going to sugarcoat this, this is going to be one hell of a fix because this is quite a larger repair and also there is a substantial amount of loss needing loss compensation to fill those damaged areas. Honored to repair a Lenz pot nonetheless.

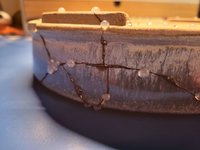
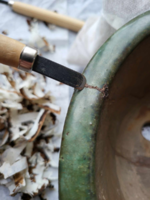
Clean breaks, very little blow out of glaze so the glaze broke also very cleanly.
20231112_220948.jpg

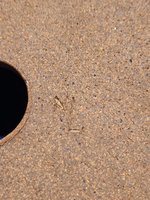
Nick Lenz chop. Seems to be a more recent pot of his, 3rd generation
20231112_221158.jpg

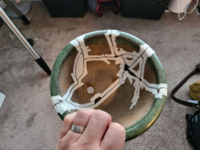
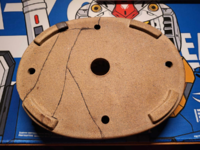
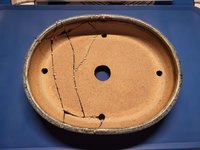
Here is the pot put back together. Note the blow out on the inside. This will be easy to fill. I've noticed that I prefer the interior intact more than the exterior. There's more reason to show off the blow out vs having it hidden away, should the pot be used.
20231112_232446.jpg

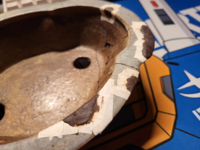
Note the very large piece missing. Part of the foot is also missing.
20231112_232506.jpg

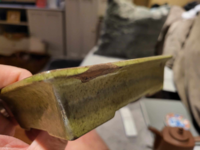
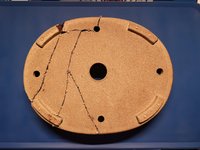
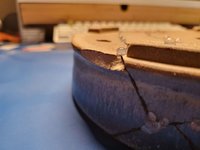
Side view of the more fragile side.
20231112_232514.jpg

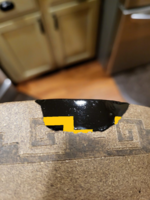
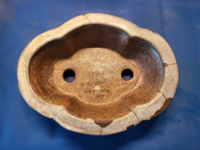
Missing piece. Will have to create a piece to fill in void.
20231112_232518.jpg

And now we wait. :) Thanks for your time!
 

lieuz

Chumono
Messages
757
Reaction score
1,336
Location
Fairfax, Virginia
USDA Zone
7
Another piece repaired. Not bonsai related but I thought it'd be a nice piece to share.

This is from a group mate, he purchased this place broken actually. It was repaired with epoxy and put back together but there was a substantial amount of problems with the repair. I learn a lot about repair from every piece of ceramic and this one taught me something I never would have thought would be a consideration.

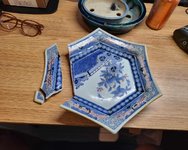
This is the piece in question. Having boiled the plate for a good hour, the epoxy softened enough where I can break the pieces apart with a slight effort. When I put this piece back together, I realized I could not get the pieces to fit exactly back together. It was nearly impossible, nothing worked. All the surfaces matched up fine; however, the bends to the pot didn't add up. I could only surmise that the ceramic piece had warped when it broke. I asked my kintsugi consultant and she enlightened me with the fact that even when vitrified, ceramics can bend to a less tense state. SO, to make things work, I had to keep the edges leveled, but the interior surface had to take a hit with a very very slight difference in level-ness.
403738702_300934462844707_3269514960711933780_n.jpg

After 5 months, the piece is fully set and cured. I had pulled the pieces apart to rework it in some way again but to no avail. This note how much a small deviation of levelness can cause such a large amount of backfill. Very good exposure to weird conditions.
405268790_6886589904709738_3984761166756651687_n.jpg

This was polished 4 times with grit up to 1000 to smooth the lacquer down. Each phase I would load up the divots with more and more finishing lacquer so it will fill in vs the filling paste. What looks dimply is actually super smooth and level. The gilding will show all flaws.
405411397_2371983222986252_340201805539849065_n.jpg

Note the large fillings with finishing lacquer. This is very smooth, the gilding will show how smooth it really is.
403738707_295644949480782_8071546067209501222_n.jpg

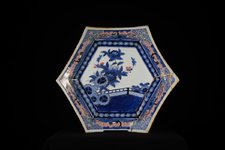
And here we are, the finished product.
403656869_1520410062128764_785464155990732101_n.jpg

If you look at the straight joined area, you will see some filling material jutting out, that's caused by blow out of the glaze which left a divot. having back filled with filling lacquer, it filled those areas naturally. Coming back with sand paper and charcoal leveled those spots down so it was a pleasant surprise to see these deformities. I welcome them.
369222325_853180813474837_273199350383166216_n.jpg

See how smooth the surface is. 4 x the polishing will do this.
403914634_386073107109914_4950441427087800555_n.jpg

The back is equally beautiful. Note the very smooth polished surface.
403745241_324054467085378_1068248397059051061_n.jpg

This piece was great fun. Taught me quite a bit. Hope my group mate will be happy with the end product. More projects to come!
 
Last edited:

lieuz

Chumono
Messages
757
Reaction score
1,336
Location
Fairfax, Virginia
USDA Zone
7
Another piece completed together with the plate. Shannon Salyer was so nice to gift this pot to me to repair. This Shigeru Fukuda aka (Bushuan) pot was put back together earlier in the year but I took my time repairing this pot. Most of my time, other than letting it cure, was to polish it over and over again. I tend to average out about 4 cycles of polishing but this took 5 cycles. I could not get it be any more smooth. If you were to run your finger past the joinery, you'd not be able to feel any indentation of the gilding.

Humble beginnings, this pot is very soft. It's like a bug, squishy on the inside by hard exoskeleton (glazing) holding the pot together. When I had etched to widen the break apart, the clay took a lot less effort than I would have thought.

This is the front that had the most surface loss.
370307605_362308576208957_9142661127466908373_n.jpg

403722941_1152757502747246_545830117500936946_n.jpg

Here is the piece back together.
405280036_366765382527847_7106902702763066620_n.jpg

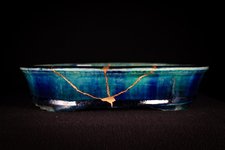
And here is the finished product. The gold against the blue is so very striking.
405381577_305351435747137_6493626334333756694_n.jpg

403946137_1290373274966587_875046554524732185_n.jpg

Unglazed areas is such a hard surface to work with. Note the charcoal staining when polishing. Doesn't seem to be any way around it but I would hope with time, it'll fade.
403738703_734615908688956_7618578318704459047_n.jpg

405429826_773559601450714_6397475017336384905_n.jpg

Quite proud of this shot. It's amazing to me that the glazing makes the gold have this strange appearance to be floating. The piece is very solid and the filling material is very tight with the repair. Love it.
403679676_274654115136722_4185651358499501514_n.jpg
 

lieuz

Chumono
Messages
757
Reaction score
1,336
Location
Fairfax, Virginia
USDA Zone
7
There are four challenging types of ceramics when it comes to kintsugi:
- Weirdly shaped items
- Because sometimes there are insanely tight areas where the finger or tools can't reach.​
- Unglazed
- Because unglazed surfaces can be marred by stains from the lacquer.​
- When sanding, you can sand the surface away, which exposes the rough interior.​
- Porcelain
- Because it's usually extremely thin and can easily break if handled too aggressively.​
- Can also be matte finished which will stain extremely easily.​
- Bonsai Pots
- Patina is the most important aspect when it comes to preservation. You'll have to not only be delicate to the piece itself, you'll have to consider not cleaning away the patina from any polishing you'll inevitably do.​
This is why when I work with a brand-new pot, I can more or less go to town on the entire piece when polishing. However, on an antique Chinese pot, it's an added layer of complexity that seems almost impossible. To mitigate this issue, I use tape to keep the material where it is and I can polish with the edge of a nail filer so it is only as thick as that edge.

1705607705670.png

1705607729334.png

1705607748547.png

So when someone asks me where is most of the attention focused, it's focused on not cleaning away the patina. This taping took about 4 hours to make sure everything is the same thickness.

Note the patina and the glaze underneath.
1705607919001.png

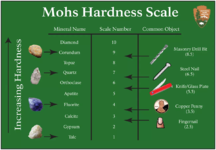
When I come through with carcoal for sanding and polishing, even the charcoal which has a hardness of 1-1.5 on the Mohs hardness scale can strip the patina off.
1705608176229.png

I learned the hardway, as you can see here. (FYI The paint didn't get polished off)
1705608298286.png

Once finished, I would hope to lend this to any of my study group mates who would want to slip pot a cascading tree into this pot for a show, possibly a National Show.
 

lieuz

Chumono
Messages
757
Reaction score
1,336
Location
Fairfax, Virginia
USDA Zone
7
I'm usually not as interested in my bonsai club's raffles but I'm more drawn to them now because it can be a great opportunity to pick up broken pieces. The club members would get some time to look around to see the pieces they want to pick up. I get a chance to look around to see if there are any pots that are broken. There's a few laying around but they don't really get picked up because they're pretty obviously broken. That's where I come in to grab the broken pieces that everyone stayed away from. It's a good opportunity to pick up pieces for practice. Some are less obvious and I'll let the person know they have a broken pot and if they want to get rid of it.

Here's a nice little pot I picked up where I'd like to do some interesting design to the repair. This is a substantially large break where the chip is over an inch long and half an inch deep. So there is going to be a substantial amount of resculpting needed. Luckily, there are good reference points to shape this natural composite. The composite is made of: tonoko powder (clay dust), cake flour, and wood dust (elm) mixed in and combined together with raw lacquer. Once cured, this stuff is extremely hard. This is just a rough shaping to get the substructure in place, I'll come back in with filling material to smooth out the substructure once the material cures.
1705951387677.png

Here's the pot after the material is filled in with filler material and smoothed out using the reference points around the break.
1705951713538.png
1705951728160.png
1705951744190.png

I'll come back in with another round of filling material to make sure everything is filled in until it's all 95% filled in leaving no cracks, chips, or crannies left to fill. I should be left with very very tiny pores remaining, I'll come back with a polishing lacquer to ensure the surface will be filled in. I'll repeat the polishing lacquer until all of the pores are filled in leaving a very smooth dark glossy surface.

The finish I'm trying to accomplish is some form of kumiko lattice design. So the base will be silver, while the lattice work will be gold. Excited to see where this goes!

I really dig the whole, something from nothing concept. Something that'll make me smile when I see a tree in it.
 

lieuz

Chumono
Messages
757
Reaction score
1,336
Location
Fairfax, Virginia
USDA Zone
7
Here's a quick example of what I mean.

Note how the sanding and filling got rid of a lot of the bigger defects. Now I'm left with smaller holes to fill with liquid lacquer.1000010187.jpg
1000010326.jpg
1000010189.jpg
1000010325.jpg

I'll sand this down again and reapply the polishing lacquer.
 

lieuz

Chumono
Messages
757
Reaction score
1,336
Location
Fairfax, Virginia
USDA Zone
7
After letting the silver cure for a few days, I added the lattice design on top of the silver and gilded it with gold. The thing I learned about doing this is that the silver might have still not been fully cured as I would have thought, it still picked up a bit of the gold dust making the resolution a bit more indiscernible (blurry) between the silver and the gold.

1706027109735.png

I'll need to practice this technique a bit more but overall, this was fun practice.
 

lieuz

Chumono
Messages
757
Reaction score
1,336
Location
Fairfax, Virginia
USDA Zone
7
It's such a bad comparison compared to my attempt; however, this is what I'm trying to mimic.

1706028638513.png

I'm not sure how this person got such clean lines, but I think it's this piece might be really small and the lines are quite fine. The brush I have is fairly thick in comparison. My design is also a lot simpler than this one, this is a pretty standard hex lattice pattern for kumiko projects. I'll keep on practicing but this is the first time I've put a design on top of the finished gilded surface.

I plan to add a design to this pot to continue the missing motif that runs the rim of the pot. So this would be gold with another layer of gold on top. Nothing intricate, just filling in what's missing.
1706030088162.png
 

lieuz

Chumono
Messages
757
Reaction score
1,336
Location
Fairfax, Virginia
USDA Zone
7
I Filled in the antique Chinese pot with clay/lacquer mix. I let it cure for about a week before coming through and scraping the excess off. This was quite exciting because I can now test my polishing skills on super fine lines.

Note this large hole that's filled now with the lacquer mix.
1000010462.jpg

Despite the messy spread, the line is quite fine.
1000010461.jpg

1000010460.jpg

After the wait, I went through and removed the excess mix to make it flush to the surface. I had my concerns about scratching the patina off; but, I've come to realize my chisel when flipped upside down will revive quite of bit of material without scratching the patina off.

Here is the pot with all the tape removed. Pretty clean lines. A lot of excess material but it was easy to remove.
1000010463.jpg

Here is the after. Still very rough but I'll go through and fill the very bad spots.
1706599733329.png

Here's the chisel right side up. More of the business end of the chisel makes contact with the pot, but upside down, the only part making contact is exactly the thickness of the material.
1706599795107.png

Upside down.
1706599891144.png

Here's a video showing the process of the chiseling of excess material away.
View attachment 423249312_768843621727042_4359111845641942743_n.mp4

The interior with all the excess material removed. Large holes are now also filled in. Everything is smooth to the touch or roughly smooth where the larger patched areas are.
1706600108944.png

I'll let this cure a bit more before I come back through with another layer of filler material.
 

lieuz

Chumono
Messages
757
Reaction score
1,336
Location
Fairfax, Virginia
USDA Zone
7
The Nick Lenz pot is now fully back together with all the hot glue dots removed. The piece still has quite a substantial loss that needs to be addressed. After scraping off the excess material, I needed to address the substantial loss before filling in the joinery. A partial foot is missing, so I had to mix in the flour, wood dust, clay, and lacquer composite to rebuild the foot as well as fill in some of the larger areas that has loss.

There are still a few spots on the interior needed filling, I'll come back with the same composite later to fill in those spots. While the souther side has pieces of the surface flaked off. That I'll just come and fill with just clay and lacquer mix. The difference is, the top bit is missing all the way through so it'll need more of that structural integrity by using that composite.
1706600477375.png

Here's another look at that very deep hole.
1706600947713.png

Note the partial foot that's missing. I rebuit that one piece, it'll be sanded down and made to have the profile of the rest of the foot to match.
1706600621315.png

And here's a side view. It's good the loss of the partial foot is joined in with the side wall. This should add in more structural integrity so that the foot stays on held by adhesion as well as the material wedged into place.
1706600705839.png

The entire pot is filled with these types of blow outs. Missing glaze and missing substructure.
1706600854118.png

I'll wait for the foot and the areas of loss repair to cure before i come through and sand. That'll be about a week or so.
 

lieuz

Chumono
Messages
757
Reaction score
1,336
Location
Fairfax, Virginia
USDA Zone
7
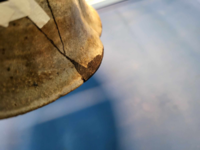
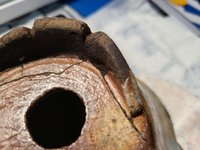
The last pot where a substantial amount of loss is addressed in this go-round. This Roy Minerai pot has a lot of the rim missing, so I added back material so I can sand it down later.
1706601250106.png

1706601265073.png

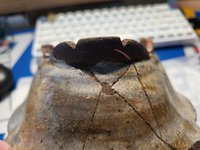
Here's the after when the composite of flour, clay, wood fines and lacquer was added to patch these areas. The repaired areas seem bulky but it'll be smoothed down by sanding.
1706601403680.jpeg

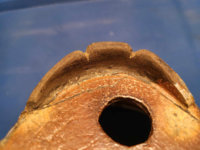
Here's a close up of the area.
1706601360324.png

The lip flares out and is quite elgant. These repairs need to fit in very well with the pot itself.
1706601455439.png

Another angle.
1706601486484.png

The foot is still missing on this repair. That foot is going to take a substantial amount of material. I do have to come up with a strategy with adding reinfocement to the foot. More to come later. Hurry up and wait for this to cure, another week.
 

lieuz

Chumono
Messages
757
Reaction score
1,336
Location
Fairfax, Virginia
USDA Zone
7
This hardened up pretty well after a few days. I scraped and sanded down so it matched the surrounding profile. Came out nice, I'll do another sanding after another few days.

1706888192376.png

There is a slight, very very slight, discrepancy that will be fixed with filler material and more sanding.
1706888238049.png

Slight gap will be fixed with filler material and sanding.
1706888292196.png

This fill came out very nice.
1706888319497.png

These gaps in the middle were filled in and sanded down.
1706888369632.png

Once this cures for a few more days, it'll be ready to recieve a new foot.
 

lieuz

Chumono
Messages
757
Reaction score
1,336
Location
Fairfax, Virginia
USDA Zone
7
In preparation for sculpting a foot for this pot, I wanted to share the recipe for the composite called kokuso (刻苧) or sometimes as (木屎). Between the two kanji, one being "chopped fibrous plant fiber" and the other literally meaning "wood poop" this stuff is meant to be a filling material that ends up being structurally sound because it gets tough and dense. The mixture ratio is typically equal parts 1:1:1:1.5. The first part is flour, the second is clay powder, the third is wood powder and the last is lacquer. Mixing these together will give you a very dense yet pliable piece of putty that can be used to sculpt missing pieces to the pot.

This is two portions of bread flour. I make the indentation to then add water so that I can mix the initial combination into a gum like consistancy.
1707199190305.png

Note how once all mixed, the flour water mixture is like the consitancy of gum or play doh.
1707199209964.png

Lacquer is then added and mixed together. This is the recpipe for mugi urushi or the glue adhesive used to join the broken pieces back together.
1707199227441.png

The mixing is quite strenuous to mix the lacquer into the gum flour paste.
1707199245092.png

The mixture is ready to be used as the adhesive once you get this long glutenous strands. If I were joining pieces together, I'd stop now and add this binding agent to the ceramic pieces to reassemble them back together.
1707199261191.png

Continuing to make kokuso, I'd add tonoko powder (clay powder) into the mixture.
1707199278994.png

Once I start mixing in the tonoko powder, I'll get the wood powder ready to also incporate together.
1707199295085.png

I'll put on a pair of gloves and would hand mix this to get the composite equally incorporated.
1707199310574.png

After a good 20 minutes of mixing, the composite is ready for application. If I couldn't finish this, I'll wrap this up and place it in the firdge and will keep for a week. At this point, this composite is ready to sculpt.
 

Wood

Shohin
Messages
424
Reaction score
1,019
Location
Alexandria, VA
USDA Zone
7a
How similar or different is the tonoko powder to a typical kaolin or ball clay?
 

lieuz

Chumono
Messages
757
Reaction score
1,336
Location
Fairfax, Virginia
USDA Zone
7
How similar or different is the tonoko powder to a typical kaolin or ball clay?
The best way I can explain that would be relative is if you sifted your bonsai soil and the ultra-fine stuff is similar in consistency.

I grabbed this picture from BONSAI TONIGHT, the dust that you see would be a similar consistency and even that I'd but that through a silk stocking and sift if some more. It's super fine material.

1707229081556.png
 

rockm

Spuds Moyogi
Messages
14,316
Reaction score
22,564
Location
Fairfax Va.
USDA Zone
7
In preparation for sculpting a foot for this pot, I wanted to share the recipe for the composite called kokuso (刻苧) or sometimes as (木屎). Between the two kanji, one being "chopped fibrous plant fiber" and the other literally meaning "wood poop" this stuff is meant to be a filling material that ends up being structurally sound because it gets tough and dense. The mixture ratio is typically equal parts 1:1:1:1.5. The first part is flour, the second is clay powder, the third is wood powder and the last is lacquer. Mixing these together will give you a very dense yet pliable piece of putty that can be used to sculpt missing pieces to the pot.

This is two portions of bread flour. I make the indentation to then add water so that I can mix the initial combination into a gum like consistancy.
View attachment 527429

Note how once all mixed, the flour water mixture is like the consitancy of gum or play doh.
View attachment 527430

Lacquer is then added and mixed together. This is the recpipe for mugi urushi or the glue adhesive used to join the broken pieces back together.
View attachment 527431

The mixing is quite strenuous to mix the lacquer into the gum flour paste.
View attachment 527432

The mixture is ready to be used as the adhesive once you get this long glutenous strands. If I were joining pieces together, I'd stop now and add this binding agent to the ceramic pieces to reassemble them back together.
View attachment 527433

Continuing to make kokuso, I'd add tonoko powder (clay powder) into the mixture.
View attachment 527434

Once I start mixing in the tonoko powder, I'll get the wood powder ready to also incporate together.
View attachment 527435

I'll put on a pair of gloves and would hand mix this to get the composite equally incorporated.
View attachment 527436

After a good 20 minutes of mixing, the composite is ready for application. If I couldn't finish this, I'll wrap this up and place it in the firdge and will keep for a week. At this point, this composite is ready to sculpt.
Pretty interesting stuff..."Wood poop" 🤣
 

lieuz

Chumono
Messages
757
Reaction score
1,336
Location
Fairfax, Virginia
USDA Zone
7
After a few more days, the pot had some more time to cure. It's time to make the missing foot. Using that recipe stated before, that'll be the composite used to shape the rough structure. Also needed ins some reinforcement, so I added two pieces of copper wire into the core to support the structure.

It was pretty hard to affix wire to this, but luckily, there were two holes I could shove wire into that ended up being just right for the use.
1707430614128.png

It protrudes pretty far out, almost to the tip of the proposed top of the foot, so this is pretty helpful to help reinforce the composite.
1707430639158.png

It's a messy process, I couldn't get any images during the process but this is the end product. It's much larger than the precieved foot, but as it hardens a bit more, I'll come back through and chisel away at the composite to sculpt the foot better.
1707430676868.png

Note how much more massive it is than to the left foot. The height is the same. I used a level to check and it is level to about .06 of a degree.
1707430694996.png

Now I'll just wait to shape this foot more. I can usually start to shape this better after a few days when it's firmer.
 

lieuz

Chumono
Messages
757
Reaction score
1,336
Location
Fairfax, Virginia
USDA Zone
7
After a few days in the humidity chamber (muro) with the feet more firm, I was able to whittle away material.
1000010673.jpg

Here's the after of the whittling away.
1000010719.jpg

1000010720.jpg

1000010721.jpg

1000010722.jpg

I was also able to do a light sanding and it exposed the copper reinforcement below.
1000010723.jpg

I'm pretty pleased with the results. I'll let this go back into the muro to let it cure a bit more. I'll come back with the sabi urushi, which is the other filling material, when this cures fully. It'll fill in all the voids and also allow for the foot to be more refined.
 

lieuz

Chumono
Messages
757
Reaction score
1,336
Location
Fairfax, Virginia
USDA Zone
7
Having cured a bit more, I applied some sabi urushi to fill in large substantial areas around the foot. The results are good, but still need another round of filler material, although less next go round.

Note the more polished and refined missing leg. Very pleased with this work. Will require another round of filling material to fully fill in all the voids.
1707880728291.png

Really pleased with how the interior is looking. Note all the voids that need another round of filler. These are too big for the liquid finishing lacquer to fill.
1707880798389.png

More voids to fill.
1707880814937.png

I'm not going to recreate the pattern of the foot. It's probably better to leave it as is than to try to add more to this.
1707880832104.png

This is interesting, the pot has these rough bits of missing material but it's all original. I'm considering filling this space in to make it more uniform.
1707880851652.png

The view of the back of the missing leg. Thankfully there is a bit of the original that helped guide shaping the rest of the foot. It's amazing that a missing piece can provide so much information.
1707880874621.png

There was quite a bit of sabi urushi left over. I decided to fill this of the cracks in. I used a piece of charcoal to polish this bit out. Still rough, but those joinery indentations are gone, smooth to the touch. I will come back through with polishing lacquer to fill in the small pores. That process itself will require a few passes.
1707880887216.png

Almost there, the pot is essentially whole again with the missing foot reattached. A few more days in the muro and I'll reapply the sabi urushi, this time I'll fill in all of the joinery also.
 
Top Bottom