Pitoon
Imperial Masterpiece
The link you posted is to the same thread you posted the link on.
The link you posted is to the same thread you posted the link on.
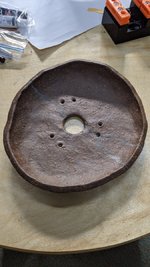
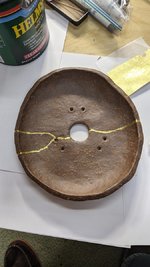
I did this to a pot that I broke that I really liked. I did not do as fine a job as the OP, but the result is a useable pot again. I used a powdered gold and just added it to the two part epoxy that was the glue component. That way it was really only one step, although since the pot was large with many breaks, I had to do it over a period of two weeks to allow each new piece to harden as I rebuilt it. I may try to go back and clean up the excess of the glue someday, but I'm pretty happy with the overall idea of having a unusable pot back.
View attachment 277980View attachment 277981View attachment 277982View attachment 277983
Gold is inert and doesn’t corrode. It may scratch from the substrate but who cares ..... the JB is doing the work. This is a sign I carved that hung outside my studio for 25+ years. The gold is as good as when it was put on. The rest of the sign.....not so good.How well does the gold leaf hold up if it's inside the pot under the substrate?

Yes exactly, just try to find one that doesn’t have glitter or sparkles in it as some crafting stuff does.What did you use for the powder? Something like this?
Gold is inert and doesn’t corrode. It may scratch from the substrate but who cares ..... the JB is doing the work. This is a sign I carved that hung outside my studio for 25+ years. The gold is as good as when it was put on. The rest of the sign.....not so good.View attachment 340525
Yes exactly, just try to find one that doesn’t have glitter or sparkles in it as some crafting stuff does.
The final cleanup is done with a rubberized wheel with abrasive impregnated in it. It's soft enough to not harm the glaze. I got these from Foredom.com.
View attachment 238362
I think the white ones are 120 grit. It’s been a while since I’ve bought them.Do you remember what grit you used?



Thanks! It was a surprisingly enjoyable/rewarding project. I have a friend that owns a sign shop, maybe I'll offer my new skill@RJG2 good effort!! There are sizes (glues) available that will work much better and easier than spar varnish. They can smooth out your sanding a bit. You still need to be able to paint evenly. Go here, there’s a lot of fun products just for gilding. https://www.goldenleafproducts.com/...MI74jKhazO7QIVzcDACh0VqQeSEAAYASAAEgKiLfD_BwE
No you don't! Well, as long as the ones I actually bought aren't broken, I still haven't opened them yet - my wife stole the box and wrapped it for Christmas.That looks dope! I owe you 2 for this!
Sorce
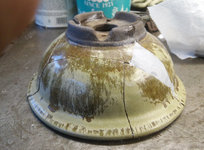

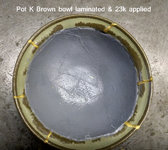


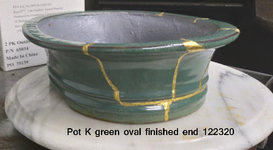
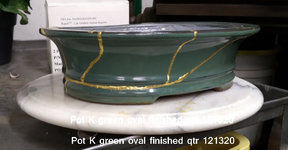

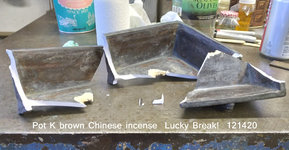


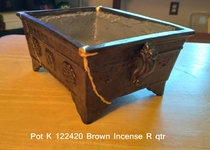


 So what now? I have a 14 inch Dale Cochoy Pot I bought from him about 2006 that is also resting this winter, so...
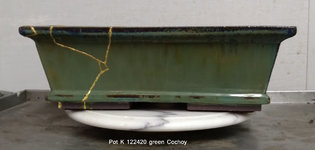

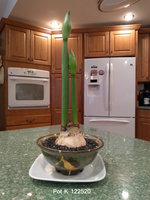

Yahoo! Glad to see you enjoying yourself. I’m sure your wife is enjoying it too! I guess this covid isolation thing can have a good side. I don’t know where my head would be if I didn’t have pots to make. Keep up the good work!!!Now I could execute a plan for the whole process. I carefully Krazy glued the pieces back together making sure the excess glue drooled or dripped to the interior or to the bottom of the exterior so I had less clean-up on the class A surface. The gold applied more cleanly and only got into the surface irregularities/pores which I scraped/scratched it off with an Xacto knife. That's a slow process and you need magnifying glasses to see that close and ruin the finished seam. It looks great...
View attachment 345992View attachment 345993
View attachment 345994
As a matter of fact, it went so well I asked myself, "What's next? What pots would I really like to apply this art to?" How about a couple 1 inch accents?..
View attachment 345995
Hah! Nothing to it and they looked a skilled artist has been at work! So, let's go for broke with another of my favorite pot that is on break this winter...
View attachment 345996
It has inconvenient chips on the upper edges, been there for years...
View attachment 345997 So what now? I have a 14 inch Dale Cochoy Pot I bought from him about 2006 that is also resting this winter, so...
View attachment 346000
View attachment 346001
Break a Dale Cochoy pot to fix it with kintsugi? Nah, clean the surface with MEK solvent and apply the bead of epoxy, and apply the gold and ipso presto First Class is upgraded. Thank You @ABCarve for a lesson well learned of a brand new ancient art!


 So the squirrels knocked this accent pot off of an upper shelf and it hit a rock and broke, so I thought I'd try something more than just epoxying it together. That pot was pretty hard to drill, I've done holes in pottery to repurpose it and with no problem, but that put the bit to the test.