A little tutorial & example on how to cross-polinate azaleas.
First off, selecting the parents. In this example, I cross-pollinate 'Girard's Fuchsia' with pollen from 'Kisshoten'.
If you are just starting out and do not have a specific goal, any cross between azaleas you like will work for you.
However, I am trying to be a bit more advanced. So I collected the one of the most hardy American evergreen azaleas, 'Girard's Fuchsia'.
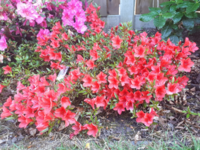
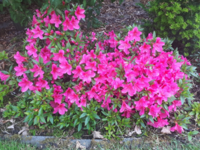
(For picture see below)
This plant the product of a lifelong of breeding my mr Girard, located in zone 5 Ohio, and is heavy on the R.yedonese var poukhanense blood. I assume that selected for it's very dark purple colour and strong blotch.
For me it is quite evergreen and does not have much autumn foliage colour.
However, if one studies the results of other people who have used 'Girard's Fuchsia' one learns that 'Girard's Fuchsia' has an ace up it's sleave when it comes down to plant breeding.
It turns out that Girard's Fuchsia has produced very pale coloured seedlings, like 'Sandy Dandy' and '‘Isabella Maria'. Checking the parents and offspring of the azaleas you are using as parents can give you some hints on how your seedlings could look.
The trick of 'Girard's Fuchsia' is likely that purple azalea and hybrids poukhanense contain the most different types of colour pigments. While a red azalea only has 1 or 2 types of red pigments. So 'turning off' some of the pigments of a purple azalea can give different effects, like these buff seedlings. Additionally, co-pigmentation plays a role.
One of my goals is to get pale flowers that have very strong blotches. So 'Girard's Fuchsia' may be good, while also making the satsuki much more cold hardy. Hopefully.

'Kisshoten' is the other parent, a very new satsuki with a somewhat small flower (only a bit larger than Kozan). It has a very near flower shape and it's red colour is quite deep. Additionally, the blotch is quite strong for a satsuki. Finally, it has some good patterning/variegation. While very new, the Japanese breeders have already used 'Kisshoten' in creating several new varieties. Foliage-wise, it is pretty standard for a satsuki azalea.
I do not expect any seedlings that are just like 'Kisshoten', but more winter hardy. I do expect some dark purple seedlings with an intermediate flower shape. And a few buff/pale/bicoloured seedlings. The split could be 50/50.
Likely, none will be pure red and likely none will be white.
Note that the satsuki 'Kisshoten' normally flowers a couple weeks later than 'Girard's Fuchsia'. Therefore, I moved the 'Kisshoten' indoors at room temperature and under LED lights a while ago. Generally, one should move the late blooming azalea indoors about 1.5 to 2 months before you expect the early flowering azalea to start to bloom. I have had no issues with lower humidity when moving plants indoors. But you need artificial lights.
Note that for some varieties, not all flowers will produce pollen. If the pollen parent has a dark flower, the white pollen will be easy to see as two dots. If the flower is white, you may not be able to see any sighs of pollen. Usually a flower needs to mature a few days after opening for the pollen to be more ready to come out.
Example of close up of the anthers of an azalea:

you can see that there are two channels on each anther. You can never be sure how many pollen is inside until you try this stamen on the stigma of the other flower.
Source:
http://www.microscopy-uk.org.uk/mag...roscopy-uk.org.uk/mag/artdec10/bj-azalea.html
Once you
One can start to make a cross when the seed parent starts to open it's flowers. Usually, the first flowers of a plant that open are not properly formed.
Usually, it is best to pollinate a flower on the first or second day after it has opened. If rain is predicted on the days you want to make the cross, or the day after, one can use an umbrella or something to protect the flowers from becoming wet.
Some people say it is best to pollinate a flower in the morning. However, for me then the flowers are still damp. So I usually do it in the evening, as that is also more convenient.
So onto 'Girard's Fuchsia', first, one selects a good properly formed flower. The style should have the right shape.

First, check if the stigma seems clean of pollen. Second, observe if the stigma is shiny. If it has a very dull look, then maybe it is not quite receptive for pollen yet.
One can see this one also has some pollen, so one has to be a little careful that the pollen doesn't stick on your hands, or on the stigma.
Only when I do a cross where the pollen parent is essential, I will remove the petals of an unopened flower.
Right now, I did not see any bumblebees in flowers yet. But they will be there in a few weeks. Usually, they do not seem able to pollinate any flowers.
So their contamination is generally not an issue. But if it is paramount, you can open a fresh flower and be sure no bumblebee ever touched it. Once you remove the petals, the bumblebees will also not visit it.
I hear people sometimes cover up the stigma after pollinating, but I see no need.
First, one removes the petals and the stamen. Then take the stamen of your pollen parent and apply it to the stigma.

(I wish I could hold the stamen in my right hand, touch the stigma, drag out some pollen strings, all while holding and operating my phone with my left, and making it center focus at exactly at the right moment, and then push the screen to take the picture. This was the best I could do.)
Ideally, once you touch the stigma with the tip of the anthers, sticky strings of pollen should already come out, allowing you to 'paint' it all over the stigma.
If not, you can tap the stamen with your finger while holding it by the filament in your other hand. Then check if pollen is coming more to the surface.
Sometimes, it just isn't working because there is little pollen and it is not very sticky, but instead quite brittle.
For some varieties, it is very challenging to use them as pollen parents. Others are extremely easy.

You can see the stigma is now completely white and fully covered with pollen from 'Kisshoten'.
Now, I label the flower with the pollen parent label. I use nylon fishing string, dutch tape and a permanent marker. I cut pieces of string, loop them, tape them down at the bottom, and label the tape.

My code for 'Kisshoten is 'ki'. This way, whne I collect the seed pod in october, I can label the envelope with both the seed and pollen parent and I can always keep the seedlings labeled the same way.
I put the loom over the ovule, make sure it sits at the base of the fruit, all the way down to the stem/pedicel. Then I tighten the loop somewhat. Make sure pulling on the scotch tape while tightening doesn't wipe out the text.

One can also remove the other flowers right next to the flower you pollinated. Many kurume have 2 or 3 flower buds at a terminal shoot with 2 to 3 flowers in each flower bud.
Satsuki have less flowers. It may be that removing the other flowers helps the fruit develop.
One can pollinate the flower with more fresh pollen 2 or 3 days later. Especially if there is some rain. It is always nice to have many many seeds come from a seed pod once you crack it open.
Nothing more annoying than a seed pod where only 10-20 seeds come out, and you have more chaff/debris than seeds.
And that is all work for now. In three to four weeks there should be signs that this seed pod is taking/getting larger, while the other non-pollinated fruit bodies start to shrivel up.
At that time you can check if the label is properly positioned and tightened.


