Choose your own Adeventure!

First off, let me apologize for the photos not being so great... had to use the flash seeing that it is getting dark. In the following photographs one will see that I have stripped the bottom branch of all foliage and for the moment have just left it as is... will have bark removed, and shortened.

So, let's go through the issues the tree has in order to find a path forward.

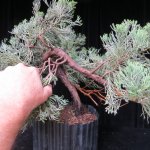
First off one will notice that right at the very base of the trunk one will see there is a bend. Now, I will be able to remove some of the soil beneath it and expose some trunk below this bend... However, right of the bat this feature limits how one can change the angle of the tree in the planting, seeing that if in the first two photos one tries to tilt to the left, you will be burying the trunk down in the soil, which we don't want to do. So, already we have one decision made for us... The tree's angle must either remain the same, or must be tilted to the right.

First branch is going to be jined as previously mentioned. The trunk then goes up, and bam... we have a dead end with the trunk splitting off, quite literally making a "T". If this was not bad enough, both are of really thick in diameter, and are equal in size. Often, in a situation such as this one might be able to use one as a branch, and the other the actual further continuation of the trunk. But, ideally what one would prefer in a scenario such as that would be varying sizes between the two, the smaller becoming the branch, as well as the one becoming the branch not being so thick in size. A branch to thick, means it limits amount of movement one can do, as well as visually needs to taper down and work within the design of the tree, as well as the look of the rest of the tree's branching. If all the tree has smaller branching and then one has this one branch 3 x that of the others... it looks kinda weird and wrong.

So... this point is going to be so far the most determining feature of where and how to move forward with the tree. If one cannot figure out a way to make them both work... then one needs to be removed.

In my next post, I will discuss the pros and cons of each path forward, in the hopes of trying to find the path forward with establishing the style of the tree. Thanks!
juniper2c.jpg juniper2d.jpg

juniper2e.jpg
 
Sawgrass, on the first tree, I like the slant style better than the cascade. But, I guess that's because I prefer upright trees to cascades anyway...

Good job!

(just don't pinch it! LOL!)
 
Sawgrass, on the first tree, I like the slant style better than the cascade. But, I guess that's because I prefer upright trees to cascades anyway...

Good job!

(just don't pinch it! LOL!)
Thanks for the reply! Only reason why I didn't go with the upright tree was that it would of had heavier branching up at the apex. It could of been removed of course, but it had some nice foliage. Now normally one does not always let the foliage determine the tree, but in this case I figured why fight it!

I found a new source for practice material such as this and only paid $40 for the tree! So, hopefully I improved on it and made a nice tree out of it!

Side note... when I first started off doing bonsai and working with junipers I pinched, cause I was told by some folks who had been doing bonsai for a long time this was what you were suppose to do... I later learned on my own not to do this! Through my trees ending up looking as your tree that you posted does...
I found the best Path forward was actually to let them grow out, completely remove all of the bad areas once it has, and do a complete restyle. In essence sadly ... start over
 
Last edited:
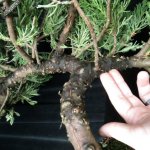
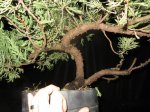
Ok... picking up where I left off with the last post regarding juniper #2. I was beginning to look at the "T" section of the trunk and try and decide a path forward with the trunk. First I wanted to show a close up of the section and it's size in relation to the size of my fingers. Which the following picture shows...
juniper2f.jpg

Now as mentioned before in my previous post regarding this tree... often with junipers it is quite common to run across this kind of bar branching. A lot of times one can use both parts by wiring, making one a continuation of the trunk, and the other a branch. However, seeing the size of both branching in relation to the size of my fingers, one can see that either one of these would be to big to make a branch out of... Why? Two reasons... The first being the branch is to big in comparison to all of the other branching on the tree. If the tree was full of heavy branching such as this then perhaps. The second being that big branching such as this does not easily allow for being moved or bent. Much better to trade out large branching in favor of smaller branching that can easily be wired and bent. (In the following post in this thread I will go into more detail, what size branching one is looking for, when styling a tree.)

So, then one of them has to be removed... which one ???

A couple of things I usually consider, when making the choice are, which one has the best branching, as well as more branching, of a size I can work with, which one has the better foliage, more of it, and more compact in towards the possible branch I will be using as the continuation of the trunk. And lastly since we are creating art, which continuation of the trunk has the best movement, and best layout for the possible tree I would wish to make. Consideration must be made as well for where with the new trunk would the apex end up being, unless future bends are to be put in place, one wants to make sure that the apex of the tree comes forward, and not away from the viewer. One other thing that was mentioned in the previous post regarding this tree, is that there is a bend right off the base of the trunk, limiting the range of how one can change the angle of the tree in the planting, seeing you don't want to bury the trunk in the soil. All something to consider...

Let's get to it!

Let's start with the "right" branch coming off of the bar... If we chose to make this the continuation of the trunk, we would be looking at something like the following photo.
juniper2g.jpg
Pros and cons of this version of the tree would be that it has the best branching and foliage of the two sides. There is a lot of workable branches, with foliage in tight, and alot of very nice foliage... this side would ideally be the immediate choice! It is healthy and strong and is actually ready to for a first styling. Before I continue I would like to side step and say that often when one hears folks discuss "Pre-Bonsai" this is what they "should" be talking about... it is material that someone has spent alot of time on, often at a nursery, cutting back material to a general shape and line, preparing a piece of material for it's first styling. Sadly however, the meaings of these words get lost in translation, and folks are often selling material such as this tree. with alot of major flaws as "Pre-Bonsai"... It is not. This tree is really nothing more than a regular nursery plant! It is just the luck of the draw, that this side of the tree has naturally just produced better material for making a Bonsai out of.

Cons of using this side of the branching to make the continuation of the tree are, that the trunk has absolutely no interest. It basically forms a "piss" arch. Which is not what anyone wants in a Bonsai... By this I mean the trunk goes up and then curves back down towards the ground again. So, this side is a no.

Which leaves one with the other side... So, let's examine and discuss a photograph of it.
juniper2h.jpg
Pros and Cons of using this side, the "Left" branch, as the continuation of the tree's trunk are that the line of the trunk holds much more interest. The trunk come up out of the ground, turns to the right, dips down, then curves back up again, and gradually curves back towards the center of the planting, or where the trunk originates from the soil So, right off the bat, with this side we have movement. As well as a centering of the apex of the tree, which establishes balance. Balance is good! No matter how ridiculously crazy one creates a tree... if it is centered and has balance, it will give the tree a feeling of harmony and strength.

Cons of this side are that the majority of the branching is to long, with growth to far out. Also, there are a couple of lower branches with the same problem, that are also very thick. They can have a little bit of movement added, but this will be minimal... so it might be best if these were removed. Lastly, seeing that the left side of the tree was facing the ground, most of the branching is on the right side of the tree. How to develop a tree that is not a windswept, is going to be a bit tricky!

So, if one were to want to pick this side to make the tree, and if this tree was of any significant worth... it really would be wise to remove the other branch, and then spend the next however many years tending to the tree, making it a "Pre-Bonsai" and forcing growth back before any actual styling should begin. However, seeing that the whole point of the purchase of the material was for practice as well as for instructional, for this thread... I will continue.

Of course in the next post! Thanks!
 
Last edited:
To pick up where I left off... I had decided to remove the "right" bar branch and make the left the continuation of the trunk, as you will see in the following photograph. I also decided to jin the first branch up from there due to the thickness of the branching as well lack of any secondary branching and foliage. Lastly in this photo you will see that I jinned and removed the top of the trunk, because I thought everything past there was irrelevant in the design of the tree. Don't know the future fate of this jin... it might be shortened or removed altogether, but for now I will just leave it.
juniper2i.jpg

Close up of the size branching in comparison to my finger, left on the tree and what I have to work with. Which is in scale with the size of the trunk and the tree I wish to make. Anything bigger than this I will usually remove due to the fact that it is hard to work with and does not suit this scale.
juniper2j.jpg

Next up on the list... is to put a bit more movement into the bend that is already there. You will notice that with this tree and the previous tree, that often I will just further bend the bends that are already there to add more movement. I am not fighting the tree's natural shape, and because the trunk is already headed in that direction, it is easier to bend.
juniper2k.jpg

At this time I want to take a second to discuss what happens when one bends a branch or trunk, I will not be going into great detail here... The outer layers of the tree are soft and pliable, so they bend easy. The inner layer of the pith or hardwood, that adds structure and helps hold the tree up right is very strong and rigid. It does not easily bend, and in all actuality when one does a bend, inside, the the pith actually splits in the process... You cannot see it because it is covered by all the layers above that are flexible enough to still make the bend and stay in tack. Of course unless the branch is bent to far, or improperly bent and these layer separate as well.

Now the reason why I am saying this, is that in this bend that I am about to do on the trunk, I will be employing a technique that will be inducing this split in the pith to make it easier to not only bend, since I will be taking some of it's strength away, but it will make it safer to bend, seeing that there is a crotch where between the new trunk and the branch that was not chosen for the continuation of the trunk. I don't want it to rip in this area...

So, I will use my trunk splitter and will split the trunk in about a one inch section, slightly above this crotch. This will take the pressure away from the crotch when bent. When doing this type of procedure one must consider the way they wish to preform the bend. One wants to do the split on the side of the trunk if bending up and down. The top if side to side... When the bend is preformed, it will allow these areas to slide easily over each other. I you split on the wrong side, when bent, this split will open up.
juniper2l.jpg

Sorry these two photos are not better, but in the following photo you will see a small dark line down the center of the trunk, where it has been split with the trunk splitter.
juniper2m.jpg

In the next post, we will do the bend! Thanks!
 
After the split in the trunk was preformed, the area to be bent was then wrapped in raffia, and the area was bent, using guy wire.
juniper2o.jpg


Here is a close up of the bent area.
juniper2n.jpg


After the bend was done, I started examining the finer branching and started to examine the trunk further up, and re-evaluated which side I thought would best be the front of the tree... and decided instead to use the opposite side of the trunk. Feeling that not only did it set up the branch placement better, but will also set up the apex and it's location better. So , here is a picture of the front I will be using, with a little bit of jin wiring and placement.
juniper2p.jpg


Now time to start wiring and setting up the branching of the tree. Because I am still working out the design... I will be setting first all of the main branches, then afterwards will be going through and fine wiring and cleaning and establishing pads. In the following photograph, you will see that I have set in place the lower branches.
juniper2q.jpg

Will post up the rest as soon as I am able!
Also, wanted to say, that I know I have gone off subject here, seeing that with this tree it is no longer a "Choose your own Adventure" thread... I just felt that some might find it informative, to see a step by step development of styling this tree! Thanks!
 
Last edited:
Ok... let's finish this one off! Picking up where I left off... I decided that the trunk that extended off to the right in the picture of the last post now needed a direction change. That it needed to come back towards the center of the trunk. So, raffia was applied and it was bent in towards the center, and up to form the apex. In the following photograph, you will see the bend.
juniper2r.jpg


After the bend was complete, I just wired and set in place all of the main branches. So... as of now all that is left is to go through and do all of the fine wiring, establish pads and clean foliage. Here is a photograph of the tree.
juniper2s.jpg

I have decided that since this tree is going to need quite a bit of growing in still... That at this time seeing that the overall shape and design of the tree is there and one can see where I am going with the tree, that I will just leave this tree for now as it is. Leaving the tree in a healthy state such as this, will allow for it to recover faster, and grow out sooner. So, for now... that's all for this one!

I will be picking up some more trees to practice on this week... Don't mind, posting up more of these, so others might be able to see the process of designing a tree. However, they do take quite a bit of time... So, let me know if anyone is interested in seeing some more. Thanks!
 
View attachment 78797

Here is the final image... and the angle that I chose for the tree! I did take out the pot in Photoshop, cause I felt it was distracting and without it one can get a better sense of what the tree looks like. It obviously needs growing in, in some areas and chasing back in others... But for the first style, the tree is for the most part there!

If one carefully considers the path forward with a piece of material, and makes decisions of what they choose to keep and use to form the tree, based on what was previously mentioned regarding foliage and branching at the beginning of this thread... one should be able to achieve almost a finished image just with the first styling.
As has been done here.

The following are the sides and back of the tree.

View attachment 78798 View attachment 78799

Lastly, I wanted to say that for me the reason for deciding to go with this angle was two fold... The first being that I felt this design held more interest visually. It also for me told a more interesting story. Secondly, when examining the branching, at this angle, what would turn out to be the lower branch, was thicker in diameter. Which gave a more realistic, feel of the lower branching being thicker, and as one went up the tree, the gradually got thinner.

However... again, no really right or wrong answers! There are many ways to style a tree, and it was great to hear some other views!
I have a second Juniper, that I bought at the same time... That I will be starting on tonight. So, will post it up. I am thinking I will post it here, and just begin a running thread on trees of this nature! Thanks!
Nice work as usual. This one has actually given me an idea for one of my junipers that I've been staring at for the last year or so. Thanks!
 
Nice work as usual. This one has actually given me an idea for one of my junipers that I've been staring at for the last year or so. Thanks!
Thanks for the reply, and the compliment! Not a problem, glad to see someone is reading the post! And hopefully it helps you out!
 
Thanks for the reply, and the compliment! Not a problem, glad to see someone is reading the post! And hopefully it helps you out!
You have a lot good information in your posts so I try to read most of them. I think mine has thicker branches so it's going to take some work to get adequate movement out of them.
 
I have learned that when all possible bomb out of the larger branching in favor of the smaller!!!
 
Interesting thread, Stacey. Takes me back to a discussion we had (here on BNut shortly after the Joshua Roth competition in 2013) about how does one avoid becomming a one-trick-pony when it comes to styling trees. You proposed an exercise in which one tries to make many different styles by just repositioning the branch(es) of a tree.

This is the Adventure I Choose (befitting the title of this tread, though maybe not the spirit of it :confused: --> maybe it needs to be a new thread). Show us how many different styles can be made with one tree.
 
How did you determine that the second juniper needed to wait to recover, while the first was good to go for fine wiring? I'm never sure how much work I can safely do at one time.

I like where the second adventure led to and would be interested to see future updates on it. I really had no idea what I would've done with the initial material, but you gave good insight into the thought process that goes into determining style. I for one would like to see more posts for as long as you are keen to do so!

This thread has been rather inspiring. I'm going to be picking up some junipers this weekend (woo 20% off coupon!) to see where I can take it.
 
Interesting thread, Stacey. Takes me back to a discussion we had (here on BNut shortly after the Joshua Roth competition in 2013) about how does one avoid becomming a one-trick-pony when it comes to styling trees. You proposed an exercise in which one tries to make many different styles by just repositioning the branch(es) of a tree.

This is the Adventure I Choose (befitting the title of this tread, though maybe not the spirit of it :confused: --> maybe it needs to be a new thread). Show us how many different styles can be made with one tree.
Often one hears the saying, "let the tree tell you what to do", and unfortunately often one takes this as to mean just bend the branches with some wire and one is done...

When in reality, what I have found is that what works best is to go through a check list of the tree starting at the roots and working one's way up the tree and examine what the tree has. As I have done with this thread, and let it tell you what is worth keeping, changing, or fine as it is. If one works on establishing a solid frame for the tree in the form of the roots and trunk... one can quite literally take the branches and foliage in often any number of ways, creating totally different trees.

With both of these trees I had no idea what the tree was going to look like until the end. I just went through resolving issues of the trunk and once these were done... I think figured how can I now place the branching and foliage to compliment the trunk the best. If one sits and looks at a piece of material and tries to figure out what type of tree to make, one will never get started!
 
Last edited:
I've been calling it my Seesaw Juniper. It's probably close to 4 ft from tip to tip.

View attachment 78978
It looks like you have quite bit of adult foliage going on... I would examine where the best growth is and where the best finer branching and more of it is, and try to incorporate these areas into the design of the tree! Good luck! You should do a post of it, documenting the tree's transformation.
 
Now that's interesting... We always seem to love those big fat branches.
Unless they have some amazing feature, or tons of useable foliage... they are to hard to work with!
Also, remove leggy branches and foliage when all possible, always easier to grow out, then chase back!
 
Last edited:
  • Like
Reactions: Vin
How did you determine that the second juniper needed to wait to recover, while the first was good to go for fine wiring? I'm never sure how much work I can safely do at one time.

I like where the second adventure led to and would be interested to see future updates on it. I really had no idea what I would've done with the initial material, but you gave good insight into the thought process that goes into determining style. I for one would like to see more posts for as long as you are keen to do so!

This thread has been rather inspiring. I'm going to be picking up some junipers this weekend (woo 20% off coupon!) to see where I can take it.
Thanks for the reply! Often I will go ahead and do both the bending and the padding at the same time, then let the tree recover for the next year. Sometimes it is better to do all of the insults at one time then let it be. However, one takes a lot out of the tree with each process... The bending, as well as the pad styling, see one removes a lot of foliage in the process of shaping the pads. The more foliage left on the tree, the faster the tree recovers, the faster it begins to grow. The first tree for the most part was pretty much there... so all I need the tree to do is start filling in the pads that I have developed. The second tree, still needs quite a lot of new branching in areas. Leaving more foliage on this one will allow for growth to return faster to the tree, to develop these new branches.
 
Juniper Parsoni #3

This tree I picked up yesterday for $40 dollars as well... In the middle of the Monsoon, we are quite literally having here in Florida. Where we have gotten over 15 inches of rainfall within the last week, and it still keeps coming! Anyways, reason why I brought this up was that in the middle of the downpour, I was out scouring a whole field of these suckers, and trying to pick out a nice one to work on and I thought I did... however, when I go home and took a closer look I figured all the water must of blurred my vision!

juniper start2.jpg

Not going to go through all the thought process behind styling this tree... The material had some nice foliage, and decent enough branching. The not so good part, was that the trunk went straight up then hooked to the right and came back down again. The "dreaded hook"... good for making coat hangers, but not much more!


juniperA.jpg juniperB.jpg juniperC.jpg

So I decided that the best course of action for the tree was to bring the bend in, at least a little bit tighter. For some reason on this tree, the strength of this crook area was really tough. So, I again used the technique that I discussed on the second juniper, of using my trunk splitters, to induce a couple of splits to help with the bend. Raffia was then applied, and the trunk was bent, using guy wires.

juniperD.jpg
 
Back
Top Bottom