Rainy day project

There are different kinds of materials to choose from, they are cloth, not vinyl like blinds you get from the store. You can get samples of anything they have. I love mine, it's made it super easy. I used to have a photo backdrop that was a PITA...
 
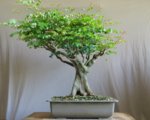
The light seems to harsh. You can see define shadows on the lip of the pot.

You might be better off aiming the light against the ceiling and using a tripod (if you aren't using one).

Definitely better than before.
 
There are different kinds of materials to choose from, they are cloth, not vinyl like blinds you get from the store. You can get samples of anything they have. I love mine, it's made it super easy. I used to have a photo backdrop that was a PITA...
They get so wrinkled.
Paper is the best.
 
Hi Hoe - I did think about that, but I’ve never used it before. Is it durable enough to be kicking around the garage?
S
It comes in a big roll and it’s quite thick. The other possibility is vinyl back drop, thinking of buying a set of different colors from Amazon.
 
And do you have any thoughts on the backdrop issue? What would you suggest I use?

First, get the tree and the lights as far away from the background as possible.
Second, use a short tele lens, not a "normal" or a wide-angle.
Finally, black velvet (expensive...) absorbs ligh, so for true black that's what I use.
As for the link...
https://www.bhphotovideo.com/c/buy/Kits/ci/12292/N/3988592073
 
To make rolling up easier get 2 pullies, mount one to the end of your top shaft, and mount the other inline and directly below. Then run a rope around and use that to roll them up. The smaller the top pully the faster it will go.
 
Scott,

we just use a simple cloth, usually gray and suspend on an painting easel.
It is wrapped around a bamboo rod.
Nothing to distract from the tree.
Good Day
Anthony

Just cut out the extra and there you are.

cloth.jpg

parts removed

cloth 2.jpg
 
Scott,

Try setting the lights from the side (perpendicular to the camera). also, if lights are dimmable, make one less strong than the other (or use a shade cloth or something to block some of the intensity)... This will add depth to the image.

you could have done it all with a camera + an external flash + some white cardboard.
 
They get so wrinkled.
Paper is the best.
I have not found this to be true, at least not with the specific shades that I have. I imagine that painting the wall as your light color would be the best thing, then you just need a shade (or paper) for your dark one.
 
Cool setup on the cheap! I think if you attach a dowel to the bottom of the backdrop cloth, that should make it one smooth background as appose to having the folds.
 
Cool setup on the cheap! I think if you attach a dowel to the bottom of the backdrop cloth, that should make it one smooth background as appose to having the folds.

Thanks M. I didn’t have a dowel, but I did have a piece of 3/4” PVC. I cut that to size and clamped it to the bottom of the fleece.

7E4DBAFF-9BB3-435B-ABD7-B1D5996C1BE5.jpeg

That fixed 90% of the problem. The few wrinkles that are left I can probably get out with a steamer. But I think I’m going to go with this backdrop as my long-term solution.

A2D8C3D2-B615-46A8-812A-0E7EAAC92782.jpeg

To do so means that my pipe hangar is too short 8’ innstead of 9’. But that’s easily fixable. Cost is $90.

Scott
 
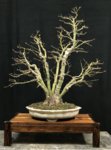
The other thing I did was move the lights back as far as possible. Bikes are in the way for one of them, ?, so I couldn’t move them too far. Just doing that seemed to help a lot. Here’s a before and after:

BFE75A9B-32D1-41CD-8999-E375E168FFF9.jpeg261EDB07-567E-4289-813B-6DE164B1AA8F.jpeg

There’s still a small shadow under the lip, but I think I can live with it.

Scott
 
So, in the end:

1) Much better
2) lighting seems OK
3) I’m still not happy with the backdrop.

Fleece is not too reflective like a lot of the fabrics I photographed at the store. But the bolt was only 1.5m wide. I’d really like something that is 8’ wide - as wide as the hangar I mounted. I also thought that the fleece would be heavy and it wouldn’t fold. But, as you can see, there are folds in the fabric behind the tree.

Any thoughts from folks more experienced with photography than I? Given what I’m trying to do, what should I do with the backdrop situation to make it better?

Scott
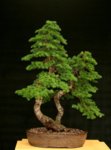
I chose a black velour with a medium nap. Works very well. After hanging mine in a similar manner to yours i have decided to switch to curtain style hangers to allow the backdrop to be collapsed to the side rather than rolled up. This is for convenience due to being vertically challenged:cool:. Not a problem for Scott.
I also created a sleeve on the bottom to insert a i inch dowel lengthwise. This helped the material to hang flat, reduced reflection from folds and shiny spots.
 

Attachments

  • Twin Trunk Mt. Hemlock Nov17.jpg
    Twin Trunk Mt. Hemlock Nov17.jpg
    288.5 KB · Views: 28
Last edited:
I chose a black velour with a medium nap. Works very well. After hanging mine in a similar manner to yours i have decided to switch to curtain style hangers to allow the backdrop to be collapsed to the side rather than rolled up. This is for convenience due to being vertically challenged:cool:. Not a problem for Scott.

Really good, Frank. The background black looks excellent. Nice tree too, btw. Miss growing those hemlocks.

S
 
So the approximate cost:
  1. Lights - 2x$80 = $160
  2. “Diffuser” (actually a translucent drape from Home Depot) = $10
  3. TV mounts - 2x$20 = $40
  4. Galvanized pipe hangar = $20
  5. Fleece back drop = $10
Total cost was $240. Not bad - I wanted to keep I under $300

Future upgrades:
  1. vinyl backdrop. I’ll probably do this right away. I need something wider than the piece of fleece I have now. In retrospect, I probably should have skipped the fleece and ordered this a while ago. Although after looking at Frank’s velour one, I’m having a bit of backdrop jealousy.
  2. One more light setup so I can illuminate from the side also. These additions will cost abt $190 total
S
 
Back
Top Bottom