JWP Pick the front!

Shouldn't the front pad be larger and the back pad smaller?
At least that is my "perspective" ;).
Probably. The back pad needs a bit of pruning. The way it was before, it was all merged into one huge pad. The front and back were all just one big dropped pad. I think breaking it up into multiple smaller pads will create more visual interest, as well as make the tree look "bigger".

I haven't reworked the back dropped branch since I created the two levels of the front pad. I used up my quota of "bonsai time" my wife allows me to have!

I do think it needs to be broken up into multiple smaller pads, too. Maybe tomorrow. I'm thinking of making the back into two levels. A higher back and a lower back.

Here's what it looked like before I started wiring:
IMG_0439.JPG

I hope I'm improving it!

An aside: JWP is certainly easier and more pleasant to wire than JBP! I didn't remove any old needles, so my fingers don't get sticky with sap. And JBP get all kinds of kinks and bumps on their branches from decandling. JWP have smooth branches. The downside is if you leave the wire on too long and it cuts in, the scar is visible for a long, long time. JWP take a long time to produce flaky bark. When they do, the wire scars will vanish. But, that's a 20 year (or more!) wait!

This tree does have old wire scars. And when I'm wiring this time, I'm trying to wire differently so that I don't place wire directly in the old grooves. So, I try to spiral the opposite way, or place the wire between the old scars.

The oldest part of the JWP branches are about 20 years old. And they're just beginning to start to develop flaked bark. It will look much better when they have rough bark. The bark on the trunk is wonderful.
 
I can see the future of this one, and it is bright. Always a good thing to brake up pads so the tree looks bigger. The tree is ready for it.
 
Can you bring the backbranch a bit more behind the tree?
A bit more behind the trunk would be better i think
 
I bought this tree at the National Show. It's a grafted JWP on what we think is a Lodgepole trunk. It was grafted about 20 years ago.

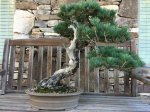
This first picture is how it's currently sitting in the pot. It's hard to get the full feeling of the tree from a photo, so I'll try to explain what you're seeing;

The Shari on the trunk becomes a jibbed branch, which from this angle, comes right at you. An "eye poker" for sure! The foliage on the right, however, also moved towards the front, to where it's easily 6 inches closer to the viewer than the edge of the pot. Which softens the "eye poking" effect.

Current front:

View attachment 117556

The alternative front is rotating the tree counter clockwise maybe 30 degrees. This moves the Jin over to the right, it no longer pokes you. The Shari is less sinuous, however, and the nebari isn't as wide. On the other hand, the upper trunk has more movement.

View attachment 117558

Anyway, it's a pretty cool tree.

Let me know which front you prefer!
Hey Adair, I'm chiming in way late...................... I looooove this pine!! I've always had a thing for 5 needle pine. The first pictures I ever saw of real bonsai were of 5needle pine, ume, and ezo spruce in a book by Claude Chidamian. I forget the title. Can't grow them down here, even though strobus does fairly well as landscape material. For my 2 cents worth, the first pic is the best front. The 2nd angle throws the balance off to my eye. I don't find the deadwood objectional at all. It doesn't appear to me to be an eye poker. I've always looked at the viewing height at just a touch over halfway up the trunk, I don't know what the current acceptable viewing height is but that's the way I learned. If you look at it from there, the eye poker doesn't seem to poke. I don't know, just my tiny thought...............what do you think?
 
Hey Adair, I'm chiming in way late...................... I looooove this pine!! I've always had a thing for 5 needle pine. The first pictures I ever saw of real bonsai were of 5needle pine, ume, and ezo spruce in a book by Claude Chidamian. I forget the title. Can't grow them down here, even though strobus does fairly well as landscape material. For my 2 cents worth, the first pic is the best front. The 2nd angle throws the balance off to my eye. I don't find the deadwood objectional at all. It doesn't appear to me to be an eye poker. I've always looked at the viewing height at just a touch over halfway up the trunk, I don't know what the current acceptable viewing height is but that's the way I learned. If you look at it from there, the eye poker doesn't seem to poke. I don't know, just my tiny thought...............what do you think?
For now, I'm keeping the original front. The photos don't really show the eye poker Jin. That's because it comes right at you! But, there will be foliage around it. So, maybe that will help.

Here are two pots I'm considering moving it to next year:

IMG_0451.JPG

Which do you like?
 
I think the nanban (great pot by the way) is way too shallow and doesn't have enough mass to anchor this one....and I'm not sure the drum does either. I'm thinking you need a deeper, more substantial pot for this one. Any chance we can see a picture of the pots and the tree together?
 
I think the nanban (great pot by the way) is way too shallow and doesn't have enough mass to anchor this one....and I'm not sure the drum does either. I'm thinking you need a deeper, more substantial pot for this one. Any chance we can see a picture of the pots and the tree together?
No. The pots are still at Matt Ouwinga's!

Maybe you would prefer this one:

IMG_0452.JPG
 
No. The pots are still at Matt Ouwinga's!

Maybe you would prefer this one:

View attachment 121391
Maybe so...if you go with a round pot, I believe it will need to be at least as deep as the pot it's currently in. By the way, I think I recognize those pots...isn't the drum a Syuzan?
 
Can you bring the backbranch a bit more behind the tree?
A bit more behind the trunk would be better i think
Perhaps. They way it was previously styled is there were (are) two drop branches of about equal thickness running down parallel to each other. And each contributed about half the foliage to make up one large pad of foliage on the bottom.

I'm restyling it to break that one large pad up into multiple smaller pads at different levels and orientations.

I'm just beginning that process. Lots and lots of tweaking to do!

It will change quite a bit when I start on the other side, too.
 
Maybe so...if you go with a round pot, I believe it will need to be at least as deep as the pot it's currently in. By the way, I think I recognize those pots...isn't the drum a Syuzan?

Yes it is!

You're good!
 
Just finished wiring out the "front" branch.

IMG_0464.JPG

@sorce Here's a link to a short video where I tried to turn the tree around on the turn table:

 
Was that intended for me?
Did I miss something?

I like it.

Can't wait to see it finished.

Sorce
Yep. You said you wanted to see the back side.
 
Wow Adair, this tree is really looking great. The separation really changed it much for the better. I like an oval for this tree, if you do a round, the trunk will be too heavy over the edge of the pot I think, unless you re-angle it a bit more upright.
 
Tidying up the apical foliage a bit, I keep wanting to see this

View attachment 121473
Oso, thank you for creating this vert! It does make for a very striking image! Something like that is a possibility in the future.

For now, I'm going to continue the path I'm on with this tree.

The first step is applying the wire. Then, once it's wired, then I can mess with it a bit. For example the other day, I first wired the lowest drop branch and made it into one big pad. I made it flat on the bottom, nice and full in the middle, a little crown on top. It was pretty much perfect. And boring.

So then, I took a look and saw that with just a bit of manipulation, I could lift a section and lower the other and make two layered pads. Much more interesting!

This morning, I went out and took a look at the "front branch" I wired last evening, and I think I see a way to do something similiar with it. I'll have to add a piece of heavy wire to do it. Good project for this evening!

So, I guess that's where the "art" comes in. The wiring is pretty much technical. To my eyes, a good wire job is a thing of beauty. Everybody doesn't see it that way. Some see "wiring" as simply a means to an end: move the branch. I work with pines, and pines will always have wire on them. It's not a temporary thing that's done while the tree is in training. So, to me, since pine bonsai will always have wire, beautiful wiring is an essential part of the art of bonsai.

I mentioned in an earlier post that JWP are easier to wire than JBP because the branches are smooth, etc. JWP foliage is also less dense than JBP. So when setting branches and twigs, you have to make every tuft of needles count! And, since the foliage is naturally less dense, your wiring is more visible when viewed up close. So, it's important to take the time to do it well.

While working this tree, I can see that the branches are too long. It will soon be time for a cutback. As I understand it, the tree had been overgrown and leggy, it was wired out to expose the inner branches to the sun to induce backbudding. And it did. Those back buds have grown into small branches. These are what I'm using to make the filler for the pads, and make the pads look full. It won't be too long before they'll be full enough to BE the pads, and the outer, longer, leggier branches can be removed.

But not yet.

This tree had been in California, and I want it to adapt to my climate before I apply that kind of stress. My wiring it out will expose those inner branches to more sun, so they'll get stronger.

Meanwhile, I'm enjoying working with this tree. It is stretching my abilities.
 
Thanks for the video. Shows of the bark and character of this tree. One step at a time, nice work.
 
Another progression picture:

IMG_0472.JPG

Sorry it's kinda dark. Taken at dusk last night.

I'm starting to work on the crown today.

At this point, I think I need to finish applying wire before I "place" the branches.

I normally start wiring the lowest branches and work my way up.
 
Back
Top Bottom