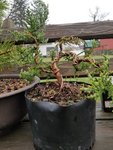
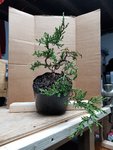
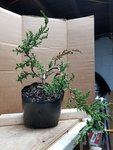
Juniperus Horizontalis (Blue Rug Juniper) #1

Orion_metalhead

Masterpiece
Messages
3,114
Reaction score
4,702
Location
Central NJ
USDA Zone
7a
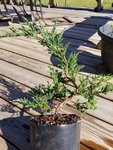
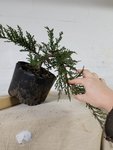
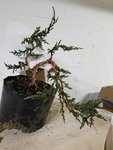
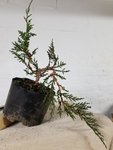
I picked this Juniper up back in spring for a club meeting to practice wiring. Back then, it was my first attenpt at wiring and I did... ok??

Well, I got the itch to mess with it again today so here's it's official thread. @mak9, this is the tree I mentioned I would post for you. I am sure that there will be styling opinions on it and I welcome all thoughts.

Initially, I wired in mid summer for some movement on the upper branch, thinking it would basically just grow and not amount to much.

20190728_102140.jpg

and removed that wire in fall before the tree started to thicken up. This was the tree after I cut off the wire:

20191019_135750.jpg
 

Orion_metalhead

Masterpiece
Messages
3,114
Reaction score
4,702
Location
Central NJ
USDA Zone
7a
Throughout summer my care was basically leave it alone and water it occasionally. It was in organic nursery soil so I didnt want to waterlog it down. I fertilized with slow release osmocote 14-14-14 in july and august and then with a small amount of miracle grow with each watering through fall.

It's been outside on my benches in full sun since october but i put it on the side of the house out of the wind and in the shade the other day. Ita gone dormant. I can tell by the bronzing of the foliage.

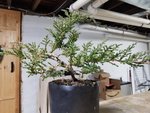
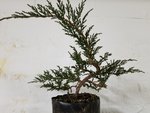
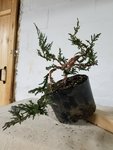
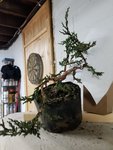
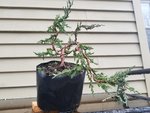
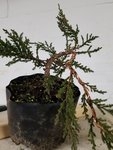
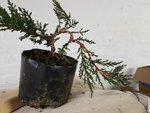
Couple of pictures of the tree today before I styled it:
20191218_183456.jpg
20191218_183701.jpg

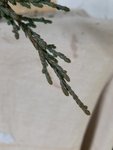
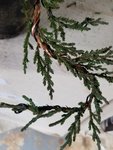
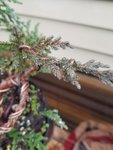
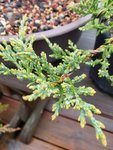
And a close up of the bronzed tips of one branch that might be turning towards mature scale foliage.
20191218_223109.jpg

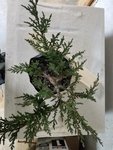
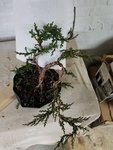
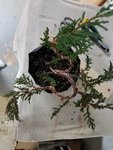
A top down view:
20191218_184046.jpg

This top down view shows the branches I have to work with. The bottom left branch is the main branch. The top branch is the second strongest branch. There is a secondary branch bottom right which splits from the main branch. There is also a branch towards the back of little long term use but I will leave it for now and let it run to add strength and vigor and thicken the lower trunk.

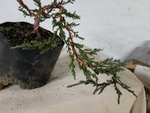
After consideration, I decided to go for a cascade style with the main branch with a new potting angle in future. Note the roots and nebari in this picture. Tree has some potential:

20191218_183753.jpg

Will post remaining update later tonight on the wiring, pruning, etc.
 

Orion_metalhead

Masterpiece
Messages
3,114
Reaction score
4,702
Location
Central NJ
USDA Zone
7a
I did the same thing. Nothing wrong with that. All I can say is get some wire and movement into the branches now. Its easier to do before it grows out thick and it doesnt do any harm at this point to get branches twisty.
 
Messages
1,114
Reaction score
2,214
Location
Tennessee
USDA Zone
7a
As an alternative to the cascade, what if you did something like below (pardon the crude photo editing). You could train either of those lower branches into a cascade at a later time, and if you wanted you could keep the main whip coming out the top to thicken up the overall trunk while you style the rest of the tree. I really like cascades but I'm finding that if the base isn't thick enough, they lose a little something...like maybe they don't look like they're really strong and clinging to a hillside.

tree.png
 

Orion_metalhead

Masterpiece
Messages
3,114
Reaction score
4,702
Location
Central NJ
USDA Zone
7a
I think I have struck a nice balance between the two styles with my final design. Will finish posting tonight. I have a strong back leader low which I am going to leave on to help thicken the trunk, also the roots on this are in such a way as I think I can create the feeling of strongly gripping the soil, even without a huge trunk.
 

Orion_metalhead

Masterpiece
Messages
3,114
Reaction score
4,702
Location
Central NJ
USDA Zone
7a
After deciding my overall design concept, I starting my process of cleaning any unnecessary foliage on the main cascade branch. Knowing that I had strong foliage at the tip of the branch, I removed some of the foliage along the thicker portion which would help me wire the tree, while retaining the entirety of branches which I felt would be beneficial in the long-term design. I made sure that my choices alternated down the branch, so I would not have any bar branches - shoots that emanate from the same point on along a main branch.

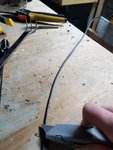
For wire, I am using stripped THHN electrical wire. You can buy it for $10 for a roll of 50ft at Home depot. It is not as soft or easy to work with as wire sold specifically for bonsai, however since this is not going to be shown, and I am more interested in getting a basic design set for future development, I felt that it would work fine. For thicker wire along the trunk, I am using wire repurposed from 10-3 residential power wire. 10-3 has (4) #10 gauge solid copper wire as conductors. Since I had it in my basement from wiring my AC unit, I felt it would work fine for the heavier bending on this juniper.
2019.12.18 - E.jpg
Stripping the wire from it's jacket is easy: a sharp utility knife, angled at about 45-30 degrees with little pressure applied will easily remove a long sliver of the jacket down the wire. The remainder comes off easy.

I pushed one end of the wire down into the pot along the base of the tree, wrapped my first turn around the trunk and continued up the main branch, careful to bend the wire without putting much pressure against the trunk and using mostly my hand and the leverage of the longer wire to get smooth bends. I followed this wire out to the end of the main branch.
2019.12.18 - G.jpg
A second piece of wire, #12, was I used to wire the branch that split off the main branch to the main branch out to the end of the main branch. Wiring to two branches assures that you have a solid hold on the branches and you are less likely to snap or break a branch. Here you can see my wiring. It is not perfect but not TOO bad for someone with only about a year of experience. Ideally, some spots would have less of a gap between the wire and the tree.
2019.12.18 - F.jpg
With the wire in place, I was able to bend the branch down towards the direction I wanted, and have it hold in place. To bend the branch, I grip the wire and bend the wire, not the branch, giving a slight twist in the direction which the wire is coiled.
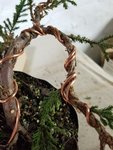
2019.12.18 - K.jpg
A close up of the wiring around the two branches. Notice how I follow the line of the thicker wire with the thinner wire. This keeps your wire organized, but it also helps add strength to spots where there are two runs of wire. If I wanted, I could bend this section even more than I did, because I know the wire would hold in place.
2019.12.18 - J.jpg
Using these techniques I also wired the other larger branch off the side.
2019.12.18 - I.jpg
This allows me to move each branch into position and get a nice flowing movement to my tree and set each branch into the basic location before doing any finer wiring.
 

Orion_metalhead

Masterpiece
Messages
3,114
Reaction score
4,702
Location
Central NJ
USDA Zone
7a
Using a thinner and softer aluminum wire, I begin to incorporate the smaller branches into my wiring and set them into a movement that appeals to me. In this case, spreading them down and out from the main branch to give the appearance of an old spruce.

2019.12.18 - L.jpg
I continue to wire two branches to each other in this process, connecting my alternating branches down the branch to each other and bending them down and out. The first shoot on the left of this main branch is wired in the above picture to the smaller branch above it on the right. The branch below this to the right is wired to the end of the main branch as I allow better branches to form along the cascade. I may remove or wire these branches a different direction next year, but for now, this gives them some initial movement and shape. Wiring two branches to each other like this can be a bit difficult if you are doing it for the first time and I still find myself occasionally having to cross over a wire or 'just do the best I can' with the wire as it is. Like I said earlier, this is currently all for development so I am not too concerned with everything looking perfect.

2019.12.18 - M.jpg
Close-up of some detail wiring.

2019.12.18 - N.jpg
As I wire, I make note of other good potential fronts for the tree. Here is another angle from the opposite side which gives an interesting perspective.

2019.12.18 - Q.jpg
Another, with more detail wiring added.

2019.12.18 - P.jpg
A Top down showing the completed wiring.

2019.12.18 - O.jpg
Ultimately, this is the front which I was going for. Next year, I will not repot this tree, however I will do some pruning to extending branches to reign in some growth and prune out any foliage which I know will not be wanted. I am still undecided on the movement of the lower part of this cascade. I may want the cascade to be even more vertical. Overall, good for now. A paper towel covers up the extra back branch eventually to be removed. The smaller middle secondary branch, ultimately, I would like to continue to develop into an almost second cascade which mimics the main cascade and, after thickening, eventually incorporate jinns into that as it traces the outline of the main cascade somehow. My main difficulties will likely be keeping the apex branch in check. I will likely cut it back so it is just above the secondary cascade branch and develop the apex there. Plenty of work still to be done with this one but I am liking this design. It appears natural to me. The covered back branch will remain for now. I may wire it straight out the back to gather as much sun as possible to help thicken the lower trunk.

Would love to hear thoughts on this design as well as anything else.
 

Orion_metalhead

Masterpiece
Messages
3,114
Reaction score
4,702
Location
Central NJ
USDA Zone
7a
In total, I think I may have removed no more than 25%-30% of the foliage. I made sure to keep as much foliage as possible on the branches I know I want to keep.
 

mak9

Seedling
Messages
19
Reaction score
18
Location
SoCal High Desert
USDA Zone
9a
Glad you tagged me - you put a lot of work into this and for me, it's solid introduction and thank you. I imagine the copper left your hands pretty sore too.
 

Orion_metalhead

Masterpiece
Messages
3,114
Reaction score
4,702
Location
Central NJ
USDA Zone
7a
Not really. My hands are pretty tough and calloused. Glad you found some enjoyment in my post. I am looking forward to see how it does this spring.
 

Orion_metalhead

Masterpiece
Messages
3,114
Reaction score
4,702
Location
Central NJ
USDA Zone
7a
Doctors for years havent been able to get blood from my fingertips. Some have used those little pin-devices and they never puncture.

I use DR DDTs. My "E" is .115" because we tune down a full step and I need the stiffness. Thinner strings get torn up. Ive broken E's and A's mid song on lankier strings.
 

Orion_metalhead

Masterpiece
Messages
3,114
Reaction score
4,702
Location
Central NJ
USDA Zone
7a
Couple updates. Tons of tips sporting happy growing tips. Gonna take the wire off as soon as these start to extend and Ill rewire again late summer.

20200329_131747.jpg

Another look.
20200329_131814.jpg
 

Potawatomi13

Imperial Masterpiece
Messages
6,176
Reaction score
4,408
Location
Eugene, OR
USDA Zone
8
As an alternative to the cascade, what if you did something like below (pardon the crude photo editing). You could train either of those lower branches into a cascade at a later time, and if you wanted you could keep the main whip coming out the top to thicken up the overall trunk while you style the rest of the tree. I really like cascades but I'm finding that if the base isn't thick enough, they lose a little something...like maybe they don't look like they're really strong and clinging to a hillside.

View attachment 274944

What is wrong with Cascade? You realize blue RUG Juniper is ground hugger not upright suited? Cascade is perfect tor these:cool:. Trunk needs developed for any but minute tree(mame, shito size). Excess cascading branches will also grow trunk.
 
Top Bottom