You are using an out of date browser. It may not display this or other websites correctly.
You should upgrade or use an alternative browser.
You should upgrade or use an alternative browser.
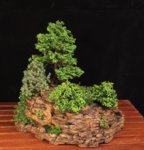
Building a wet slab bonsai pot
- Thread starter ABCarve
- Start date
Gsquared
Shohin
What what whaaaaat?Or this one??
Bonsai Nut
Nuttier than your average Nut
Or this one?
EXCELLENT!
Very interesting! I have never seen anything like this!
namnhi
Masterpiece
Interesting...
ABCarve
Masterpiece
These are all examples of using the same technique without keying the plug. Stay tuned...it's not pot making season yet.EXCELLENT!
Very interesting! I have never seen anything like this!
Pitoon
Imperial Masterpiece
What you got planned for fall?
ABCarve
Masterpiece
It will make itself evident.What you got planned for fall?
Pitoon
Imperial Masterpiece
How interesting
barrosinc
Masterpiece
Have you tried doing just one slab for the walls and base?? (Not for your original post pot) like for simpler pots?
ABCarve
Masterpiece
Yes. Simple rectangle. I was going to show that for a tutorial. Few more weeks till I start again. There are some short cuts to doing it.Have you tried doing just one slab for the walls and base?? (Not for your original post pot) like for simpler pots?
jonathanvperth
Mame
- Messages
- 141
- Reaction score
- 160
Such a great post!! Thanks for taking the time to make the post
Pitoon
Imperial Masterpiece
updates......?
This was a fantastic walk through of you process. Really fascinating to see all of the fine steps and details involved, thank you for sharing.Flipped right side up and allow to dry slowly.....very slowly!!
ABCarve
Masterpiece
Doing a kusamono pot workshop for the Rochester club today, back in the studio Monday. Finally we have some cold weather.updates......?
ABCarve
Masterpiece
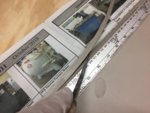
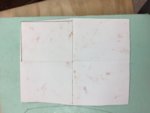
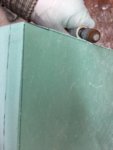
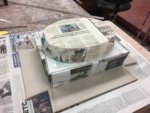
OK. Simple rectangle with single slab tutorial at the request of @barrosinc. Start by making the insulation board plug mold. Folded paper makes a template. Notice the curve outside of the straight line. This will allow for shrinkage/warping in drying and firing. I've had too many pot (without a lip) warp toward the inside of the pot. It doesn't effect the function but I think it's ugly.
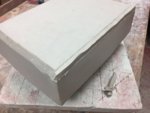
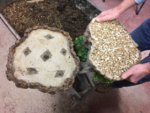
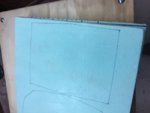
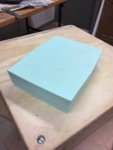
The template is traced on the foam and cut out with a bandsaw. The side has a 7 degree angle so the sides are not vertical. @Bananaman should like this as it makes for easy removal at repotting time.
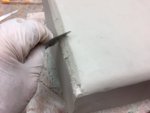
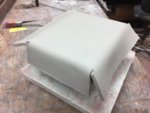
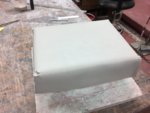
Once cut out, the bottom curve is straightened out by carving off the excess and fairing between the curved top and straight bottom with sandpaper. The final shape is gift-wrapped.
The template is traced on the foam and cut out with a bandsaw. The side has a 7 degree angle so the sides are not vertical. @Bananaman should like this as it makes for easy removal at repotting time.
Once cut out, the bottom curve is straightened out by carving off the excess and fairing between the curved top and straight bottom with sandpaper. The final shape is gift-wrapped.
Attachments

Bananaman
Chumono
- Messages
- 668
- Reaction score
- 1,575
True that!!!!The side has a 7 degree angle so the sides are not vertical. @Bananaman should like this as it makes for easy removal at repotting time.
ABCarve
Masterpiece
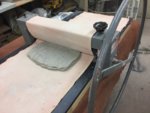
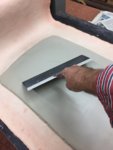
Next is rolling out the slab. I use a slab roller but a rolling pin can be used as I explained earlier. You can see the two roller and a thickness gauge. The clay is put between a heavy canvas cloth so it doesn't stick to the roller and pulled through much like a washing machine ringer. A large taping knife is used to compress the slab and even out any variations in thickness.
Attachments

ABCarve
Masterpiece
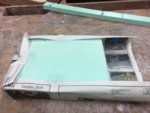
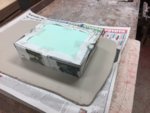
The plug is put onto the slab and then the corners are laid out with the proper geometry. Notice the corner is adjusted for the 7 degree angle in the sides. Also one side of the cut corner has 3/8" extra to accommodate the corners joining when its folded.
Attachments
ABCarve
Masterpiece
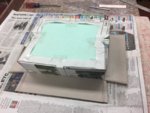
It's prepared to flip over by putting a spacer on the plug to allow the excess to hang over the plug if there is extra clay. Once flipped the sides are folded down. The corners are scored and joined by compressing them with a rib. Note the corner going around the bottom of the pot is stretched and rounded.
Attachments
ABCarve
Masterpiece
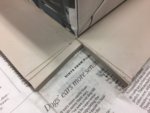
I order to square the corner extra clay needs to be added. Start by roughing the clay with a toothed rib. A strip of clay cut from a piece of slab on a 45 degree angle is placed to fill in the missing corner. The toothed rib is used to move the clay in order to smooth it out.