Benches finally all but finished

Great job! Bravo!
What is the grey colour material on the benches in the last photograph?
 
Thanks! Yeah I thought about using something like that I'll be keeping that in mind. Guess that's part of the never being completely done since there's always something else you could do or change.
 
Really nice!

Are those two trees that are in the ground by the raised bed (looks like a yew and a live oak) supposed to be landscaping? Or are you growing them out? If landscaping, I would suggest putting them in containers / pots for a more finished look - plus you can move them if necessary.

Do you ever have to protect your deciduous from sun in Cincinnati?
 
Nice work and I like the layout!!!!! The work IS never done but that is the fun part. Bricks make a nice border too and cheap, but it looks awesome either way!
 
I am planning to put rocks down also.... can you tell me if you put anything down underneath?

In my avatar that crushed stone is 4 inches thick. I dug the area out and leveled the clay you and I are blessed with, dug little drainage ditches to go out under the fence, and covered it all with 8 mil plastic. I filled the drainage with heavier rocks and then topped it all off with crushed stone - 5 1/2 ton to be precise :eek:

I stopped by there a couple of weeks ago and there is still no weeds there - we moved out in 2013...

Grimmy
 
Do you ever have to protect your deciduous from sun in Cincinnati?

I noticed the same, seems like to much sun for a few plants there, especially the one that looks to be a tropical.

Next phase - Shade cloth FTW!

Grimmy
 
Very good job, I really like the raised bed thing! All I see missing is a workbench area. I like nice display areas.
 
Thanks!

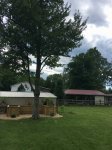
Is this the tree you are talking about? It's a maple and yes it does make me nervous about a little MBA breaking off and hitting the trees guess I like to live on the dangerous side ha.

As far as protecting any trees I haven't yet but not saying I probably shouldn't. Judy would be a better person to ask that to I think she's a little north of me IMG_2012.JPG
Really nice!

Are those two trees that are in the ground by the raised bed (looks like a yew and a live oak) supposed to be landscaping? Or are you growing them out? If landscaping, I would suggest putting them in containers / pots for a more finished look - plus you can move them if necessary.

Do you ever have to protect your deciduous from sun in Cincinnati?
 
Very good job, I really like the raised bed thing! All I see missing is a workbench area. I like nice display areas.
Funny you mentioned a workbench. That's be planned for, would like to stick it on the other end of my shed.
 
Just struck me you may have been talking about the small ones on each end of the raised bed. If that's it ones a blueberry bush since my youngest likes blueberries and the other is a mugo. Both are for landscaping.

Really nice!

Are those two trees that are in the ground by the raised bed (looks like a yew and a live oak) supposed to be landscaping? Or are you growing them out? If landscaping, I would suggest putting them in containers / pots for a more finished look - plus you can move them if necessary.

Do you ever have to protect your deciduous from sun in Cincinnati?
 
I lease, but am planning to do raised planters like this. Knees and back aren't what they used to be.
 
Get some durabench as your top for your workbench, you can put a tub under the bench that way and the old soil just falls thru the durabench... I love mine.
 
Looks awesome! I have heard of other members wish they would have stained their lumber when the time comes.That way a nice color.
I am going to stain mine when I get building my bonsai display at the nEw house.
 
In my avatar that crushed stone is 4 inches thick. I dug the area out and leveled the clay you and I are blessed with, dug little drainage ditches to go out under the fence, and covered it all with 8 mil plastic. I filled the drainage with heavier rocks and then topped it all off with crushed stone - 5 1/2 ton to be precise :eek:

I stopped by there a couple of weeks ago and there is still no weeds there - we moved out in 2013...

Grimmy
Thanks for the insight... so the plastic is basically what you would use for pond lining?
 
Thanks for the insight... so the plastic is basically what you would use for pond lining?

I used vapor barrier sold by the roll at places like Home Depot. I overlapped and taped all seams with duct tape. I used short pieces every few feet to hold the long seams in place and then ran the tape down the lengths.
I am pretty certain it would be far less expensive they way I did it on such a large area as it is over 57 feet long. For a smaller spaces or spaces that pond liner material would work though ;)
Most important though, make sure you have drainage. Otherwise you will have moss and fungal problems. With the drainage, the stone on plastic, the sun evaporated all nicely and often looked pretty cool like a short wall of fog.

Grimmy
 
Back
Top Bottom