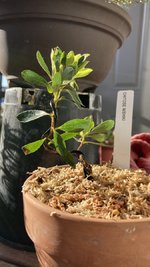
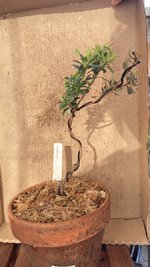
Satsuki from Whip Development

How to bend is very well explained in that Koya.nl article, by the head instructor of the Japanese satsuki society. Including hand placement and how to bend, when to use rice paper, when to use both copper and alu wire (if I remember correctly).

If needed, I can translate back to English.

It is challenging to grow pliable tall whips, and then to bend them as well.
I think now might even be on the early side for bending.

And best not to snap. I had some 2 year whips directly from Japan. These were already hard to bend. I even snapped one near the apex.
And others have very poor movement. Maybe I got them too late. Maybe I buy them in spring as 2 year old whips. But I received them the winter after, because of imports and the timing of this during winter.

About the flowers, if you want to keep them, no worries. Especially if it is a cultivar with variable flowers and you'd rather keep the branch with the correct flowers as leader.
You can prune later. Between now and flowering, you won't receive any permanent reverse taper.

I think John/DSD is one of the few people in the US that grows very tall whips out of cuttings.

I am also considering putting in some extreme bends in a satsuki once. Like almost bending in on itself, like is sometimes done with pines.
Sometimes, the Japanese almost put knots in some of those pines or junipers. That can give a lot of character long-term. Maybe also in satsuki?
Hi,
I have been to the above website, but my Google translate did do its thing.
Would you be able to provide the translation to me and others. PM me if it can’t be loaded here, thank you.
Charles
 
Hi,
I have been to the above website, but my Google translate did do its thing.
Would you be able to provide the translation to me and others. PM me if it can’t be loaded here, thank you.
Charles

I guess you mean that it 'did not' translate?

I can copy&paste, but it puts every word on a new line. I guess that is what you mean.
Any preference for a specific article? I can start at some point with the first one.

Maybe I can email the guy behind the website, if it is still active, and ask. They might even have the original English somewhere.
 
Hi,
Don’t worry sorry. It translates now and don’t know why it didn’t first time.
I didn’t realise there was so much info here. An amazing resource.
I wonder if @Deep Sea Diver wants to use some or lots of this for his resource book on here?
Charles
 
Yeah, despite the translations, it has pictures and comes straight from the lead instructor in Japan.
And it even deals with specifics, like developing a whip to grow on a rock, ishizuki, kengai/cascade, fertilizing regimes, pruning at more mature stages, rooting the cuttings themselves, ect.

Another excellent source for wiring is this:
Turn on the English captions.

Not sure if I posted that channel before. They also have many other informative satsuki videos. Wiring actual branches is even more challenging, but this one is on wiring and makes some excellent points on how to control the wire.

This one is pretty cool as well:

(The background music gets to me though...)
 
Last edited:
Thank you all for the resources and advice and personal experience with azaleas! This thread I hope will be beneficial to also those trying to make their start with whips.
I’ve already learned so much. Now to actually put it to practice!
I have not detected any warning signs from the leaves yet from the places that snapped. Basically I guess if they do heal, I’ll have to be wary about those high winds snapping them once wire is off, and also when I take the wire off, to be very careful since it’s already on a weakened state.
One thing I am grateful, is, since they are so young and it’s azaleas, they can take a beating and bud back. So can always make a new leader.
 
When bending the azalea whips or any more fragile material it helps to control the bend with a couple of extra techniques within the bending process. Some of those have already been mentioned in the thread. Such as thicker wire and larger bends to begin with so they remain as the growth evens out.
1. even application of the wire helps a lot so take your time with this.
2. one variation is to use two wires and evenly space the turns to distribute the load.
3. second variation is to hold the wire when bending so there is no specific pressure on the whip itself.
4. third variation is to use two pliers to hold specific points on the wire and slowly bend the wire. This allows more pin point control and the bend is done in shorter stages.
5. Consider staging the bends, this allows you to bend the whips partly in earlier stages, leaving a length of wire to continue the bending as the whip extends. This in turn avoids wiring sections too late or too soon in the growth process. ( alternatively you can add sections of wire as you proceed if they are properly anchored to earlier wire sections.
6. For thicker and stiffer sections, copper clad in aquarium tubing works very well. a combination of soft surface contact and very strong holding power. ( Illustrated in Prunus Mume developmental trunk below) The bends are actually 3d, even though the picture presents as 2 d. The addition of a tension wire allows for slow tightening of a tighter bend without breaking. This allows the tension to relax between added tension to prevent breakage. Similar to the rest and relax used with bonsai jacks between tightening for additional bend.

I have found that each person will choose a variation that they feel most comfortable with using their motor skills. Not necessarily that one approach is the best for everyone.
Essentially applying some wiring variations to suit the task at hand. Hope one or more of the suggestions help.
 

Attachments

  • IMG_1611.JPG
    IMG_1611.JPG
    77.7 KB · Views: 79
I have not detected any warning signs from the leaves yet from the places that snap.

It’s highly likely the area above will continue to grow, Just be weakened

One thing I am grateful, is, since they are so young and it’s azaleas, they can take a beating and bud back. So can always make a new leader.]

This spring backbudding will likely occur at intervals down the length of the area. You might begin y growing out some branches below the affected areas.

This will serve to provide a new apex and thicken the trunk area starting from each branch and down below to the surface.

Looking forward to seeing your future progress.

Cheers
DSD sends
 
Yeah i'm also excited to see these young ones grow. Definitely will wait for flowering before pruning the top, specially the whorly one, to see which one produces the red flower and keep it, cull the white ones.
I would've loved to keep some of the pruned twigs i took off a couple weeks back for cutting but alas i suck at azalea cuttings.
 
When bending the azalea whips or any more fragile material it helps to control the bend with a couple of extra techniques within the bending process. Some of those have already been mentioned in the thread. Such as thicker wire and larger bends to begin with so they remain as the growth evens out.
1. even application of the wire helps a lot so take your time with this.
2. one variation is to use two wires and evenly space the turns to distribute the load.
3. second variation is to hold the wire when bending so there is no specific pressure on the whip itself.
4. third variation is to use two pliers to hold specific points on the wire and slowly bend the wire. This allows more pin point control and the bend is done in shorter stages.
5. Consider staging the bends, this allows you to bend the whips partly in earlier stages, leaving a length of wire to continue the bending as the whip extends. This in turn avoids wiring sections too late or too soon in the growth process. ( alternatively you can add sections of wire as you proceed if they are properly anchored to earlier wire sections.
6. For thicker and stiffer sections, copper clad in aquarium tubing works very well. a combination of soft surface contact and very strong holding power. ( Illustrated in Prunus Mume developmental trunk below) The bends are actually 3d, even though the picture presents as 2 d. The addition of a tension wire allows for slow tightening of a tighter bend without breaking. This allows the tension to relax between added tension to prevent breakage. Similar to the rest and relax used with bonsai jacks between tightening for additional bend.

I have found that each person will choose a variation that they feel most comfortable with using their motor skills. Not necessarily that one approach is the best for everyone.
Essentially applying some wiring variations to suit the task at hand. Hope one or more of the suggestions help.
I definitely prefer 1 & 2 but my problem is that I know I have to, but once i get started its like my brain just wants to get it done. terrible approach, so just need to slow my breath, think and be gentle and slow with thoughtful bends and wiring having the vision before me as I perform the actions.
 
I definitely prefer 1 & 2 but my problem is that I know I have to, but once i get started its like my brain just wants to get it done. terrible approach, so just need to slow my breath, think and be gentle and slow with thoughtful bends and wiring having the vision before me as I perform the actions.
Simply hang a sign in front of where you do your Bonsai.
It reads. TTT and ATD
Things take time. Attention to Detail

I need these reminders pretty often myself. The tendency is to want to get the job done and move on to the next one.
 
Simply hang a sign in front of where you do your Bonsai.
It reads. TTT and ATD
Things take time. Attention to Detail

I need these reminders pretty often myself. The tendency is to want to get the job done and move on to the next one.
Not gonna lie, I really like that idea!
Yes, it sometimes feels like there's a timer over you and need to do it within that time frame lol
 
Not gonna lie, I really like that idea!
Yes, it sometimes feels like there's a timer over you and need to do it within that time frame lol
For some tasks that do require very careful work I need to get up and walk away after a certain period of time or I start to get careless and the quality of the work goes way down. I find this particularly with detail wiring and thinning for refinement in congested pads of foliage. For some of my friends it is quite humorous the amount of time it takes me. A larger tree can take me a week of stops and starts. Azaleas are a lot more fun, because they are typically smaller than my Fir or Hemlock.
My rule of thumb lately, is to take a break every hour or so. On some days it pays not to start.😉 But I have many azalea cuttings to repot this week after two years in the same small pots. Time for a bit of root work and larger containers for the next stage. Keeping the side shoots short really aids the trunk development so a little pruning is always involved with the repots.
 
Azalea Chitose Nishiki repot. 95% Kanuma and pumice 5% for drainage . With sphagnum on top. New foliage starting to grow, so indicating I can go ahead!
 

Attachments

  • 37B8CC76-B54D-48EB-8CB9-B9B65ABC8718.jpeg
    37B8CC76-B54D-48EB-8CB9-B9B65ABC8718.jpeg
    134.7 KB · Views: 63
Second repot done. This one was actually a struggle, and one I will have to have on a very close watch and shaded area. I discovered it was so rootbound, it was basically bound and glued to the organic matter. Grew frustrated but tried also to be delicate, lost a lot of roots. Hoping it lives.
my third repot I will be a lot more careful and leave more roots.
 

Attachments

  • C74A397A-94F6-43F9-AEDE-0292D53D2F72.jpeg
    C74A397A-94F6-43F9-AEDE-0292D53D2F72.jpeg
    155.7 KB · Views: 51
Nice! Really interested in how your Chitose Nishiki grows. I love the flower combinations it !

I’ve had some issues with a couple…. nothing big, just an overall failure to thrive. These are still alive, so this year may be their big chance!

Likely because these were trees I spent a lot of time experimenting with in the first batch I ever received.

Cheers
DSD sends
I hope they thrive for you this year! I’m sure with your knowledge for azaleas, they’ll be under good care. They really do have pretty flowers.
I took an executive decision and went ahead and pruned back the flowerbuds to divert energy for actual foliage growth and stop the hormones and energy going into flower production.
yeah, it’s interesting trying to find a balance when you’re trying to get rid of the old media and give the plant something better but the philosophical question is, when to stop? You know.. like at some point I need to leave more roots so it even has a chance of survival and then give it the new media to thrive in it.
partially, I’m leaning on doing a half bare root, if I’m being honest, on the third one tomorrow. I say that because I’m also treating these as experiments at the same time. So time will tell my friend!
Plenty of sphagnum moss as well to help those surface roots stay moist
 
Thanks!

Taking off the flowers is a good move if you are concerned about survival. The other actions you documented seem reasonable.
The first year after cleaning the roots I usually remove at least half the number of flowers.

Honestly, my goal is to clean the roots. That’s it. Then spread out the remainder to foster building the nebari,

Given good aftercare things should turn out well. Likely the first month or two there may be little growth, but things will speed up.

Cheers
DSD sends
 
Last edited:
Last but not least. Ai No Tsuki.
Satisfied with the work. The nebari looked much better on this one. Tried doing a bit of HBR on it and also choose a wider pot to develop those horizontal flat roots across.
I think I did much better with this one!
 

Attachments

  • EA28BF35-11C8-4C95-A2F7-4B65EB2D3F4C.jpeg
    EA28BF35-11C8-4C95-A2F7-4B65EB2D3F4C.jpeg
    114.8 KB · Views: 47
Back
Top Bottom