Tidal Bonsai
Omono
I was discussing my procedure on working on rough stock to someone newer to the hobby, and I wanted to share the process with visuals. I have only been in this hobby about 2-3 seasons, so I am not claiming to be an expert, but this is my general 10 step procedure for working on stock:
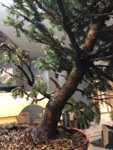
1. Expose the nebari and identify a best front (for now)
2. Clean out everything that’s dead
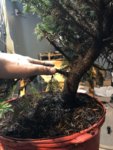
3. Identify the trunk line, and remove things that cause inverse taper.
4. Remove branches that are too thick for the design (A general rule of thumb is any branch that is bigger than 1/3 the thickness of the truck section)
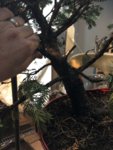
5. Reduce whorls of branches to one primary branch.
6. Reduce secondary branches to pairs of two (any more will risk swelling).
7. Wire main/primary branches and set them to your envisioned design.
8. Remove downwards growing branches if they can’t be wired flat.
9. Wire secondary/tertiary branches.
10. Enjoy all your labor!
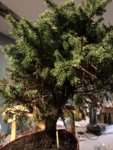
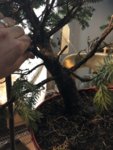
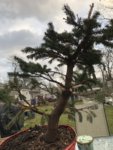
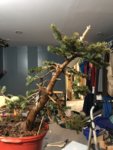
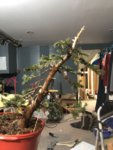
This piece of rough stock I am demoing was a living Christmas tree I got for an affordable price. It took me a few nights to get from A to B. I find it best to work on a tree over multiple sittings (unless you are a bonsai professional who is working full time).
1. Expose the nebari and identify a best front (for now)
2. Clean out everything that’s dead
3. Identify the trunk line, and remove things that cause inverse taper.
4. Remove branches that are too thick for the design (A general rule of thumb is any branch that is bigger than 1/3 the thickness of the truck section)
5. Reduce whorls of branches to one primary branch.
6. Reduce secondary branches to pairs of two (any more will risk swelling).
7. Wire main/primary branches and set them to your envisioned design.
8. Remove downwards growing branches if they can’t be wired flat.
9. Wire secondary/tertiary branches.
10. Enjoy all your labor!
This piece of rough stock I am demoing was a living Christmas tree I got for an affordable price. It took me a few nights to get from A to B. I find it best to work on a tree over multiple sittings (unless you are a bonsai professional who is working full time).


") .
.