You are using an out of date browser. It may not display this or other websites correctly.
You should upgrade or use an alternative browser.
You should upgrade or use an alternative browser.
HGs Ceramics
- Thread starter harshadg
- Start date


harshadg
Yamadori
Celadon on bmix. Cone 10. I don’t like this combination of celadon and bmix as much since it’s too glossy and the glaze looks pretty muddy on the bmix body.
Attachments
-
 IMG_5496.jpeg269.7 KB · Views: 50
 -
 IMG_5495.jpeg176.6 KB · Views: 50
 -
 IMG_5494.jpeg269.8 KB · Views: 50
 -
 IMG_5493.jpeg295.3 KB · Views: 49
 -
 IMG_5497.jpeg268.4 KB · Views: 48
 -
 IMG_5498.jpeg286.3 KB · Views: 48
 -
 IMG_5500.jpeg279.7 KB · Views: 46
 -
 IMG_5499.jpeg277.2 KB · Views: 46
 -
 IMG_5502.jpeg285.8 KB · Views: 45
 -
 IMG_5501.jpeg299.4 KB · Views: 44
 -
 IMG_5503.jpeg279.7 KB · Views: 46
harshadg
Yamadori
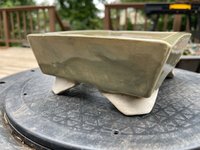
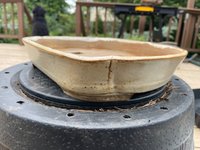
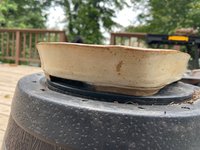
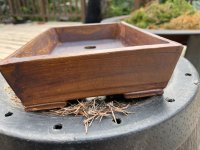
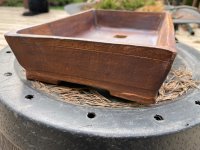
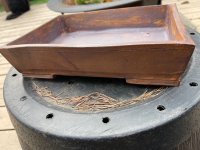
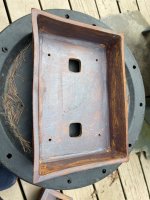
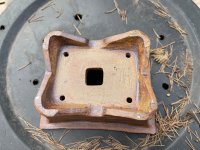
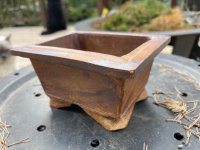
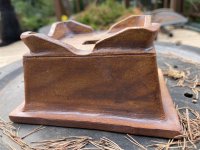
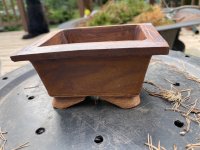
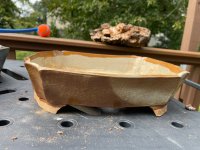
Tan rectangular pot with curved sides. Very pleased with the lack of warping for a pot this size especially since it’s fired to cone 10. I also like the look of the iron from the clay body coming through.
Attachments


harshadg
Yamadori
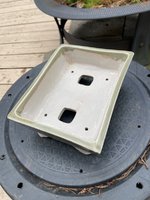
Kiln opening! Just got this one this week. This came out better than I expected. Really digging the iron oxide. And no warping/slumping. (What you see is intentional… since I didn’t want it to look too perfect and characterless.)
Attachments


harshadg
Yamadori


harshadg
Yamadori
This was a fail since it cracked at the seam during the high fire … I should have supported it. But the celadon is just gorgeous.
Attachments


harshadg
Yamadori
A new form that I’ve been working on. Hand built entirely. This was my first attempt at it. Happy to take feedback on it. Cone 10 fired brown stoneware.
Attachments


harshadg
Yamadori
And this is the second attempt. Same as above from the same firing, just a different glaze.
Attachments


penumbra
Imperial Masterpiece
I think you are doing a great job. It is unusual for studios to fire to cone 10. I know that is favored by many bonsai folks, but mostly in reduction. I fire all of mine to cone 6, my go to clay is Standard 547, and my first go to for stains is iron oxide. I do also use manganese, copper, and rutile. I really like a touch or rutile over iron. You might try some Mason stains as well.
harshadg
Yamadori
Thank you. I’ve been finding that the oxides are very reproducible. I don’t have easy access to cone 6 which would additionally make my builds warp less. For now I’m happy with cone10 reduction while I work on improving my process.
RonS
Seedling
Hello, everyone. My first post here.I found that the slabs will sometimes sag and warp during the high fire.
I'm a potter with my own studio and this week I made my first two bonsai pots after my wife gifted me a book on bonsai. I'm excited to get started on this journey
When I do any pot with feet like the ones you do, I always place an extra foot or two on the bottom center of the pot to prevent the pot from sagging. I fire to ^6
Very nice pots harshadg
gooeytek
Shohin
I'm likin' what I'm seein'. Nice work!
harshadg
Yamadori
Thank you. Since I started adding a support during the firing I’ve had fewer cracked pots.Hello, everyone. My first post here.
I'm a potter with my own studio and this week I made my first two bonsai pots after my wife gifted me a book on bonsai. I'm excited to get started on this journey
When I do any pot with feet like the ones you do, I always place an extra foot or two on the bottom center of the pot to prevent the pot from sagging. I fire to ^6
Very nice pots harshadg
RJG2
Masterpiece
Hello, everyone. My first post here.
I'm a potter with my own studio and this week I made my first two bonsai pots after my wife gifted me a book on bonsai. I'm excited to get started on this journey
When I do any pot with feet like the ones you do, I always place an extra foot or two on the bottom center of the pot to prevent the pot from sagging. I fire to ^6
Very nice pots harshadg
If you haven't found it yet, there is a sub-forum dedicated to pot making:
Would love for you to make your own threads with some of your stuff or technique discussion.
harshadg
Yamadori
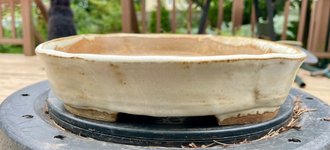
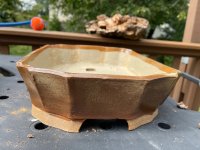
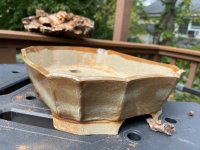
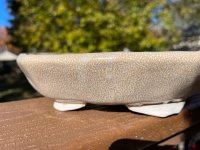
Another hexagonal pot this time with white stoneware. My first attempt cracked in the high fire so of course I had to re do it. 12” in diameter. About 2.5” deep.absolutely love the crackle in the celadon. No warping either - this was a good result.
Attachments
harshadg
Yamadori
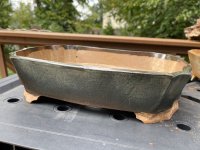
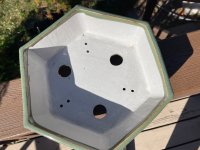
A couple more from a new process. When I roll out a slab, cut the pieces and assemble them painstakingly one piece at a time they have to be of comparable dryness and they have to be “just right” depending on how much flexibility the form demands. In practice - given the limited frequency of touch points - this means I’m often taking 4-5 weeks for a single piece to be completed to the stage where it can be bisque fired. From there it’s another 3-4 weeks before I can get it back from the cone10 firing.
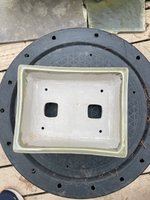
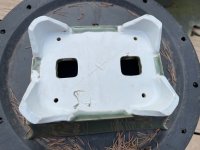
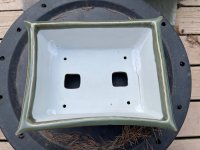
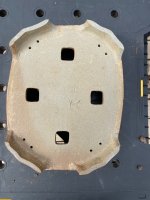
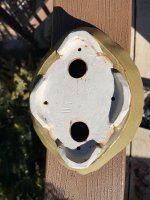
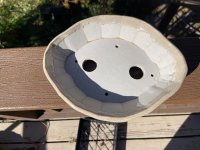
A major problem for me has been the lack of control over drying in a community studio. And this has meant that attaching feet at a point where the bottom slab is sufficiently dry so that it can be turned over without sagging inevitably leads to hairline cracks which at best are aesthetically annoying, and at worst could trap water/ice and potentially worsen the integrity and limit the life of a pot.
Over the year I’ve improved my technique and the white hexagon celadon pot (above) is evidence of that.
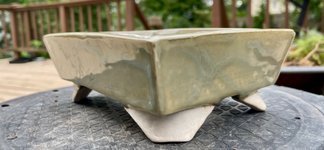
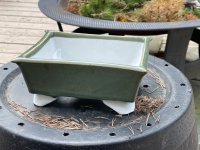
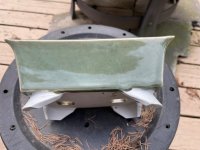
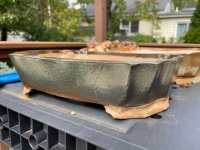
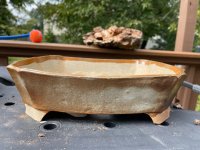
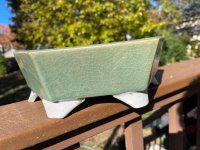
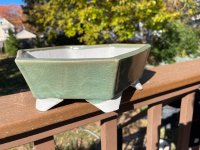
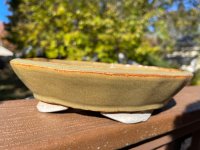
I’ve tried drape moulding as an alternative more recently here. The biggest advantage is that I can work with wet clay and attach feet at the same time as the shaping of the form. A second advantage is seamless construction which only makes the form stronger. A third advantage is that it’s stupidly quicker once the initial mould is made. A fourth advantage is that given that I can make these so much more quickly (and I’d argue better from a construction perspective) I can be bolder with trying new glazes.
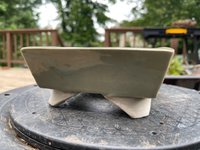
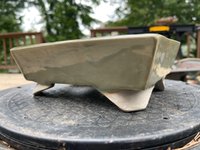
With that I have a couple of “replicates” from the same mould with a couple of different glazes. Would love to hear your feedback.
Personally, I like the green glaze, but the other speckled pot I’m not so sure…
A major problem for me has been the lack of control over drying in a community studio. And this has meant that attaching feet at a point where the bottom slab is sufficiently dry so that it can be turned over without sagging inevitably leads to hairline cracks which at best are aesthetically annoying, and at worst could trap water/ice and potentially worsen the integrity and limit the life of a pot.
Over the year I’ve improved my technique and the white hexagon celadon pot (above) is evidence of that.
I’ve tried drape moulding as an alternative more recently here. The biggest advantage is that I can work with wet clay and attach feet at the same time as the shaping of the form. A second advantage is seamless construction which only makes the form stronger. A third advantage is that it’s stupidly quicker once the initial mould is made. A fourth advantage is that given that I can make these so much more quickly (and I’d argue better from a construction perspective) I can be bolder with trying new glazes.
With that I have a couple of “replicates” from the same mould with a couple of different glazes. Would love to hear your feedback.
Personally, I like the green glaze, but the other speckled pot I’m not so sure…
Attachments


RonS
Seedling
ForrestW
Shohin
I agree with @RonS it seems like you have all the skills you need, you just need to carve out a place in your garage or basement to assemble. You can roll out slabs in the studio and bring them home on boards. As for the molds-- they make great pots but your nice facet details are lost on a drape mold. It would be great to make a mold that you press (the form is the outside). I have never made those molds but I know Nao makes great pots with that technique and I am sure there is info out there to find out how.
As for the glazes I think they are both good. The green one is a little stronger in my taste, but I really like a glaze that will break with variety on an edge. If that one had those nice facets on the outside with sharp edges it would have been even more sweet.
Well I understand the struggles of working in a community studio, your have done some killer work and learned a lot with those limited hours to work. I am looking forward to seeing more work to come.
harshadg
Yamadori
Unfortunately, the community studios here frown on making stuff at home and firing it at the studio considering the demand. Understandably, there’s also too much risk with people firing pieces made of incompatible clay and/or glazes. Would be nice to have that option tho!
Peter/Chang’s/Nebari/
Sapling
I know nothing about the fabrication of ceramics but I think you’re doing awesome. To me your work looks amazing and I’d happily put my plant in them. 
That being said I do have a strong predisposition to unique/not cookie cutter pottery and no sense of style or what is correct or by the book either.
That being said I do have a strong predisposition to unique/not cookie cutter pottery and no sense of style or what is correct or by the book either.
Similar threads
- Replies
- 15
- Views
- 1K
- Replies
- 33
- Views
- 3K
- Replies
- 12
- Views
- 1K