MACH5
Imperial Masterpiece
I've wanted to try this ingenious technique for many years. But I did not have a proper subject until about three years ago when I purchased this multi-trunk Japanese maple that was originally imported from Japan by Doug Paul at the Kennett Collection. The tree suffered greatly in the quarantining process in which one of its large trunks died back. Despite this I fell in love with this large maple and was determined to bring it back to glory by using any and all techniques at my disposal. One of those involved relocating a branch (or two) which was invented and developed by the great Mr. Ebihara who is often referred to as the Kimura of the deciduous genre.
I want to share my process of relocating one branch by said method. Below a play by play account of the first phase of this technique which was just completed.
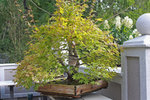
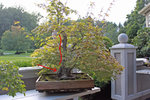
This is the maple March 2019 showing strong growth from the previous year with a thread graft in progress.
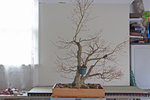
The maple right before the removal of the targeted branch to be relocated.
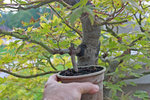
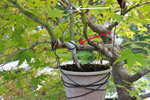
A two year old Japanese maple sapling was used to do an approach graft onto the targeted branch to be relocated. Grafting tape and wire were used to secure the graft in place as indicated by the red arrow. The white arrow indicates a second point where additional support was added to hold things in place. The pot in which the sapling is in was suspended and secured with a series of wires fastened onto various nearby branches.
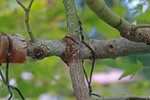
The graft union after the grafting tape and wire were removed. In 3.5 months, the graft union is strong and complete. It was safe now to sever the branch from the tree.
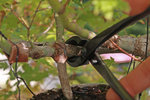
Removing the branch at its base.
After the branch is separated and the resulting wound.
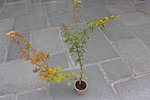
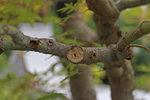
Cutting off the top portion of the grafted sapling as this part is no longer needed. What's left of it is the source that now will feed the severed branch.
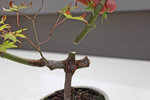
Close up and schematic illustrating part of the mechanics behind this technique. The short stub left behind the graft union will be made into a peg which will be inserted into a predrilled hole of the same depth and diameter at the desired new location. The green portion represents the exposed cambium that will butt right up against the new location which will also have the cambium exposed to ensure a good and solid graft union.
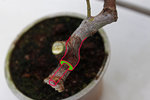
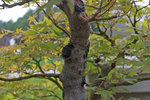
Most of the main trunk is in much need of being repopulated with branches shown by the red line. Many were removed for one reason or another. I decided to use their original locations to graft new branches onto. The red arrow indicates the location where the original fourth trunk was. A large scar was left which is currently in the process of healing.
I want to share my process of relocating one branch by said method. Below a play by play account of the first phase of this technique which was just completed.
This is the maple March 2019 showing strong growth from the previous year with a thread graft in progress.

The maple right before the removal of the targeted branch to be relocated.

A two year old Japanese maple sapling was used to do an approach graft onto the targeted branch to be relocated. Grafting tape and wire were used to secure the graft in place as indicated by the red arrow. The white arrow indicates a second point where additional support was added to hold things in place. The pot in which the sapling is in was suspended and secured with a series of wires fastened onto various nearby branches.

The graft union after the grafting tape and wire were removed. In 3.5 months, the graft union is strong and complete. It was safe now to sever the branch from the tree.

Removing the branch at its base.

After the branch is separated and the resulting wound.


Cutting off the top portion of the grafted sapling as this part is no longer needed. What's left of it is the source that now will feed the severed branch.

Close up and schematic illustrating part of the mechanics behind this technique. The short stub left behind the graft union will be made into a peg which will be inserted into a predrilled hole of the same depth and diameter at the desired new location. The green portion represents the exposed cambium that will butt right up against the new location which will also have the cambium exposed to ensure a good and solid graft union.

Most of the main trunk is in much need of being repopulated with branches shown by the red line. Many were removed for one reason or another. I decided to use their original locations to graft new branches onto. The red arrow indicates the location where the original fourth trunk was. A large scar was left which is currently in the process of healing.

Last edited:

