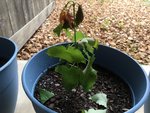
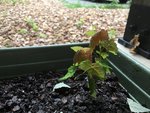
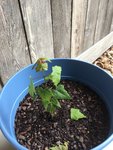
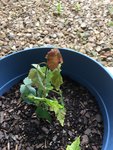
Questions from a well-researched newbie

CliffracerX

Yamadori
Messages
51
Reaction score
25
Location
Blacksburg, VA
USDA Zone
6b
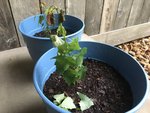
They're not on the screen porch yet, but I've moved them to *a* porch so oncoming rain wouldn't utterly soak the soil.
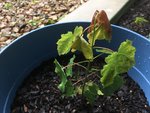
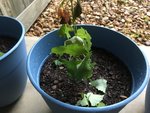
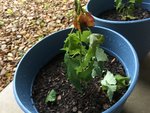
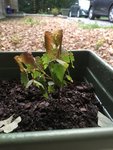
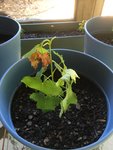
Took a pair of kitchen scissors out and started trimming off any and all leaves that were sagging - though it's hard to tell from the pictures, not all of them seem to be suffering from low water pressure, surprisingly enough. The newest growths across all the trees were the weakest links, and in particular the ones that'd turned grey-red on the tall tree were just...almost entirely devoid of texture.

Trim results for one of the two trees from the intertwined bush:
Bush1Trim_1.jpg*nyoom*Bush1Trim_3.jpg

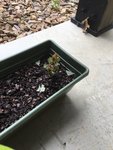
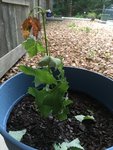
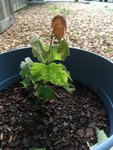
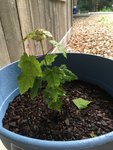
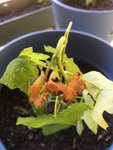
The tall upright one, which i may do another pass on to outright remove topmost leaves since they are **not** doing well:
TallTrim_1.jpgTallTrim_2.jpgTallTrim_3.jpg

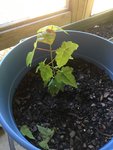
The other part of the bush was actually doing pretty good, so only the topmost leaves had any actual droop to them
Bush2Trim_1.jpg

Finally, the small branching one wasn't doing so hot (unlike the other two in the long pot, oddly enough), so its softest leaves got trimmed too.
SmallBranchTrim_1.jpg

If I should go back and indiscriminately halve the other leaves as well, or outright remove some of the weakest-looking ones, let me know.

==REPLIES==
@BobbyLane
Holy dangwow, that's gotta be the tiniest set of scissors I've ever seen! How do you even use them?!
 

CliffracerX

Yamadori
Messages
51
Reaction score
25
Location
Blacksburg, VA
USDA Zone
6b
End-of-day status report - apologies about the spam, all! I dunno what mix of it is having a few hours to recover, the leaf trimming, or general daily changes in their status, but most of the trees are looking much happier.

The two from the intertwined bush look more or less back to normal, trimmed leaves notwithstanding - the leaves are mostly horizontal and plenty rigid from water pressure, with some very mild droopiness at the very top.
Bush1EOD_Aug6th.jpgBush2EOD_Aug6th.jpg

Tall one is visibly a bit recovered, but still looking pretty rough - I suspect it might need more rigorous trimming, and I dunno if those leaves at the top are gonna make it at all. I believe it has likely had the roughest transplant experience of the lot - its rootball had actually penetrated the ground cloth & so there was some more root loss required to get it out. Will be keeping special attention on it in the coming days, as it seems to be the worst-off of the lot.
TallEOD_Aug6th.jpg

The small multi-branched guy is looking much better.
SmallBranchEOD_Aug6th.jpg
 

CliffracerX

Yamadori
Messages
51
Reaction score
25
Location
Blacksburg, VA
USDA Zone
6b
Day 2 - Afternoon Status Update
Things are looking pretty droopy again, though I think it's afternoon heat more than anything. Trees in order of doing best to worst:

==BUSH HALF #2 (LEFTMOST)==
While it's a little droopy, all the leaves - even the topmost ones - still have some real pressure, up to the top leaves actually being horizontal.
Bush2_Aug7th.jpg

==BUSH HALF #1 (RIGHTMOST)==
This one's not doing nearly as well, but still seems to be managing to get by alright.
Bush1_Aug7th.jpg

==SMALL BRANCHING==
Looking significantly less vibrant and happy than in last night's pic, but I suspect it'll bounce back without issue once things cool down in the evening.
SmallBranch_Aug7th.jpg

==TALL UPRIGHT==
I think there's been some minor growth on the newest leaves, and the super-darkened leaves *might* have some green returning to them? It's hard to say. I will note that the stems look like they have more pressure in them, even compared to last night - so it's probably healing? It's really not doing well, though, definitely faring the worst of the lot - if anyone has advice on extra maintenance I can do to try and help it along, I'm all ears.
Tall_Aug7th.jpg

==SMALL EDIT COMMENTARY==
I realise they're trees, and tough ones to boot, so this commentary is *probably* fairly redundant, but if nothing else it's helping me keep track of their progression & hopefully keeps my brain from spending quite so much time going "AAAAAAAAAAAAAAAAAHHHHH THEY'RE ALL GONNA DIIIIIEEEEE", as it is wont to do. I'd not have noticed the decrease in stem droop in the tall guy in particular had I not made this, and it's definitely helpful to assuage my fears that it's not gonna get better.
 
Last edited:

CliffracerX

Yamadori
Messages
51
Reaction score
25
Location
Blacksburg, VA
USDA Zone
6b
Day 2 - End of day status update
Things are looking rougher than they were at the start of the day. The blackened leaves at the top of the tall guy were officially crinkled and crunchy, so I've gone ahead and snipped them off on the stem at the halfway point, and I went ahead & trimmed some of the lower leaves on it. Most of the trees seem like they're in a little worse condition than they were at the start of the day, which I assume has something to do with it just being really hot today. I think they are still looking a *little* better in some areas than yesterday - one of the leaves on the tall guy that was entirely crumpled yesterday has unfurled again, and the stems seem to generally be a bit less saggy - but still not looking good. Commentary in the alt-text for each - mouse over if you want to read it.

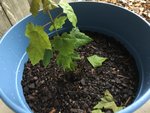
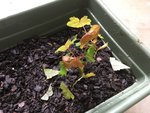
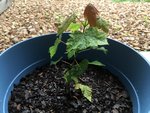
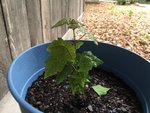
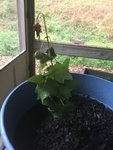
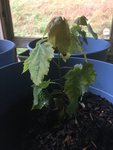
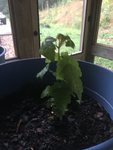
Tall guy.  Note that upper-leftmost green leaf now has pressure in it again, rather than being folded up on itself.  I'm also not certain, but I feel like it's gotten taller since yesterday, though it could be a quirk of the camera angles I've chosen.Right-side bush tree.  It's just...drooping.  I'm starting to wonder if I didn't prune the leaves enough yesterday.Left-side bush half is still holding up the best of the lot, but not looking as good as it did this time yesterday.  This is the only one where my confidence level for its survival is still > 50%.This guy's doing worse too, definitely a bit saggier than it was this time yesterday.

Not pictured: they've all been moved to the screen porch, and the snipped leaves have been removed from the pots. We'll see how they're doing tomorrow. May that this thread not turn into a play-by-play of their untimely demise to later end up in Trees I Killed This Year - though if it does, hopefully it can at least be useful to some future newbie as a guide of how not to kill your transplants.

EDIT 1: shoulda said "removed from the pots", so that's what it says now
 

CliffracerX

Yamadori
Messages
51
Reaction score
25
Location
Blacksburg, VA
USDA Zone
6b
Day 3 - Varied status update
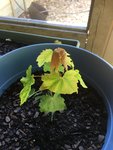
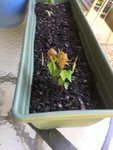
All the seedlings look probably the best they have since having been transplanted, though the tall guy & branched smaller one are still looking pretty rough. The tiny forest has also grown by one - breaking it down tree by tree.

==TALL GUY==
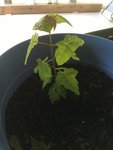
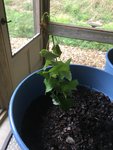
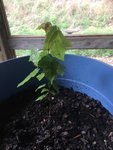
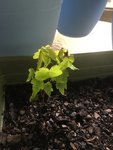
This is still the tree I'm most worried about. Those bigger red leaves are getting more crinkled and brown, and their stem continues to be very droopy. That said, even the most consistently droopy of the already-green leaves are starting to make progress as well - though not pictured is the whole thing sort of regressing back a few steps due to mid-day heat and unplanned afternoon sun coming through the screen.
There *are* new shoots coming out the very top of the stem, though - look at those tiny li'l leaves! That gives me some real hope it's starting to bounce back & will ultimately recover, even if it loses a few more leaves before that happens.
TallMorning_Aug8th.jpgTallMorningShoots_Aug8th.jpg

==LEFT-SIDE BUSH==
I think this guy has reached the point of looking more or less back to normal, on the tier of it being forgivable to assume it had ever been in shock. All the leaves have good pressure, even during the hottest parts of the day, nothing looks withered or brown, and the new growth up top is moving along. I have very few doubts about its recovery - it was already bouncing back after light trimming the day after the transplant, and has been carrying on like a trooper ever since.
Bush2Morning_Aug8th.jpg

==RIGHT-SIDE BUSH==
Still not fully back in action, but doing fairly consistently well, with even the once-saggy, weird, sorta splotchy leaves having reasonable pressure. Like with its twin, I'm pretty confident it's gonna recover.
Bush1Morning_Aug8th.jpg

==THE SMALL BRANCHY GUY & OTHER SEEDLINGS==
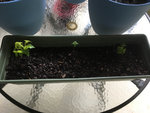
This guy oscillates between looking okay, and looking like it's really struggling, depending on how hot it is. I'm still semi-confident it'll pull through. As for the other two small guys, they've...not really changed a ton that I can see one way or another. Not clear on whether that's good or bad, but remaining optimistic until we see how they progress.
SmallBranchMorning_Aug8th.jpg

==THE TINY FOREST GROWS BY ONE==
Was out at Lowes earlier to help try and track down some pots, haul soil, and stock up on perlite, fertilizer, etc for the maples. We'd been tasked with seeing if they had any decent ficus trees (not for bonsai purposes - we had a big ol' ficus at our previous house that didn't survive the move IIRC), and while we were unable to find a big ficus, perlite, or pots, we *did* still succeed in finding what appears to be *a* ficus.
Just a very small one.
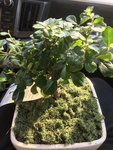
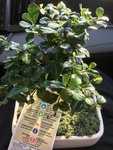
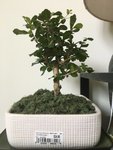
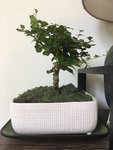
Ficus1.jpgFicus2.jpgI realise the utter lack of a Nebari here is likely frowned upon for Proper Styling purposes (tm), but it was the only one that really resonated with me - all the others had comically large...dunno if they'd be classified as Nebari or something else entirely.  Long-term styling goals on an established tree though, right?
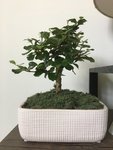
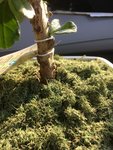
I realise that most box-office store-bought bonsai are typically not in the best of health and usually not in a very good soil at all, so gonna be paying close attention to it & doing some research to try and discern what species it even is - but figure it's a good addition to the family, since peeps usually recommend having trees across multiple different stages of development, *and* it likely didn't have a hopeful life ahead of it on store shelves or taken home by someone as clueless as I once was about bonsai. It's already styled to my liking - looks like a small Shohnin-sized formal broom if I'm getting my classifications correct - so just need to take care of & maintain it, maybe repot it soonish depending on the soil situation & seasonal recommendations.

(With that in mind: thoughts on how to test the soil quality & overall health of the tree? Far as I can tell this is a score compared to some box-office bonsai that literally have rocks and stuff glued to the soil, and the moss (?) seems to just be loosely stuffed on top, with little water retention - it's totally dry & I had to pry some away from a corner to stick a finger in and see if the soil itself was damp. It was, though not overly so.)
 

leatherback

The Treedeemer
Messages
14,095
Reaction score
27,488
Location
Northern Germany
USDA Zone
7
Stop measuring.
Stop fiddling

Put them in a shaded spot out of the wind. Avoid the soild being completely wet. And leave them alone.

You gave them open heart surgery at a very bad time of the year. Best would have been to just leave them till winter, as recommended. Now you just have to wait and see. Every time you fiddle with them, they have to balance a new reality. Plants do not respond n timeframes of hours, but days to weeks. SO let them react.

ONLY thing you can consider is using a humidity dome of some sort. But that seems to be unneeded. One seedling is deciding to die. The rest will probably make it as long as the roots do not drown and you do not put them back into the sun untill well established..
 

Saddler

Chumono
Messages
697
Reaction score
909
Location
Vancouver, British Columbia
As @leatherback said, you are loving them to death. The best way to stop that is go get more trees. When you have so many trees you can’t quite work on all of them every year, you have about the right amount.
 

Mikecheck123

Omono
Messages
1,677
Reaction score
3,210
Location
Northern Virginia
USDA Zone
7b
I'm okay with them not ever being perfect Bonsai, or necessarily even good ones. Sorta like the old quote of "There are many like it, but this one is mine.", except more..."There are many better than it, but this one is mine." - like I'd said in the main post (I think), I consider this first project to be a victory if I can keep 'em alive in the first place, even if they never become much more than TN_Jim's gorgeous pine-mulch-dwelling spiral seedling.
IMO this is a perfectly fine frame of mind as long as it's not the only thing you're doing.

I.e. you should also be leveling up your game by also cultivating the "suitable" species for experience (of which Acer ruburm is not one). That way when you encounter a problem with your sentimental seedlings, you'll know what to do, know what's normal and what isn't normal, etc, etc.

To put it another way, you're just setting yourself up for failure if you try to tackle a very hard species with limited experience.
 

CliffracerX

Yamadori
Messages
51
Reaction score
25
Location
Blacksburg, VA
USDA Zone
6b
Stop measuring.
Stop fiddling

Put them in a shaded spot out of the wind. Avoid the soild being completely wet. And leave them alone.

You gave them open heart surgery at a very bad time of the year. Best would have been to just leave them till winter, as recommended. Now you just have to wait and see. Every time you fiddle with them, they have to balance a new reality. Plants do not respond n timeframes of hours, but days to weeks. SO let them react.

ONLY thing you can consider is using a humidity dome of some sort. But that seems to be unneeded. One seedling is deciding to die. The rest will probably make it as long as the roots do not drown and you do not put them back into the sun untill well established..
I measure because I want to document the whole process, successes and failures, both for my own sake & sanity, and for anyone else who decides to dive down the rabbit-hole after me.
I haven't trimmed or the likes since taking the extremely dead leaves off the tallest seedling on Friday, the extent of my interaction has been monitoring the soil (it finally needed a proper watering today as it was getting pretty dry), misting the leaves occasionally when the day's at its hottest, and having moved them to the porch w/ some subsequent position adjustments so they aren't roasted by late-afternoon sunlight.

Been doing my best on the position & soil maintenance front - they live out on a screen porch right now, and I've been keeping them out of the path of the late afternoon direct sunlight so they don't get roasted. Soil has seen very little attention since the first post-transplant watering, as I know it's wiser to err on the side of letting it come close to drying out so as to avoid root rot.

As I think I'd said in the original post, I wasn't sure they'd make it *to* winter - they were all growing out of river rock w/ no real access to actual soil unless they broke through the ground cloth underneath (which the tall guy did, hence its unsurprisingly more traumatic transplant experience) - and I'd been under the impression that trees this young were generally more amenable to transplants year-'round, in particular from people like HorseloverFat & Sorce sharing their own experiences in transplanting non-ideal trees at non-ideal times of year. That impression may very well be wrong.
I've been doing my best to let 'em be and watch how they react, keeping them out of the path of sunlight notwithstanding. If this, too, is a dumb idea & I should just plonk them down and let them be, even when they get a few hours of sunlight through the screen, let me know - I'm erring on the side of more paranoia rather than less about leaf scorch, since I know it's a real concern.

(Edit: I should also mention - I'm not trying to throw anyone under the bus! I don't blame anyone here for what's happening to the seedlings but myself, nor do I think any of the advice offered has been bad - y'all rock & are sharing your experiences & techniques, and I'm inevitably going to fumble it for a while until I've had the opportunity to learn & practice more as a patron of the tiny forest.)

Humidity is semi-decent here, and I've got a spray-bottle on hand & mist the leaves when it's really hot to keep them from drying out. I assume there's very little I can do for the tall guy but keep it lightly watered, out of shade, etc, and care for it like the others in the hopes it changes its mind and bounces back?

As @leatherback said, you are loving them to death. The best way to stop that is go get more trees. When you have so many trees you can’t quite work on all of them every year, you have about the right amount.
I realise there's very little I need to do with it right now, but this is part of why I decided to grab that little Ficus at Lowes yesterday, since it was, A, not very expensive (like $30ish IIRC), B, in a style & size-range I liked, C, a significantly more newbie-friendly tree species that can be kept indoors, and D, it's another thing to work on and keep my mind and attention elsewhere from the seedlings.
We're gonna be heading back next week likely to see if they've gotten their perlite and the likes back again, and hope to peruse the regular young trees, see if anything calls out as interesting material to work on, so as to add yet another source of distraction for tiny tree maintenance.

IMO this is a perfectly fine frame of mind as long as it's not the only thing you're doing.

I.e. you should also be leveling up your game by also cultivating the "suitable" species for experience (of which Acer ruburm is not one). That way when you encounter a problem with your sentimental seedlings, you'll know what to do, know what's normal and what isn't normal, etc, etc.

To put it another way, you're just setting yourself up for failure if you try to tackle a very hard species with limited experience.
I do plan to try other species, just need time, money, and opportunities to do so - as outlined above there was a Shohnin-sized formal broom ficus of some description (ginseng, maybe?) that I grabbed on a Lowes trip yesterday, and I'm hoping to get some regular young trees there to fit into the prebonsai/in need of training tree progression slot, as well as to learn more about working with other kinds of more popular trees for bonsai purposes.

==END REPLIES, BEGIN MORNING STATUS UPDATE, DAY 4==
Things are more or less the same as they were at the start of yesterday, maybe slightly droopier as today's started off warmer & they've been a bit farther from the brightest spot on the porch so as to avoid them getting roasted by afternoon sunlight as occurred for an hour or two yesterday before I realised what was happening. Also got the label off the ficus, and checked the soil water level - still a bit damp, but it might need watered this evening as it's definitely drying out. Need to track down a plate or something to use as a temporary tray for the pot to drain onto. Pictures incoming, any commentary will be in the alt-text as usual.
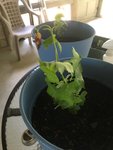
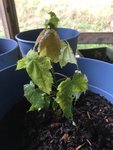
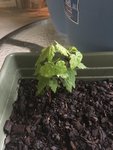
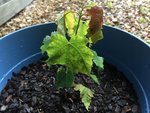
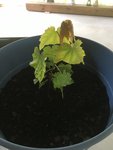
Tall guy.  Those large red leaves are dying/maybe already dead, and even the leaves that were unfurling from pressure again are back to mostly droopy.  New growth up top is still happening, and there are small buds (?) on the trimmed stems, so...maybe it'll still ultimately bounce back?  Given what other people here think, and the voice of my own anxiety, I have very little hope for it though - I am assuming a gallery of its transition from vibrant and full of promise to a dead stick will end up in the Trees You Killed This Year thread sometime in the next couple of weeks, and only a miracle could save it.Rightmost bush.  More or less the same as it was this time yesterday, just a tiny bit droopier.Leftmost bush.  Status nominal, just slightly droopier than yesterday.Small branched seedling.  Inscrutable as always.A majestic little tree - by my tastes, anyway. Far as I can tell, the moss is for show & could be removed fairly easily.  The soil underneath forms something of a hill around the tree - the moss around the trunk is very thin.

(Postal Note: the Lowes' plant page for the ficus literally just says it is "a bonsai", and while it does provide care instructions that more or less fall in line with my understanding of how to care for ficus bonsai, it doesn't actually specify species or the likes. Literally says "Scientific Name: Bonsai" - ace documentation, Lowes. </sarcasm>)
 

CliffracerX

Yamadori
Messages
51
Reaction score
25
Location
Blacksburg, VA
USDA Zone
6b
==DAY 8, STATUS REPORT, POSTED LATE ADMITTEDLY==
Things have been mostly stagnant the past couple of days. Taking it group-by-group.

==MAPLES==
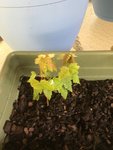
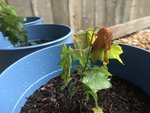
Slow decline the past couple days, though not necessarily an unsurprising one. It has been *bloody hot* outside lately, with the temperature curve since transplant being a mild, but exponential increase up 'till day before yesterday (avg from around 70F to 90F), with a brief reprieve over the next few days - even the seedlings still in the river rock haven't been looking too good. More leaves on the tall guy are officially dead, and it appears some of the new growth on the small branching guy is succumbing to the same fate as well. Some concerning brown spots on the leaves across all three of the big seedlings.
Tall-Aug13.jpgBush2-Aug13.jpgBush1-Aug13.jpgSmallBranch-Aug13.jpgSmallSeedlings-Aug13.jpg

It is my hope that we'll see them bouncing back as weather cools down somewhat.

==FICUS==
The ficus is, unsurprisingly, doing just fine. New growth is slowly moving along, and I realised I needed to change how it'd been left on the shelf after noticing that some of the young branches had literally gone through a 45-60 degree change in rotation to try and face towards the windows (and in doing so, were making the canopy even more lop-sided) - I suspect said new growth likely needs a pruning, and figure the resultant cutting could be rooted for more material to work on down the line - more after the break.
Ficus1-Aug13.jpgFicus2-Aug13.jpgFicus3-Aug13_TrimMark.jpg

Thoughts about rooting cuttings from it:
Marker in red indicates where I'd estimate that branch should be trimmed. For the purpose of cuttings, I assume I'd want to remove at least the closest set of leaves to the cut point, maybe more. I also wonder if it wouldn't be possible to try and make two cuttings out of it - snip it above the middle leaves and make a second one that way - but I suspect it isn't a good idea.

==FUTURE PLANS==
I've been doing more research, and come to the conclusion that a good priority for material to acquire & work on next would be some Portulacaria Afra (the Dwarf Jade/Elephant's Bush), as while not technically trees, they still grow like 'em and can be bonsai'd in a variety of different sizes & shapes, whilst also being happy indoors, able to withstand under-watering with more ease, and comparatively cheap to boot. I'll still be keeping an eye out for regular tree material that looks good on my next visit to Lowes (likely a pine of some sort - would appreciate suggestions as to what species to look out for), but my main focus there's likely to be restocking on perlite & such for planting in (assuming they haven't been bought out *again*) and some P. Afras to work with.

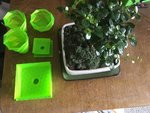
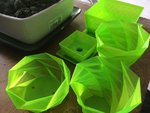
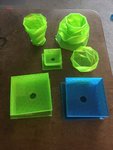
I've also been passing the time working on some 3d-printed pots for use in the long run - two square bonsai pots of my design, an old low-poly succulent vase from Thingiverse that's technically what got this whole adventure started (my first thought upon popping it off the print bed was "omg I need to put a tree in this"), and several taller low-poly vases of my design that'd be suitable for rooting cuttings in or the likes. Tree for scale:
I do apologise for the state of my desk - it's been filled up with random detritus for months now & I only finally made a point of starting to clean it up very recently.Pots2.jpg

I do realise that "transluscent neon green and super-low-polycount" is definitely not a standard aesthetic for Bonsai pots, but it's what I've got. Versions in other colours (most notably a soothing blue) likely to be featured in future posts, hopefully one day with trees in 'em.

Some notes about those pots:
  • The smaller of the two square ones is 50mm across at the base, 60mm at the top, and has a plantable depth of about 19mm, with the combined height of the pot, feet, and tray coming out to around 30mm. It's got a 15mm-wide drainage hole in the middle, and likely would only work for Mame bonsai on the smaller side of things, and likely only those that've had training time to acclimate to ever-smaller pots if I understand things correctly. If the 3:1 ratio recommendation is for actual soil depth only, then it could support a tree up to ~6cm tall, or ~9cm if it's for visual purposes & based on the total height of the pot.
  • The larger square one is 100mm across at the base, 110mm at the top, and has a plantable depth of about 36mm, with the combined height of the pot, feet, and tray coming out to around 50mm. It's got a 20mm-wide drainage hole in the middle, and seems like a good candidate for a Shohnin. As above, this'd support a tree ~11cm tall based on soil depth, or ~15cm if it's based on the total height of the pot.
  • The round low-poly vase is technically for succulents. Drainage holes were added after the fact, and a matching tray is being printed right now. It's got a plantable depth of about 47mm, and goes from about 66mm in diameter at the base to about 98mm at its highest point. While height-wise it'd support a tree ~14cm tall, I assume its comparatively low width is problematic.
  • The taller cup-like ones are about 50mm at the base, going up to 80mm at their highest point, with a plantable depth of around ~74mm. They have no drainage holes at present (though could easily drill some in, and have made a couple matching trays just in case), and I'm planning to use them mainly for rooting cuttings in. Though, a formal upright aiming to replicate the classical conic pine look might look great in one...
  • These were all printed on an Ender 3 Pro w/ a glass bed using YOYI Transluscent Green PETG. The cylindrical vases were made using an approximation of standard Vase Mode made to account for the fact I only have a 0.4mm nozzle & vases should be made with 0.6-0.8mm ones since they're single-walled. The square ones were not, since I needed some solid geometry for the feet, and they use cubic infill, hence the grid pattern in the sides. Drainage holes notwithstanding, the cylindrical ones are confirmed to hold water. Square ones should be fine as well, just going to be a wee bit harder to test with drainage holes in place.
  • My personal readings on styles: the square pots would likely suit a lot of types decently well, the round one would look great with some kinda nice bushy upright broom with a super-round canopy, and the cylindrical ones would be best suited to...whatever style a classic Christmas tree would be classified as, I guess. Formal Upright, maybe?
Edit 1: Pruning some unnecessary ramblings about the ficus that were there from writing up an initial draft of this on day 7. Please don't sit on your posts-to-be for two and a half days stressing over finer details, folks
 
Last edited:

Mikecheck123

Omono
Messages
1,677
Reaction score
3,210
Location
Northern Virginia
USDA Zone
7b
==DAY 8, STATUS REPORT, POSTED LATE ADMITTEDLY==
Things have been mostly stagnant the past couple of days. Taking it group-by-group.

==MAPLES==
Slow decline the past couple days, though not necessarily an unsurprising one. It has been *bloody hot* outside lately, with the temperature curve since transplant being a mild, but exponential increase up 'till day before yesterday (avg from around 70F to 90F), with a brief reprieve over the next few days - even the seedlings still in the river rock haven't been looking too good. More leaves on the tall guy are officially dead, and it appears some of the new growth on the small branching guy is succumbing to the same fate as well. Some concerning brown spots on the leaves across all three of the big seedlings.
View attachment 322696View attachment 322697View attachment 322698View attachment 322699View attachment 322700

It is my hope that we'll see them bouncing back as weather cools down somewhat.

Not a great sign. There is a difference between a plant surviving and a plant growing. It's August, which is when seedlings need to be growing if they're ever going to survive the winter.
 

CliffracerX

Yamadori
Messages
51
Reaction score
25
Location
Blacksburg, VA
USDA Zone
6b
Not a great sign. There is a difference between a plant surviving and a plant growing. It's August, which is when seedlings need to be growing if they're ever going to survive the winter.
This is most definitely true, and wintertime worries are a longer-term monkeywrench I see hurtling towards any plans I may have.

That said, I'm still cautiously optimistic for a majority of them - the exception here is the tall one, who's just in a slow and constant decline so far since Day 3; I'm operating on the assumption it won't last long enough that worrying about its surviving the winter can even become a factor. For all the others - and to a lesser degree, the tall one, as the tiny new growths at the very top of the trunk are moving a bit - growth is by no means going *speedily*, certainly not as compared to before the transplant, but it's still happening, and most of the other seedlings across the property have been similarly somewhat droopy and slow-growing the past week or so thanks to things just being roasting outside. Totoro's Tree may even be noping out and dropping some leaves thanks to how stinkin' hot it is - some small patches of its foliage have turned red & dropped way earlier than normal, though I have a suspicion that could be a sign of ill health in some other form.
 

Carol 83

Flower Girl
Messages
11,222
Reaction score
27,611
Location
IL
==DAY 8, STATUS REPORT, POSTED LATE ADMITTEDLY==
Things have been mostly stagnant the past couple of days. Taking it group-by-group.

==MAPLES==
Slow decline the past couple days, though not necessarily an unsurprising one. It has been *bloody hot* outside lately, with the temperature curve since transplant being a mild, but exponential increase up 'till day before yesterday (avg from around 70F to 90F), with a brief reprieve over the next few days - even the seedlings still in the river rock haven't been looking too good. More leaves on the tall guy are officially dead, and it appears some of the new growth on the small branching guy is succumbing to the same fate as well. Some concerning brown spots on the leaves across all three of the big seedlings.
View attachment 322696View attachment 322697View attachment 322698View attachment 322699View attachment 322700

It is my hope that we'll see them bouncing back as weather cools down somewhat.

==FICUS==
The ficus is, unsurprisingly, doing just fine. New growth is slowly moving along, and I realised I needed to change how it'd been left on the shelf after noticing that some of the young branches had literally gone through a 45-60 degree change in rotation to try and face towards the windows (and in doing so, were making the canopy even more lop-sided) - I suspect said new growth likely needs a pruning, and figure the resultant cutting could be rooted for more material to work on down the line - more after the break.
View attachment 322694View attachment 322695View attachment 322786

Thoughts about rooting cuttings from it:
Marker in red indicates where I'd estimate that branch should be trimmed. For the purpose of cuttings, I assume I'd want to remove at least the closest set of leaves to the cut point, maybe more. I also wonder if it wouldn't be possible to try and make two cuttings out of it - snip it above the middle leaves and make a second one that way - but I suspect it isn't a good idea.

==FUTURE PLANS==
I've been doing more research, and come to the conclusion that a good priority for material to acquire & work on next would be some Portulacaria Afra (the Dwarf Jade/Elephant's Bush), as while not technically trees, they still grow like 'em and can be bonsai'd in a variety of different sizes & shapes, whilst also being happy indoors, able to withstand under-watering with more ease, and comparatively cheap to boot. I'll still be keeping an eye out for regular tree material that looks good on my next visit to Lowes (likely a pine of some sort - would appreciate suggestions as to what species to look out for), but my main focus there's likely to be restocking on perlite & such for planting in (assuming they haven't been bought out *again*) and some P. Afras to work with.

I've also been passing the time working on some 3d-printed pots for use in the long run - two square bonsai pots of my design, an old low-poly succulent vase from Thingiverse that's technically what got this whole adventure started (my first thought upon popping it off the print bed was "omg I need to put a tree in this"), and several taller low-poly vases of my design that'd be suitable for rooting cuttings in or the likes. Tree for scale:
View attachment 322723View attachment 322724

I do realise that "transluscent neon green and super-low-polycount" is definitely not a standard aesthetic for Bonsai pots, but it's what I've got. Versions in other colours (most notably a soothing blue) likely to be featured in future posts, hopefully one day with trees in 'em.

Some notes about those pots:
  • The smaller of the two square ones is 50mm across at the base, 60mm at the top, and has a plantable depth of about 19mm, with the combined height of the pot, feet, and tray coming out to around 30mm. It's got a 15mm-wide drainage hole in the middle, and likely would only work for Mame bonsai on the smaller side of things, and likely only those that've had training time to acclimate to ever-smaller pots if I understand things correctly. If the 3:1 ratio recommendation is for actual soil depth only, then it could support a tree up to ~6cm tall, or ~9cm if it's for visual purposes & based on the total height of the pot.
  • The larger square one is 100mm across at the base, 110mm at the top, and has a plantable depth of about 36mm, with the combined height of the pot, feet, and tray coming out to around 50mm. It's got a 20mm-wide drainage hole in the middle, and seems like a good candidate for a Shohnin. As above, this'd support a tree ~11cm tall based on soil depth, or ~15cm if it's based on the total height of the pot.
  • The round low-poly vase is technically for succulents. Drainage holes were added after the fact, and a matching tray is being printed right now. It's got a plantable depth of about 47mm, and goes from about 66mm in diameter at the base to about 98mm at its highest point. While height-wise it'd support a tree ~14cm tall, I assume its comparatively low width is problematic.
  • The taller cup-like ones are about 50mm at the base, going up to 80mm at their highest point, with a plantable depth of around ~74mm. They have no drainage holes at present (though could easily drill some in, and have made a couple matching trays just in case), and I'm planning to use them mainly for rooting cuttings in. Though, a formal upright aiming to replicate the classical conic pine look might look great in one...
  • These were all printed on an Ender 3 Pro w/ a glass bed using YOYI Transluscent Green PETG. The cylindrical vases were made using an approximation of standard Vase Mode made to account for the fact I only have a 0.4mm nozzle & vases should be made with 0.6-0.8mm ones since they're single-walled. The square ones were not, since I needed some solid geometry for the feet, and they use cubic infill, hence the grid pattern in the sides. Drainage holes notwithstanding, the cylindrical ones are confirmed to hold water. Square ones should be fine as well, just going to be a wee bit harder to test with drainage holes in place.
  • My personal readings on styles: the square pots would likely suit a lot of types decently well, the round one would look great with some kinda nice bushy upright broom with a super-round canopy, and the cylindrical ones would be best suited to...whatever style a classic Christmas tree would be classified as, I guess. Formal Upright, maybe?
Edit 1: Pruning some unnecessary ramblings about the ficus that were there from writing up an initial draft of this on day 7. Please don't sit on your posts-to-be for two and a half days stressing over finer details, folks
The tree you're calling a Ficus is a Fukien Tea.
 

CliffracerX

Yamadori
Messages
51
Reaction score
25
Location
Blacksburg, VA
USDA Zone
6b
The tree you're calling a Ficus is a Fukien Tea.
Ah, dangit - I shoulda known. It was an outlier among the other obvious Ficus bonsai there for not being air-layered to high heaven, and I didn’t stop to think of it being a different species. Thanks for the heads-up!
 

hinmo24t

Masterpiece
Messages
2,480
Reaction score
3,166
Location
Dartmouth Massachusetts
USDA Zone
7A
the tree in the OPs pic is a Norway maple. Extremely common landscape tree here in Va. Not very good bonsai material. Leaves tend to remain HUGE, much larger than acer rubrum.
i thought norway or sugar maple for his pics. the 3 point has me think sugar (along w the size compared to reds), the norways have like 5 points and are large too
 

CliffracerX

Yamadori
Messages
51
Reaction score
25
Location
Blacksburg, VA
USDA Zone
6b
i thought norway or sugar maple for his pics. the 3 point has me think sugar (along w the size compared to reds), the norways have like 5 points and are large too
We do have a sugar maple on the property, but it is decidedly not 3-lobed, and distinct from Totoro’s Tree. Norway may be a fair guess - there are supposedly 3-lobed ones, though Google wasn’t super helpful at finding ‘em.
 

hinmo24t

Masterpiece
Messages
2,480
Reaction score
3,166
Location
Dartmouth Massachusetts
USDA Zone
7A
We do have a sugar maple on the property, but it is decidedly not 3-lobed, and distinct from Totoro’s Tree. Norway may be a fair guess - there are supposedly 3-lobed ones, though Google wasn’t super helpful at finding ‘em.
1597429288468.png
 

CliffracerX

Yamadori
Messages
51
Reaction score
25
Location
Blacksburg, VA
USDA Zone
6b
==DAY 10 STATUS REPORT==
Progress! Actual progress!

==THE MAPLES==
Exactly as predicted, they are all looking decidedly happy to have a day where the temperature is down to 66F, rain is pouring so the light is purely indirect as opposed to leaf-burning, and the humidity isn't so low as to wick the leaves dry every few hours - one or two mistings across the entire day and they'll stay plenty moist. The tall guy's officially got four dead leaves standing, which my first instinct is to trim off so it doesn't throw sap at trying to revive them, but is otherwise also starting to make some forward progress towards being less droopy as well. I will note that of the lot, the tall guy's also been the one sucking up the most water - perhaps unsurprising since it's the one struggling the most & went through the most trauma in transplant, plus it has the most impressive canopy of the lot.
Tall-Aug15th.jpgBush1-Aug15th.jpgBush2-Aug15th.jpgI'd be lying if I said I wasn't tempted to make this li'l guy into a Mame as-is.  I recognise it's a terrible idea & will resist the temptation, though.

I will note that this is officially the ten day mark, and by the schedule @Kanorin used for their field o' maples, may mean this is the first day they should be fertilised. I'm leery of doing so since I know trees in shock will often *worsen* from being fertilised, but I thought I should go ahead and throw it out there to get some opinions.

==THE FUKIEN TEA==
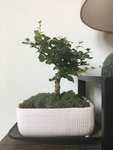
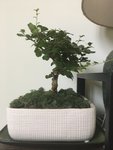
No real developments to report here. Is definitely getting low on water - down to a 3 on the moisture meter - so I'm pretty sure it's time for a fairly thorough watering, and not sure if I should leave the moss (?) on top or no.
I also wanted to go ahead and ask if anyone has advice on caring for 'em - this is my understanding so far:
  • They want more light (is ~5' away from massive south-west windows good?)
  • They want a higher delta-water level; i.e, let them get fairly dry before providing a thorough watering (what moisture level am I aiming for when watering it today?)
  • They want more humidity (I haven't done *anything* on this front, misting earlier notwithstanding)
  • They want regular misting, maybe (went ahead and misted it gently earlier)
  • They will likely go dormant during the winter
  • Don't panic about leaf loss, it's gonna happen
  • Aphids and stuff REALLY like 'em so we need to be extra-careful about pests
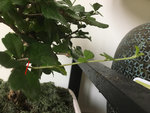
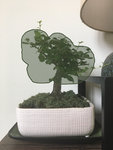
Growth-wise nothing much has happened - some new leaves are starting to unfurl that were just shoots two days ago.After misting it and moistening the moss someVeeeeery rough & janky concept art of the look I'm aiming for - by no means fancy or prestigious or something that'll get seen at a show...like, ever, but it'll make me happy & that's the bit what matters.

Some other notes:
  • This guy's in what appears to be mostly organic soil. I'm leery of rushing to do a repot without further research & advice, because it's, A, healthy, and B, a rushed, no research repot is a good way to blunder into making a very dead tree.
  • Some minor pruning definitely needs to be done soon - those long growths are going to lead to weird levels of branch thickness and detract from the overall shape I'm aiming for. I would like to root the resultant cuttings to try and make more material (and continuations of the tree, in case the parent meets with disaster) for later use.
    • If I understand correctly, in order to do so, they should go into a decently draining pot w/ regular soil, with a humidity chamber built around them (read: a plastic bag or ball jar set on top), the bottommost leaves stripped, the base dipped in rooting hormone, and be given a few weeks to grow out new roots from the cutting point & stripped leaf nodes. Skipping rooting hormone is doable, but reduces the cuttings' chance of taking. Less leaves are better (to a point) since it forces them to focus on roots instead of trying to maintain roots *and* loads of foliage.
    • The soil should basically never be watered outside of an initial watering, just mist the leaves & let the humidity chamber do the rest.
    • Let the chamber breathe for half an hour or so daily.
    • They shouldn't be in direct light.
    • Roots should appear in a few weeks.
  • About the concept art:
    • The biggest thing it needs for this is another branch w/ ramification to fill out that nasty void in the left side of the canopy. There was once a branch there by the looks of things, but it was likely a sacrifice branch that got lopped off after its job doing trunk thickening was done. However, there *are* leaves coming out of the scar for it, so it's probably likely I could coax it into growing a new one there, or near to it at least.
    • It also needs some minor trunk thickening around the base, mainly. It disappears and becomes branches pretty quickly, so I don't think it needs much taper, mostly around the base to compliment an eventual Nebari, and the change in thickness at the base is likely to be gaining ~0.5cm or less in diameter.
    • The big long term challenge is the fact that it needs a Nebari. I don't need much of one to be happy, but it currently has none that I can see, which's not great.
      • To my understanding the best way of resolving this is likely with re-potting and careful root trimming to force it to grow roots outwards rather than downwards, and a few years of patience & not killing it by accident.

==EXTRA RAMBLINGS & REPLIES==
After fighting with the printer a lot yesterday, I finally got a blue bonsai pot done this morning. Still kinda gaudy and weird, but boatloads less so than burn-your-eyes-out dayglow green.
(To those concerned: I do plan to get some actual proper pottery ones as well down the line - these were just a personal challenge of mine & a place for testing trees or personal projects that I don't really care if they have fancy, proper pots for or not.)
It took three tries to actually print the dang thing.  First time went overnight & I awoke to find the nozzle entirely subsumed by an impressive snotball of material.  Second time died with the Z-axis.  Only the third one actually worked out.

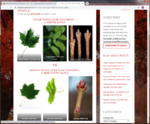
To hinmo24t's identification pic: we have neither of those particular species of Sugar or Norway maples on our property, that I know of anyway. The sugar maple one is close-ish to Totoro's Tree in terms of overall structure, but the spikes on the edges of the leaves are smooth, curvy, and infrequent, while Totoro's Tree has these very ragged, "fuzzy" edges. This is more or less a good match for its leaves (source):
Acer_rubrum_leaf03.jpg


Edit 1: Retroactive note: My "aw dangit, I shoulda known post" said that the Ficuses at Lowes were air-layered to high heaven: this should have been "air-rooted to high-heaven" instead. My brain reaaaaaaaally likes mixing those two up on me.
 

Kadebe

Chumono
Messages
594
Reaction score
768
Location
Tielt, Belgium
USDA Zone
8b
==EXTRA RAMBLINGS & REPLIES==
After fighting with the printer a lot yesterday, I finally got a blue bonsai pot done this morning. Still kinda gaudy and weird, but boatloads less so than burn-your-eyes-out dayglow green.
(To those concerned: I do plan to get some actual proper pottery ones as well down the line - these were just a personal challenge of mine & a place for testing trees or personal projects that I don't really care if they have fancy, proper pots for or not.)

[/QUOTE]
Why buy pots? You already have experience with 3D printing. They already print houses made of concrete, and they can also print ceramics. Maybe a nice challenge? ;)
House printing in concrete:
Ceramics 3d printing:
 

CliffracerX

Yamadori
Messages
51
Reaction score
25
Location
Blacksburg, VA
USDA Zone
6b
Why buy pots? You already have experience with 3D printing. They already print houses made of concrete, and they can also print ceramics. Maybe a nice challenge? ;)
House printing in concrete:
Ceramics 3d printing:
I'm well aware I could likely get away without buying any proper pots - I'm mostly just trying to avoid drawing the ire of any of the resident pottery experts for not using the real deal :p

While printing with ceramics and concrete is rad as heck - and oh man, what I wouldn't give to design some nice tiny houses that could be printed with the concrete ones - I don't think the Ender 3 can do either, and I have a feeling it doesn't count for pottery purposes unless it's made with your own two hands anyway. Could probably do casts for 'em if I was real desperate though, Cura includes options for slicing models specifically for that purpose.
 
Top Bottom