Making Slabs With New Materials

I have used tile glue in the past, very light weight and looks (with some dye) and feels just like rock. Since it needs mixing like cement, you can more or less decide on how to use it; dryer to sculp, wetter to cast.

EDIT: I read over the tile thinset part. Sorry for that. Do have a look at the composition, I found the titanium oxide to be slightly toxic to plants if it wasn't leeched properly.
I’ll have to look into that. Thank you.
 
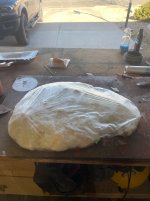
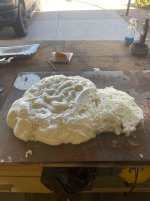
Tried another mold idea. Used a can of spray foam to create an organic shape.

Then wrapped that in a thin piece of plastic

Cut to shape some mesh for reinforcement. Not entirely sure it needs this but keep doing it anyways.

I mixed my thinset using brown concrete dye

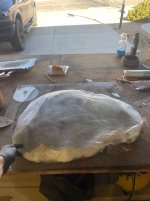
Applied an initial thin layer on the mold using wd40 on my gloves so the thinset didn’t immediately stick to my gloves and I could push it down and spread it evenly.

Pressed the mesh in and applied a second layer of thinset over mesh. Continuing to use wd40 so it wouldn’t stick to my gloves

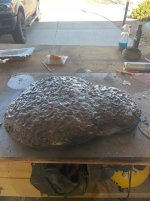
I then began applying texture without wd40 to build up a texture.

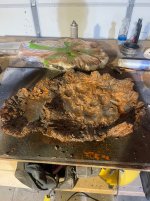
I then began applying colors from dyes and paints and continued adding texture till I was happy.

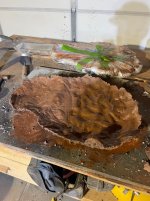
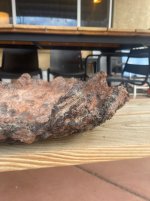
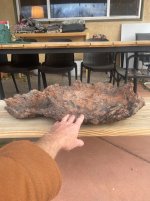
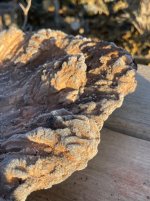
After this stage was mostly dried, I pulled the mold and flipped the piece over, where I then began adding depth, texture and dimension to the lip and visible portions of the slab. Adding more colors and dyes along the way.

Before it was full cured I pushed and pulled and adjusted the over all look slightly.

It’s now mostly done and I may add a bit more color and soften some edges after it’s full dry.

The last thing I will do is use a diamond hole saw attached to a grinder for drainage and tie down holes.
 

Attachments

  • IMG_9980.jpeg
    IMG_9980.jpeg
    300.9 KB · Views: 75
  • IMG_9981.jpeg
    IMG_9981.jpeg
    273.3 KB · Views: 61
  • IMG_9982.jpeg
    IMG_9982.jpeg
    297 KB · Views: 55
  • IMG_9983.jpeg
    IMG_9983.jpeg
    325.9 KB · Views: 53
  • IMG_9987.jpeg
    IMG_9987.jpeg
    408.2 KB · Views: 55
  • IMG_9990.jpeg
    IMG_9990.jpeg
    448.1 KB · Views: 58
  • IMG_9993.jpeg
    IMG_9993.jpeg
    258.9 KB · Views: 62
  • IMG_9995.jpeg
    IMG_9995.jpeg
    312.9 KB · Views: 68
I’ve also left all of the other pieces I’ve made outside in the cold and have sprayed them down with water daily to see how they handle freezing and thawing of water. They have hardened very well and are still quite light.
 

Attachments

  • IMG_9976.jpeg
    IMG_9976.jpeg
    356.3 KB · Views: 83
That came out really good!
Also, last time i used spray foam was a few years ago and i'm pretty sure i still have some stuck on the pants i was wearing. 😄
 
That came out really good!
Also, last time i used spray foam was a few years ago and i'm pretty sure i still have some stuck on the pants i was wearing. 😄

Oh absolutely. It’s the stickiest stuff and will ruin clothes real fast!
 
Tried another mold idea. Used a can of spray foam to create an organic shape.

Then wrapped that in a thin piece of plastic

Cut to shape some mesh for reinforcement. Not entirely sure it needs this but keep doing it anyways.

I mixed my thinset using brown concrete dye

Applied an initial thin layer on the mold using wd40 on my gloves so the thinset didn’t immediately stick to my gloves and I could push it down and spread it evenly.

Pressed the mesh in and applied a second layer of thinset over mesh. Continuing to use wd40 so it wouldn’t stick to my gloves

I then began applying texture without wd40 to build up a texture.

I then began applying colors from dyes and paints and continued adding texture till I was happy.

After this stage was mostly dried, I pulled the mold and flipped the piece over, where I then began adding depth, texture and dimension to the lip and visible portions of the slab. Adding more colors and dyes along the way.

Before it was full cured I pushed and pulled and adjusted the over all look slightly.

It’s now mostly done and I may add a bit more color and soften some edges after it’s full dry.

The last thing I will do is use a diamond hole saw attached to a grinder for drainage and tie down holes.
I've used spray foam in terrariums, it holds pretty well for about 4-6 years and then it starts degrading (in stable room temperature). It will crack and crumble.
If the covering is thick enough, you might not notice it at all.
 
I've used spray foam in terrariums, it holds pretty well for about 4-6 years and then it starts degrading (in stable room temperature). It will crack and crumble.
If the covering is thick enough, you might not notice it at all.

The spray foam is not a permanent fixture of the slab. Just used as a mold that gets removed when the slab dries. See pics.
 
Back
Top Bottom