Sthlmbonsai
Yamadori
Hey,
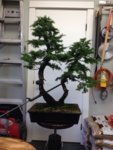
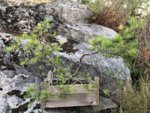
wanted to share my first styling ever. Would love to hear some feedback on this Scots pine yamadori that I had a go at. There are certainly things I’m aiming to improve once ramification gets better.
Twin trunk sure makes things tricky but I think I might be off to an ok start?
Pictures are before and after.
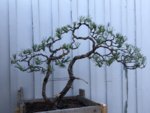
") I don’t believe I’ve not done any crazy spectacular bends even though I’m sure what I’ve done so far take will have a big effect on the tree. I’m sure there will be many lessons learned along the way.
I don’t believe I’ve not done any crazy spectacular bends even though I’m sure what I’ve done so far take will have a big effect on the tree. I’m sure there will be many lessons learned along the way.