Building a wet slab bonsai pot
- Thread starter ABCarve
- Start date
ABCarve
Masterpiece
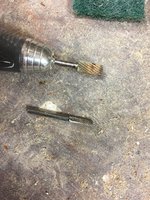
Hot craft glue. Use as little as possible. Keep it away from where you carve it because it will clog carving bits and sandpaperHow do you laminate the foam layers together?
ABCarve
Masterpiece
Sekibonsai
Shohin
So what is the best material to use for carving molds, Have you moved on form the big box insulating panels?
ABCarve
Masterpiece
If you’re asking where I get my foam...... I get it at Lowe’s. It’s insulation board in 4 x 8 foot sheets. I use 2” and 1” thickness’. They do have 2’x 2’ x1” sheets if you want something smaller.So what is the best material to use for carving molds, Have you moved on form the big box insulating panels?
Sekibonsai
Shohin
I was just wondering if you had switched to something else over the course of the 12 pages...If you’re asking where I get my foam...... I get it at Lowe’s. It’s insulation board in 4 x 8 foot sheets. I use 2” and 1” thickness’. They do have 2’x 2’ x1” sheets if you want something smaller.
")
I tried to make a simple one for a soap dish prototype from regular styrofoam egad what a frikkin mess!
ABCarve
Masterpiece
Hmmmm........I might have to make some more of these. Maybe a more square format. Bjorn’s Facebook. 
RJG2
Omono
It's in his most recent video too! Same setup and photos (he took some trees around town for a photo shoot).Hmmmm........I might have to make some more of these. Maybe a more square format. Bjorn’s Facebook. View attachment 340798
sorce
Nonsense Rascal
square format
That one's perfect! I've always liked it. Especially the little tubey feet!
Sorce
Forsoothe!
Imperial Masterpiece
It looks like a running piggy...That one's perfect! I've always liked it. Especially the little tubey feet!
Sorce
sorce
Nonsense Rascal
It looks like a running piggy...
You can take that to the bank!
Sorce
ABCarve
Masterpiece
Finally trying my hand at some shogun pots. Gonna do a deep dive into the process of mold and rib design. Stay tuned.

ABCarve
Masterpiece
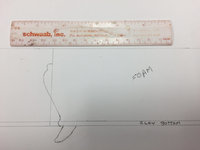
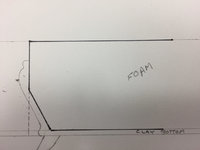
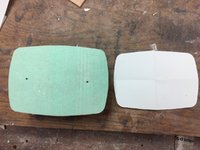
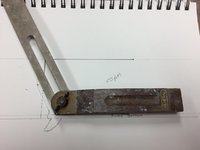
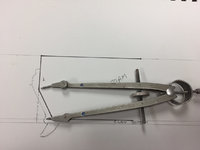
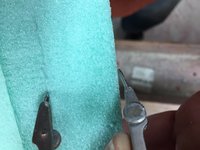
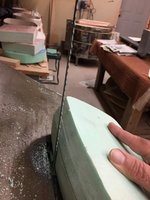
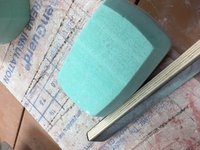
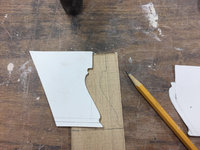
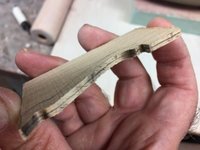
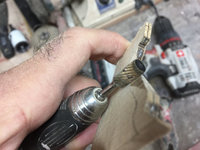
So here is a pictorial of how I now design and make the the plugs and ribs for my wet slab pots. The shohin pots I just posted were made in about 2 hours from the time the slabs were rolled out. The bottom slab is a different thickness than the sides.
Attachments
-
 16EFE65E-3DCF-4F10-984A-C44921662B2C_1_201_a.jpeg72.4 KB · Views: 74
 -
 2F386359-CC2A-4F17-BDC6-2D0911C2D070_1_201_a.jpeg68 KB · Views: 64
 -
 84F25225-CE17-4A27-90D6-A7580203FA47.jpeg178.1 KB · Views: 51
 -
 AB699620-0117-42F4-9BA0-94FA73C8B657.jpeg89.4 KB · Views: 56
 -
 069B3783-F056-4C2F-99D9-A99E44AD750A_1_201_a.jpeg67.6 KB · Views: 53
 -
 E6D9DD61-7918-432A-B023-8FE88ED78077.jpeg152.2 KB · Views: 52
 -
 9086EFBD-9D00-480E-9F62-B6101CD9FF4F.jpeg159.7 KB · Views: 50
 -
 00395999-8403-4536-A533-C981EEC6AE5E.jpeg165.4 KB · Views: 51
 -
 CD54C1AB-AB4B-4F7A-B5AB-3BC7A6E2EF1A.jpeg141.8 KB · Views: 52
 -
 5953D43A-B82B-475F-8BCC-E6D0CD24341F.jpeg210.5 KB · Views: 58
ABCarve
Masterpiece
Part two.
Attachments
-
 E80440C7-3DAD-4DB7-B30E-B90A29685E9E.jpeg118.3 KB · Views: 60
 -
 A12536EC-AA55-4C01-AD7C-FE4CF33ACC2D_1_201_a.jpeg173.3 KB · Views: 58
 -
 7F90EF59-F42E-4CD0-9015-943119DE344A_1_201_a.jpeg200 KB · Views: 53
 -
 95060194-DC02-47AB-8533-B65300F43089.jpeg374.1 KB · Views: 53
 -
 71EAC639-82FE-4D2B-91E8-3BD321531253_1_201_a.jpeg139.1 KB · Views: 51
 -
 C57B263E-6655-4866-977B-BFBBA70B42A6.jpeg134.5 KB · Views: 52
 -
 0A3AA9E7-2BCD-4EBB-9B30-0DD1FDEC06B6.jpeg107.2 KB · Views: 53
 -
 F1DC835F-F965-44EB-B112-FE1A8C08CB86_1_201_a.jpeg126.1 KB · Views: 60
 -
 4DD89FCC-1D6E-4758-ADCF-BA677E7D2252.jpeg115.8 KB · Views: 59
 -
 0311AB6E-1012-4CCD-B562-8CD76E0A9488.jpeg123.9 KB · Views: 72
Pitoon
Imperial Masterpiece
So here is a pictorial of how I now design and make the the plugs and ribs for my wet slab pots. The shohin pots I just posted were made in about 2 hours from the time the slabs were rolled out. The bottom slab is a different thickness than the sides.
Extremely helpful. What's the thickness for the slabs?Part two.
ABCarve
Masterpiece
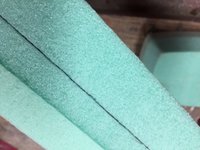
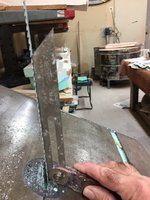
5/32" for the bottom and 5/16 for the sides......although a lot of that gets scraped off.Extremely helpful. What's the thickness for the slabs?
ABCarve
Masterpiece
I’m gonna do wrapping paper next. Mostly cause we’re nearing the holidaysExtremely helpful. What's the thickness for the slabs?

ABCarve
Masterpiece
Klaatu Barata Nikto - Redux
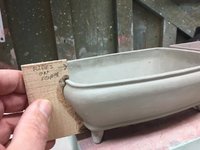
So this is a pot that's been mentioned previously in post #178 that I thought I would like to revisit. I thought the design could benefit from a more squarish look, especially for literati which seems to be used in wide-lipped pots. I keep plugs around for a period of time before I cannibalize them for other pots. This one only needed to be slightly altered to accommodate the shortened version.
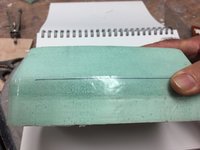
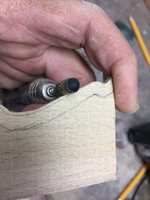
If you look closely you'll notice the plug has been broken into quadrants with a 1/2" key in the middle of each quadrant. I usually reserve this technique for pots that will enclose the plug and used to get the plug out after the clay is formed around it, just like the pot in the first posting of this thread. This time there are ulterior motives. BTW this plug was carved in two layers, one for the lip, one for the container and then put together.

So this is a pot that's been mentioned previously in post #178 that I thought I would like to revisit. I thought the design could benefit from a more squarish look, especially for literati which seems to be used in wide-lipped pots. I keep plugs around for a period of time before I cannibalize them for other pots. This one only needed to be slightly altered to accommodate the shortened version.
If you look closely you'll notice the plug has been broken into quadrants with a 1/2" key in the middle of each quadrant. I usually reserve this technique for pots that will enclose the plug and used to get the plug out after the clay is formed around it, just like the pot in the first posting of this thread. This time there are ulterior motives. BTW this plug was carved in two layers, one for the lip, one for the container and then put together.
ABCarve
Masterpiece
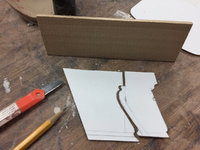
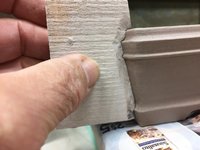
This had one slab laid over the form and V-sections were removed from the corners to accommodate the geometry. The clay for the feet are weighed and shaped individually so as to have them of equal mass.
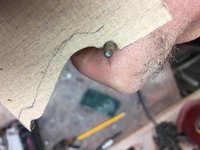
This took a few hours and the clay was still quite wet. If I would try to flip the pot to remove the plug the lip would collapse. If I left the plug in for enough time for the clay to firm up, the pot would shrink so much around the plug that it would crack the pot. The pot was spanned over two tables so as to remove the keys (without flipping it over) and allow the pot to shrink overnight to a leather hard stage. You can actually see how much it has shrunk by the gap in the two quadrants compared to the thickness of the keys.

This took a few hours and the clay was still quite wet. If I would try to flip the pot to remove the plug the lip would collapse. If I left the plug in for enough time for the clay to firm up, the pot would shrink so much around the plug that it would crack the pot. The pot was spanned over two tables so as to remove the keys (without flipping it over) and allow the pot to shrink overnight to a leather hard stage. You can actually see how much it has shrunk by the gap in the two quadrants compared to the thickness of the keys.
ABCarve
Masterpiece


Similar threads
- Replies
- 2
- Views
- 371
- Replies
- 25
- Views
- 1K