The Three Serpents

Awesome job, and good-looking stock I think that can come out reallly nice!! Any updates? Imagine it's bushed-out quite well in the 5wks since that last pic ;D Am curious, how long do you let the shoots grow before you start thinning them (or do you just let each trunk get 20+ shoots if it wants?)

I love collecting stuff like this, have never found something so 'fit', the taper in that, both the material and your chosen trunk-line, should make for a pretty great tree in reasonable time if you grow it right (and based on substrate/box it seems there's no worries there!) When would you start intervening and 'adjusting' shoots on something like this (wiring, guy wires, weights...I use zip-ties on stuff that grows too-fast to make wiring practical!!) And re that box...I hope that bottom holds strong! Would suck to find unexpected tap-roots (sorry if you put something under the box to prevent that that I missed!) after thinking it were contained, and can't imagine that can be moved now that it's full (fwiw, my first large collection went into a similar setup, only it didn't even have a bottom just window-screen along the ground with 2" of lava rock beneath the substrate, it packed that box in the first year but escaped-root issues were very minimal :) )

Thanks for posting, am jealous that's great stock that will be a good specimen someday, was nice getting to see the details!!


Thanks for the input! Can't see it in photos, but box is up on bricks supported by a couple of 2x6's perpendicular to bottom slats so it's not touching ground - so no chance of tap roots forming, just lots of fine feeder roots. I've dabbled with this species before for landscape plants and found that it's best not to mess with new shoots, they have a tendency to "pop" off if too much pressure is applied in their first year. I'm going to apply more of a "clip and grow" method to this plant so I don't have to worry about popping off branches, but I may apply some guy wires in the future if I need the growth to be more horizontal than it is. This is all speculation of course, my main concern now is feeding and building up the plant enough to make it through this coming winter after such a drastic reduction. I'll post an update pic tomorrow once it's light out. Been meaning to post more since my uppity post #22 in the "shoutout" thread, but life it seems always has a habit of getting in the way of the stuff that really matters. Luckily that's all resolved now - New job, new outlook, new bonsai scheduled.
 
good lord! ambitious to say the least! But after remembering your huge, Graham Potter inspired privet dig, I shouldn't be surprised. I love what you've found and your initial idea for the tree. Great process documentation as well.

I don't have a ton of experience with eunymous but I do have some. Ive got a few nursery bought trees that I've been training for about 3 years now.

A couple things I should note, after their initial bud push and growth, they will flush a second time after trimming but will not typically flush again. And in some cases will only flush once. Keep this in mind if you desire a autumn show.

Ramification is slow going but if patient can yield great results. I will say that yes, while new shoots are tender, once lignified, most branching will take to wire very well and will bend quite a bit. and don't be afraid to be liberal with some branches, because mine tend to back bud at the base of existing branches the trunk itself or where branches once were, so replacing a branch should not be too hard.

Great find and I look forward to seeing the progression on this!
 
I've dabbled with this species before for landscape plants and found that it's best not to mess with new shoots, they have a tendency to "pop" off if too much pressure is applied in their first year.

The trick is to wire right when the branch has extended but hasn't lignified significantly. That is the time to get the most movement out of the branch. The angular nature of the tree means you will need wire to at the very least direct the growth.

Also as @Hartinez pointed out these things back bud like crazy and will usually throw shoots at the base of branches. If you get a branch that doesn't emerge in the direction you want just cut it off. In the spring 3 or 4 will sprout in its place.

I like to treat my burning bush similar to a single flush pine. For the last few years I have let the spring shoots grow freely. In the next couple of weeks I'll do a cut back to open things up to strengthen the interior buds. I'll then wire again in the fall.
 
Thanks for the input! Can't see it in photos, but box is up on bricks supported by a couple of 2x6's perpendicular to bottom slats so it's not touching ground - so no chance of tap roots forming, just lots of fine feeder roots. I've dabbled with this species before for landscape plants and found that it's best not to mess with new shoots, they have a tendency to "pop" off if too much pressure is applied in their first year. I'm going to apply more of a "clip and grow" method to this plant so I don't have to worry about popping off branches, but I may apply some guy wires in the future if I need the growth to be more horizontal than it is. This is all speculation of course, my main concern now is feeding and building up the plant enough to make it through this coming winter after such a drastic reduction. I'll post an update pic tomorrow once it's light out. Been meaning to post more since my uppity post #22 in the "shoutout" thread, but life it seems always has a habit of getting in the way of the stuff that really matters. Luckily that's all resolved now - New job, new outlook, new bonsai scheduled.
Haha I know what you mean (I always like thinking of it as a dichotomy of "urgent versus important" stuff to help me prioritize, am ADHD as hell so it only goes so far :p )

Re fearing that 'pop', I know all-too-well what you mean!! I collect and propagate to get my trees (have only a handful of purchased specimen), and in most cases this entails me having to 'build branches from scratch' and some species are very prone to 'the pop', hell I thought I had crape myrtle wiring down until a few weeks ago when trying slightly more lignified areas and popping several branches I'd spent >1yr growing, so damn frustrating!!! That said, I approach initial branch-development differently than @Hartinez , I find that you really lose the ability to change the angle of the branch-collar once you've let the branch lignify...sure, you can wire it after, but the angle it leaves the trunk is virtually fixed (and aggressive moves here are real dangerous, at least IME the branch-collar of new shoots are a 'fracture point'! I go through TONS of zip-ties, I'll tie shoots to other shoots, to the trunk, to the roots, to hooks or nails on the box, whatever, to gently guide the orientation of the branch, before wiring would be appropriate.
Have you ever used zip ties? I've found them to be my best go-to for fast, crude manipulations - just for getting things oriented a bit better, it lets me fly through the garden correcting a lot of improperly-angled shoots as they're young and supple (and the zip-ties stay on as long as necessary, the precision of adjustment they offer is great insofar as not snapping stuff, in that once you've 'set' the zip-tie you can fine-tune the angle of harder stuff w/o popping it if you just pay close attention while doing it!) I'll also use rock 'ornaments' on occasion to drag-down heavier branches, although for those my go-to is to simply put S-hooks or even nails along the perimeter of the box's top, will just put one wherever I need an anchor-point, and then use either zip-ties or rope to tie-down branches....this may be annoying BUT it lets me do things I wouldn't be able to do otherwise, there's simply bends you cannot make once things are set that you could have made earlier, and to that end I've been experimenting with a "purple porterweed" bonsai, this isn't even a tree and is just a pet-project but the stems on this, once halfway-lignified, become 'poppy', and once set there is *no* bending at-all, they're the most 'poppiest' specie I've worked with (which is why I've been spending so much time on my experimental bonsai porterweed!), anyways I've developed my primaries & secondaries on this otherwise-apically-dominant specimen in such a way that they're now set (for a time, at least!) in horizontal planes instead of vertical, I probably have to mess-around with the zip-ties once a week, either adding more or doing adjustments to already-placed ties on my test-porterweed-'bonsai' (and it's working!!) Then, once things are starting to lignify, I'll wire- right as they're starting to lignify is best IME, so long as you're ok re-applying in not-that-long! (at least here in FL, where things grow like crazy!!)

For example of how well you can use zip-ties, here's a normal porterweed, not tended in months (except topping it at ~14", flat cut of the canopy to keep it from top-heavy), they just shoot straight-upward:
20180807_171229.jpg


Alternatively, here's a close-up of my 'bonsai porterweed', a project where I'm frequently clipping & zip-tying my way to a 'proper branch structure' (for a non-tree, lol!) am using the surface roots as my anchor-points as it's not in a box but a large ceramic container, am unsure but expect this will actually help give a cooler surface-root profile too:

20180808_150839.jpg

This thing grows so strong and back-buds so readily (on any degree of hardened wood!) that it takes to 'ramification pruning' so well that I couldn't resist trying to make a temporary bonsai out of it for fun, am unsure if I'll be able to get a sparse-but-complete full canopy by the end of this summer but if not, mid-summer next year and I'll have the only porterweed bonsai I've been able to find (google images shows none!), will be a 'standard upright' with a domed top that's 80% as wide as the container it's currently in:

20180808_150959.jpg

I expect that, when it's ready (ie, I've satisfactorily finished my secondary&tertiary structure and have transitioned into 'hedge'/'shape'-pruning it), I'll probably re-pot it / finish-prune it / take its picture, and by the next day or two it'll already be an unkempt 'fro!! They're just such rampant growers- and they POP worse than anything I've seen (worse than papaya trees!), it's still growing crazy vigorous right now so I *may* get to finish it this year otherwise early next year, at which point I'll be done with it but will have grown out a 'tree' entirely by directing growth as it occurred which is what I've been trying my hardest to get good at (have too-many large pieces of stock that I'm growing, don't want to look-back in 3yrs and think "why did I let every primary grow straight upward?!?")

As mentioned, rocks are sometimes very useful and faster/easier than wire IMO, it's not nearly as often but for instance a rock was much simpler for what I needed here:
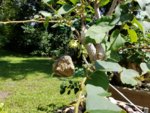
20180808_152553.jpg

Also took a pic of a crape-cutting I'm developing initial branches on, have wired the primaries because I needed shape (if I were *only* combating apical-tendencies on a crape - which seems to be a bit of what you have, ie apical tendencies you're afraid of popping - I'd be wedging smooth rocks between the base of the branch and the trunk, this works **very** well to change branch-angle, relative to trunk, by up to at least 25-35degrees, so on strongly apical trees I find this indispensable in the first weeks of shot-growth when they're just finding their angles and 'setting their collars' into position, once the collars are set the branch-angle relative to trunk is WAY harder to change, and is an inherently dangerous spot to do strong bends on!) I'd wired the primaries but the new, supple shoot on the left-primary is being zip-tied (twice, green zip-ties) to that primary to force it in that general direction, for the eventual 'pad' that'll be there, before the collar has set in the vertical position it otherwise would have!)
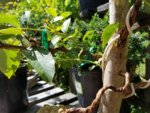
20180808_152636.jpg

And here's my 'box's edge with nails/screws/hooks' approach, just set them wherever I need anchor and wire (I'll put padding over the branch if it's a thin wire!!)

qsZdYnb.jpg

^that's more for preventing future upward-angling of already-set branches, really....while these techs help to start the branch that way, given enough time it'll start making itself more vertical if the specie has strong apical tendencies!

[just noticed a red lava-rock/scoria 'rock ornament' in the center, that'd be slid up that supple shoot its on in ~3-6 days, whenever it's strong enough to handle that light ornament at ~3-5" out from the trunk w/o worry it'll bend downward!! The large rocks stay in-place, the small ones, not so much, haven't been using those much anymore but opting for zip ties in such instances instead!]
--------------


Would love to see new pics!! Will have to browse around for this 'shoutout' thread you speak of ;) Good luck with the job- and everything else!!
 
Last edited:
So here's the new pics as promised, but a couple days late (fellow employee at new job had a death in the family so I volunteered to cover for a couple days, hence delay)

IMG_0886.jpg IMG_0889.jpg IMG_0903.jpg

The extensions aren't as long as I would like, but there's a lot of them on each trunk so I feel this tree has a really good chance of making it through its first winter. Upside to the short extensions... lots of buds only an inch or two from the trunk, so I can trim in the spring as they swell to direct next year's growth. Normally, a couple inches is generally too far from the trunk to make good branch structure, but given the sheer size of the tree I feel this can be used and still create good scale. On a side note, there's one section of the leftmost trunk that never popped buds for some reason or another... but it looks like the plant came up with a solution that kills two birds with one stone...

IMG_0901.jpg IMG_0902.jpg IMG_0899.jpg

So here's a closeup of where I needed a branch... In the past someone had cut the lower branch to this trunk off and left a significant chainsaw cut on the branch above. It has since callused over but is still very visible from the side/back of the tree (one of the reasons I chose the front I did so it was hidden) It had popped buds off the callus in the past, but these had failed due to being shaded out or some other reason. Here's where the tree gave me a solution - the back trunk threw off a branch growing towards the front, and for whatever reason it has conveniently grown right under where the chainsaw cut is, and since the cut is facing the right direction this whole setup screams "approach graft" to me. What do you guys think?
 
  • Like
Reactions: SU2
So here's the new pics as promised, but a couple days late (fellow employee at new job had a death in the family so I volunteered to cover for a couple days, hence delay)

View attachment 205246 View attachment 205247 View attachment 205251

The extensions aren't as long as I would like, but there's a lot of them on each trunk so I feel this tree has a really good chance of making it through its first winter. Upside to the short extensions... lots of buds only an inch or two from the trunk, so I can trim in the spring as they swell to direct next year's growth. Normally, a couple inches is generally too far from the trunk to make good branch structure, but given the sheer size of the tree I feel this can be used and still create good scale. On a side note, there's one section of the leftmost trunk that never popped buds for some reason or another... but it looks like the plant came up with a solution that kills two birds with one stone...

View attachment 205249 View attachment 205250 View attachment 205248

So here's a closeup of where I needed a branch... In the past someone had cut the lower branch to this trunk off and left a significant chainsaw cut on the branch above. It has since callused over but is still very visible from the side/back of the tree (one of the reasons I chose the front I did so it was hidden) It had popped buds off the callus in the past, but these had failed due to being shaded out or some other reason. Here's where the tree gave me a solution - the back trunk threw off a branch growing towards the front, and for whatever reason it has conveniently grown right under where the chainsaw cut is, and since the cut is facing the right direction this whole setup screams "approach graft" to me. What do you guys think?

I'm having a bit of trouble telling where that graft is in relation to the rest of the tree but, so long as you think a shoot works there, it seems the smart thing to do!!! I imagine you'll rough-up that chainsaw cut before setting the graft? Would advise so, as it's clearly healed-up so the fusing will take wayyy longer if you don't scarify the inside of that cut!

Something I noticed and was curious how you'd approach it- in pic 1, the left-side trunk has that bulge on its left side (from where another limb protruded in the past), am very curious what your thoughts for approaching that are! (unless that graft *is* hitting that spot, am unsure based on the pics just where on-trunk the suggested grafting is!)

Re the shoots not being that long, am surprised they didn't grow-out longer in their first year....I have to presume you're expecting this to go full-dormant in your area, right? So those shoots will need to be fully hardened to survive, in such a case I can't help but wonder if it may've been worthwhile to, earlier in the season, to have removed some branches so that the remaining ones could've strengthened-up enough to be confident they were sufficiently hard for the winter..
 
Good Questions! Here's my thoughts:


I'm having a bit of trouble telling where that graft is in relation to the rest of the tree but, so long as you think a shoot works there, it seems the smart thing to do!!! I imagine you'll rough-up that chainsaw cut before setting the graft? Would advise so, as it's clearly healed-up so the fusing will take wayyy longer if you don't scarify the inside of that cut!

If you look in the first pic... on the left trunk just below that odd triangle cut left by a saw you can see the intended graft branch sticking out from underneath. I fully intend to open up the tissue on the cut again to set the branch, would be pointless otherwise. Cambium to cambium contact is needed for this graft.

Something I noticed and was curious how you'd approach it- in pic 1, the left-side trunk has that bulge on its left side (from where another limb protruded in the past), am very curious what your thoughts for approaching that are! (unless that graft *is* hitting that spot, am unsure based on the pics just where on-trunk the suggested grafting is!)

Carving, my friend, is the answer here. This tree already has a few Uro, so it will be in keeping with the tree to capitalize on this where I can also use it to hide flaws and create taper.

Re the shoots not being that long, am surprised they didn't grow-out longer in their first year....I have to presume you're expecting this to go full-dormant in your area, right? So those shoots will need to be fully hardened to survive, in such a case I can't help but wonder if it may've been worthwhile to, earlier in the season, to have removed some branches so that the remaining ones could've strengthened-up enough to be confident they were sufficiently hard for the winter..

Guessing it had something to do with the collection time - probably should have done it a few weeks earlier when more of the sap was down in the tree and not 15 feet up in the canopy. Thats also the reason behind not removing any buds/branches this season - more solar panels means more energy: more energy means more root growth and energy stored for winter, etc etc.... Shoots have already hardened off and started to bark up their characteristic wings, so no worries there. I'm worrying more about the health of the tree first, branch selection can come later.
 
There is no risk that the branches haven't hardened off. You can see that the branches have started to make the cork wings that these are known for. This is an indication that the branches have hardened off. You only get one push of growth with these so there is all summer to harden off. Removing branches earlier in the season would have only weakened the tree. The shoots are what is strengthening the tree.

That said I would consider thinning the shoots to one keeper at each location in early October. Then cut the keepers back to one to two nodes. Get some wire on the shoots to direct them into usable positions. The wire can stay on the tree through the winter without any problems. Alternately you can do this in the spring. I prefer fall because it is the time that the tree is strengthening the buds it set over the summer for next spring.

You might be tempted to give it another season of growth but don't. You want to start building your branch structure right from the start. I didn't cut back hard enough in the beginning on mine and I'm seeing the effect now. You will get better taper and movement into your branches by growing out only one node a year. It will take a long time to build a tree but it will be worth it.
 
Cool process and looks great so far, seems you have done a few larger tree chops. I'm going to do one for a 10' Kousa Dogwood in the spring. Any recommendations for these larger chops? Is wrapping the plant in greenhouse plastic something you do normally and recommend?
 
Quick Spring 2019 Update:

Came through the winter like a champ! Back to looking like a bush in only a year. Due to my work schedule I probably will do branch selection in the fall/next spring and begin training then. So for this year it's just fertilize and grow.

IMG_1424.jpg IMG_1427.jpg

Front & Right Views
 
Remove one of three trunks this winter?
 
I’m going to attempt this as a three trunk for now, if it doesn’t go as well as I like then maybe a two trunk. Time will tell.
Thanks for your response, I see where you’re coming from and was perhaps to quick on the suggested; especially, as I too am taking the exact approach with a few. That’s impressive find & wrangling friend -adding more-so to being worth the patience. That fat trailing root is really interesting.
 
Back
Top Bottom