Dav4
Drop Branch Murphy
- Messages
- 13,991
- Reaction score
- 35,110
- USDA Zone
- 6a
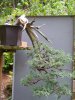
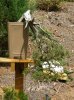
This is the front. Are you saying the pot corner as the front makes the design unstable, verses having a side face the front? Never really noticed it, let alone considered it. Something to think about. As far as the canopy goes, I'll be jinning some of the branches that widen the middle of the canopy and pull it to the right.the pot looks a bit small to me but working on the foliage and reducing it's overall mass would help with that. For some reason the angle of the pot makes the whole design unstable as if the tree is about to fall. Is this your front in which care why did you chose of the corner of the pot facing the viewer?
Manny
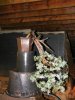
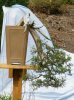
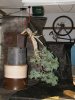
 ...might add some weight to the pot if it was rotated a bit, I suppose.
![100_0039[1].jpg](/data/attachments/12/12316-eebe58fbb46e6a462cc1cbce285e2dd8.jpg?hash=7r5Y-7Ruak)
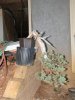
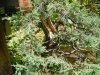
") . We decided the deadwood on this side needs some work...I started yesterday but there's alot left to do. The tree isn't quite where I want it, but it get's a little better every year. I'll post pictures of the deadwood reworked when I get to it...next year?
. We decided the deadwood on this side needs some work...I started yesterday but there's alot left to do. The tree isn't quite where I want it, but it get's a little better every year. I'll post pictures of the deadwood reworked when I get to it...next year?