Plaster Mold: Bonsai Pot Casting

lieuz

Chumono
Messages
795
Reaction score
1,551
Location
Fairfax, Virginia
USDA Zone
7
I wanted to share this year-long journey so that I can say to myself that I did it, and also so that others can observe and maybe not attempt this because, in the end, it'll probably be better to just go and buy a pot for an astronomical amount of LESS effort. I've been trying to come up with ways to replicate a pot I've made. Even before all of that, I came across this video I'm sure many have probably seen.


This one video when I watched it, was immediately captivated. I dabble in ceramics and found great joy when creating various pots; however, something about replication just entranced me.

Our club offered a crash course into bonsai pot making and that was pretty much the start of everything for me. I did the whole pinch pot, slab building, and wheel-thrown pots and they were all very entertaining bonsai-related offshoots of things to do during the winter.

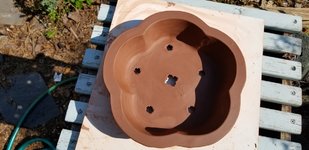
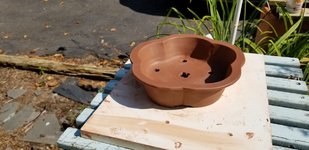
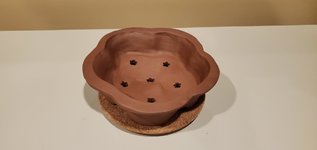
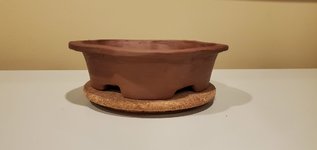
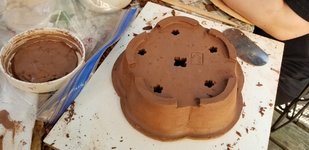
After building this unique pot, I had the motivation to want to replicate it.
20180701_155617.jpg


20180701_163038.jpg

20180701_163025.jpg

This was a pretty clean build, everything was well defined, it was crisp and it was unique. In hindsight, this was a fairly ambitious pot to try to replicate.

I think I spent a pretty good amount of time devising a plan on how to approach coming up with a mold that would allow me to replicate the pot, but still allowed me the option to customize (feet). In April of 2021, I just dove head first into it.

20210730_022631.jpg
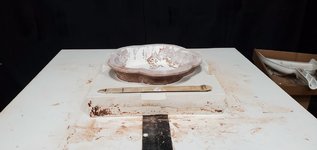
A base was poured first so the pot can stand atop something.
20210730_220007.jpg
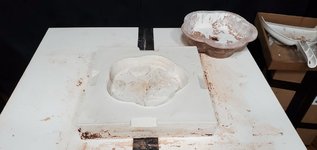
After pouring the second layer, the registration marks were made and the pot was able to release from the plaster thanks to Murphy's Soap.
20210730_220031.jpg
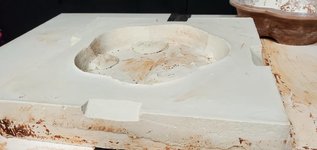
There was an unforeseen issue with the plaster not flowing underneath the pot. This made for mounds of plaster.
20210730_220039.jpg
Ultimately, I'll have to backfill with plaster so I can make the feet from scratch.
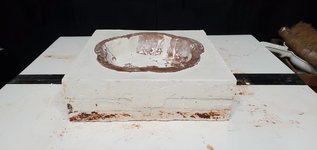
20210801_094929.jpg
The third layer was to fill it up to the lip. In hindsight, this later was pretty important. In fact, the entire pot should have been casted upside down. There were a lot of unevenness and that will eventually be a huge problem.
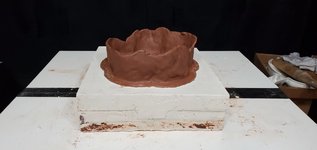
20210802_014852.jpg
I have to make the last layer which is the top, The top should be like the first layer, it should not have any imprint on it. It should just flatten the clay so that excess can be removed.
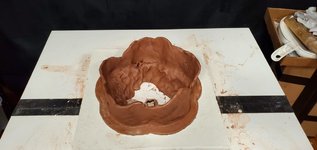
20210802_014855.jpg
It didn't occur to me how important it was that this layer should be impeccably smooth; however, it isn't.
 
20210802_014910.jpg
The clay wall being built here should be very clean and well defined as it will imprint the interior side of the bonsai pot. This however was haphazardly built.
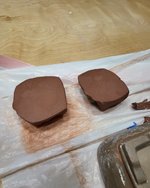
20210802_021502.jpg
Poured the plaster in. The form working its magic.

20210802_030203.jpg
By this time, I realized, the top layer I made was not straight. It was off, and not leveled. In hindsight, the top layer is supposed to be a point in reference where I had a tool, a profile rib to go around the pot to evenly distribute the clay for even thicknesses. This did not happen and I did not realize the scraper idea until much later.
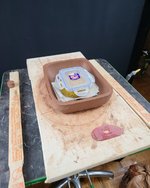
20210802_122726.jpg
Cleaned up the edges so I can have more grip on each layer.

20210802_130837.jpg
Notice I went back in and refilled the bottom with plater.

20210802_131005.jpg
This is the final product. I was a little worried about how everything would turn out but this was an achievement for me.

20210802_131031.jpg
Another exploded view of the layers.
 
It would have been easier to start the mold with the pot upside down to make the two halves (1st and 2nd section). Then finish the mold off doing the 3rd section for the lip right side up.

Mold making is so time consuming, congrats for making it this far.
 
20210807_120400.jpg
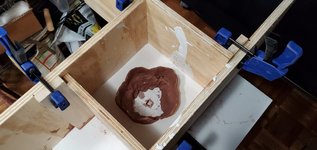
This is the start of the build. Each slab is 1/4" thick and all the corners (not pictured) have additional pieces in between to build up corners.

20210807_123416.jpg
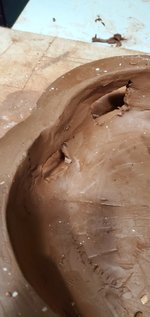
Pulled the pot out. Man was it rough, note the interior is not clean as I would have wanted. The edges with the lip was not clean at all. Also note, first pot out of this mold means a lot of plaster bits. Those will eventually go away the more you use the mold.

20210807_123423.jpg
Very lop sided, this was unfortunate to discover.

20210807_124033.jpg
I took some sample cuttings into the various parts of the wall to see how uniform the walls were and the findings were a bit concerning.

20210807_124101.jpg
Some areas were thicker than other areas.

20210807_124134.jpg
Note the corner vs the wall, the thickness differences.

20210807_124153.jpg
The only good thing was, the exterior wall impression was nice and defined.

20210807_124636.jpg
Insult to injury, the plaster top layer was very thin on some parts, and forcing it on top of clay caused it to cray and essentially break.

20210810_003241.jpg
I had to pull 1 good pot from the mold. I'm glad I did but it took a lot of guestimations and eyeing a lot of the clay. This wasn't supposed to be like this because the point of the mold was to be able to work semi automously.

20210810_003258.jpg
This was sort of success but I would probably not use this mold again, knowing it has a lot of faults.
 
It would have been easier to start the mold with the pot upside down to make the two halves (1st and 2nd section). Then finish the mold off doing the 3rd section for the lip right side up.

Mold making is so time consuming, congrats for making it this far.
Definitely a hindsight thought. I'm going to redo this mold with the original but I made a second mold that taught me a lot. I learned a lot from the first mold too so I'm in the process of making another mold. The pot is still in good condition. It's been bisque fired so it's able to take on the abuse.
 
Definitely a hindsight thought. I'm going to redo this mold with the original but I made a second mold that taught me a lot. I learned a lot from the first mold too so I'm in the process of making another mold. The pot is still in good condition. It's been bisque fired so it's able to take on the abuse.
A lot can be learned from the first mold. I've made some molds and failed to identify undercuts and basically had to trash the mold as the plug ended up stuck inside. I'm in the process of making some new molds myself, they are only as good as the time you invest into making them.
 
PLASTER MOLD 2.0

I think there was a hiatus of 8 months in between. I was pretty decimated by the failed attempt. I went through a shit ton of plaster and the time it took to cure and everything was a lot. Time is always more precious it seems; however, good thing the resources were not as expensive to acquire. I talked it over with the club president who is a ceramicist and went to art school and dealt with plaster molds extensively. He consulted me quite a bit and gave me a pot to replicate since this one is definitely more uniform and a safer shape to replicate.

So the plan is essentially the same, the difference would be the approach and it's all based on lessons learned from Mold 1.0.
unknown-2.png
The goal this go-round is to pour less and strengthen more. The top and bottom pieces are going to be plywood planks while the only thing plaster is going to be the middle. I will have to calculate the ratio but there is a way to make the plaster denser by tweaking a factor in the formula (basically more plaster). The sides are registration marks.
unknown-3.png
This is really the main concept I want to make very apparent to myself. The top layer is really the most important piece aside from the scraper. The top is level and has to have a slight overhang. This will ensure the scraper will have the leveled reference point to scrape excess clay away to ensure uniformity.

20210816_221945.jpg
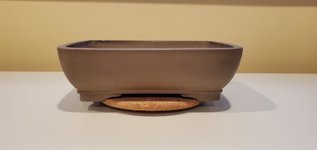
This is the pot that will be replicated.

20210816_221959.jpg
The feet have a slight outward bend making it impossible to capture the feet in this one pour. What's also an issue is the ridge right above the feet. This presents a problem because it to will be locked in without removing it.

20210816_222108.jpg
Lessons learned from before, this pot will be imprinted upside down.

20210817_102701.jpg
Painters tape is added to ensure I have a clear line of sight of what the fill line will be. It will also save the pot so that plaster won't further ruin any part of the pot without Murphy's Soap.

20211219_234426.jpg
Note how the ridge is not eliminated by wedging a coil of clay between.

20211219_234437.jpg
This coil goes around the entire perimeter.

20211221_141502.jpg
The exposed part as well as some of the underside of the pot is saturated with Murphy's Soap.
 
20211221_144248.jpg
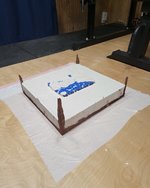
Prepping the form. I ensured what I'm pouring on is very level. So the floor is usually your best bet.

20211221_144255.jpg
Sealed the edges to ensure no plaster will leak.

20211221_150417.jpg
Placed the pot in the center of the form.

20211221_152149.jpg
The pour. Note how thick the walls are, this was a lesson learned in case the plaster were to crack. Then again, this plaster slab is almost 3" thick.

20211221_153603.jpg
Plaster is setting.

20211221_215633.jpg
With the form removed about 3 hours later.

20211221_220236.jpg
Looks good, it's level and that's how I should have poured the plaster for Pot 1.0.

20211221_220243.jpg
Clean back with the tape removed. No damage done on the bottom.

20211221_221559.jpg
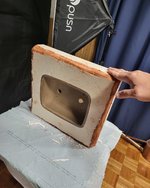
Clean impression.

20211221_221621.jpg
Clean impression.
 
A lot can be learned from the first mold. I've made some molds and failed to identify undercuts and basically had to trash the mold as the plug ended up stuck inside. I'm in the process of making some new molds myself, they are only as good as the time you invest into making them.
Good luck to you. It's sorta addicting for some strange reason.
 
Good luck to you. It's sorta addicting for some strange reason.
Maybe I'll post a thread of my mold making when I get to it. I'm looking forward to seeing the outcome of Mold 2.0.
 
20211221_223304.jpg
Feet were next on the list to make molds of. I couldn't get away with 1 mold, I needed 2 because this rectangular pot has essentially 2 types of feet as they weren't symmetrical.

20211221_223400.jpg
With the two globs of clay, I pressed them firmly into the pot to get the imprints of the feet.

20211221_223752.jpg
Good imprints.

20211221_231722.jpg
Poured plaster in to get a plaster positive of the mold.

20211222_133724.jpg
2 hours later. I had made feet. I realized I should have taken 2 from the same side vs opposing since they are the same feet.

20211222_135430.jpg
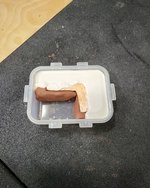
I took the feet and then placed them in this container which will be it's carrying case. It will allow me to force the clay in without forcing the mold apart. This was how I made the two pieces of the foot impression.

20211222_140712.jpg
Poured plaster onto the one side.

20211222_142508.jpg
Removed the excess clay and lathered up the soap for quick release.

20211222_145643.jpg
The other side of the mold poured.
 

Attachments

  • 20211222_004910.jpg
    20211222_004910.jpg
    69.6 KB · Views: 3
You’re better off starting with a pot that doesn’t have feet. Without feet many shapes can be made as a one or two piece mold.
 
20211222_165304.jpg
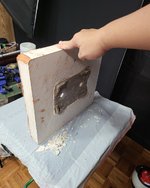
Here is the completed mold. Everything came out without a hitch.

20211222_165315.jpg
That's the separation point.

20211223_002000.jpg
Here are the pieces that came out of the feet mold. They are slightly less clean; however, when cleaned up at the end, they will even out.

20211223_002025.jpg
There's the clay foot from the mold. Took 30 seconds flat vs, my normal 20 minutes to make feet.

20211224_223457.jpg
Next, I had to cut the opening in the top, to figure out the overhang thickness.

20211224_223533.jpg
Coincidentally, my slab dividers were exactly 1/4" and together made up the 1/2" that is the clay wall of the pot.

20211224_223525.jpg
Here is the 1/2" check.

20211224_223637.jpg
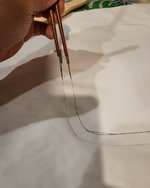
My poor man's DIY compass.

20211224_223652.jpg
I ran it around the outline I traced from the pot to get the inside line. The darker blue line is the overhang I need to cut out of the plywood top.

20211224_223659.jpg
Not too bad.
 
20211224_224023.jpg
Here is the overlay just as a check.

20211227_222518.jpg
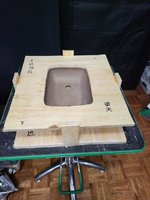
With the sheet firmly between the slab and the top, registration keys were glued on the side. I don't think I'll do this next time. I'll probably make a box so it fits over the entire slab, there was a lot of warpage. I think making the box will ensure everything is at least within range.

20211228_201355.jpg
This is essentially the completed mold. The bottom piece is held together by gravity, I didn't need to make any keys for it.

20211228_201950.jpg
The very last piece is making the profile scraping rib. I achieved this by putting the top over the pot so I can build a wall of clay against the pot and the top plate to get a profile.

20211228_202008.jpg
Here's the top piece against the pot. You can see there's quite a bit of warpage.

20211228_202835.jpg
The wedge of clay to get the profile.

20211228_202842.jpg
Closer view.

20211228_220122.jpg
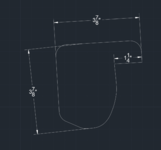
The next part is pretty much the coolest part of the process I think. This is a picture I used to upload into my AutoCAD software. This way I can get a polyline around this real-life object and get dimensions off of it. The ruler is the reference item used to align and scale objects in AutoCAD.
 
I recently connected with my new neighbor and found out he and his girlfriend are both engineers. He's an electrical engineer and she's a mechanical engineer. She apparently has a side hobby and is very much into ceramics herself. After a brief description of what I was trying to make, the next thing was "Hey, I have a 3D printer!" - Electrical engineer neighbor. I asked him if he would be able to print me the rib and he said he'd be insulted if I didn't ask him.
1.PNG
After uploading this into the software, I had to scale the picture up. Note the 1" in the program vs the 1" in the picture.

2.PNG
Scaled up, the picture is now the right reference scale.

3.PNG
I threw in a poly line just to get the curve and the straight top.

4.PNG
I readjusted the shape.

5.PNG
Got some measurements to check.

6.PNG
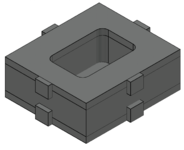
Made a 3D model in the program.

7.PNG
Shaded it and sent it to my neighbor.

20211230_140824.jpg
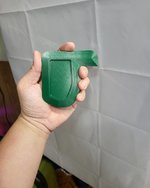
8 hours later, I got the prints!

20211230_140828.jpg
He had made me 2 because he was worried the 1/4" rib was probably too thick and without filleted edges.

20211230_140809.jpg
Here's the check against the pot and top.
 
That was the last piece of the puzzle. Here is the building process.

20220101_132317.jpg
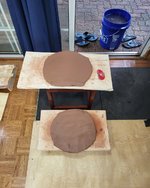
I've set up my station and wedged my clay. I have a bucket of water to wash my hands and surfaces to put my slabs.

20220101_132417.jpg
I made an etched-in mark on the rib to show the 1/2" as an extra measure to ensure just in case the registration keys on the sides should warp, I'll have even thicknesses.

20220101_132420.jpg
Checking thickness.

20220101_132427.jpg
Checking thickness.

20220101_132431.jpg
Checking thickness.

20220101_132436.jpg
Checking thickness.

20220101_141135.jpg
Here are the 1/2" slabs. These have to be the thickest slabs I've worked with.

20220101_141236.jpg
Templates of the base and sides.

20220101_142438.jpg
Out came the pieces.
 
20220101_143041.jpg
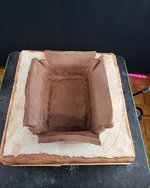
Slabs are placed with corner reinforcement.

20220101_143342.jpg
All the corners were pressed so that corner impressions were captured.

20220101_144008.jpg
A coil of clay was added to the areas where the clay was pressed firmly to ensure even thicknesses when the rib went through.

20220101_144012.jpg
A canvas bag filled with rice was applied to distribute even pressure onto the walls and base rather than using fingers or hands.

20220101_144239.jpg
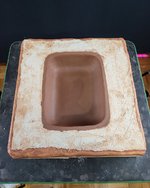
Excess clay was removed from the top.

20220101_144320.jpg
The mold is now ready for the top and rib to go through the impression.

20220101_144413.jpg
Top on.

20220101_144534.jpg
The rib doing it's magic.

20220101_144536.jpg
Better to have excess than nothing to scrape. This was the magic tool. The 1/4" worked better because there was a lot of excess clay to remove.

20220101_151203.jpg
Here is the point where if I had gotten in 1.0, I would have been happy. Now to let it rest for 8 hours to let the mold absorb the water in the clay.
 
20220101_215626.jpg
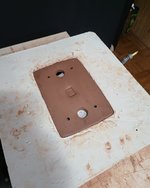
After the 8 hour mark, the clay was firm enough for me to add my chop mark and drainage holds.

20220101_215709.jpg
There is a support structure inside the pot that isn't shown. It's basically a sponge with a flat top and base.

20220101_220234.jpg
Drainage holes and wire holes were applied. Note the gap in between the mold and the clay. This was a clear indication the pot has more or less separated from the mold.

20220101_220753.jpg
Here is the pot removed from the mold with the support structure.

20220101_221645.jpg
The ridge that was removed from the original pot was put back in.

20220101_221648.jpg
The ridge that was removed from the original pot was put back in.

20220101_132706.jpg
This was the profile rib for the ridge/coil of clay that ran around the pot base.

20220101_223349.jpg
Cleaning up, I noticed there were some areas where the clay walls were off. This showed how the top warpage affected the opening.

20220101_223405.jpg
More finishing was done to the exterior walls. That coil added back into the pot was like going full circle.


20220101_223624.jpg
Top view. The pot is now ready for feet.
 
Back
Top Bottom