humanafterall
Yamadori
- Messages
- 57
- Reaction score
- 21
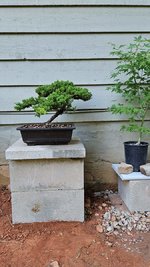
Did as you said and asked my local club and they said the work is good to do year around for the most part. Here's the result. No trimming of courseIt would be helpful @humanafterall to edit your profile to include a general location and USDA grow zone.
I can only guess by the foliage that you are in grow zone 7 or higher based on development.
There has been work done to this procumbens in branch selection and removal.
When was this work done?
By you or before you received it?
Many variances of soil is fine. Here's what I use, and this will vary from person to person and climate
and availability or cost. I use bonsaijack.com to order my soil. pumice/lava rock/Monto clay (1'4" turface) and some bark.
For my pines in better development stage, I use Boon mix pumice/lava rock and hard fired medium size akadama in equal parts.
Bonsai jack is quick to ship and a very clean, washed and sifted and tested for pathogens product.
Not knowing where you're located, if you were in my location, I would pull the root bound mass out of the can
saw off half of the root ball, a serrated knife does well, take a bonsai rake or chop stick and begin removing soil
from the underside raking out maybe another inch and a half of soil and cut thick roots as high up into the bottom
as you can in that 1.5 inches (3-4cm). Rake out some soil from around the trunk trying not to damage good thicker roots
if you find any. Of course you'll need a pot of sorts 1st, be it a pond basket (low cost, popular grow out method found at Lowes)
and soil enough to fill the basket that may hold 2 gallons. Also popular is a REB-10 mica pot, or a quick hand made wooden
grow out box. Over order on your soils. You will have more projects and don't want to be mid potting and run out.
Basically you want to tease the roots out radially when repotting and remove a good % of the nursery soil.
Backfill around the roots using a chopstick to work into the roots and void spaces AFTER tethering the root ball to pot 1st
using a couple of wires through the bottom tall enough to have both ends meet + some to begin twisting together to secure to pot.
Raise up with pliers and twist, raise and twist till snugged in and trim excess wire off leaving several spirals of wire so it does not fall apart.
You'll have to mound the soil high enough under the roots to get the nebari close to the surface before you snug it in. Try not to leave any
air pockets.
Would like to hear what your aftercare looks like, shade time before moving to light, misting.
Just in general would I be looking at for a solid recovery?

