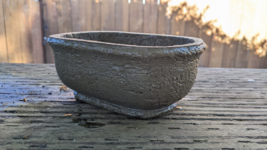
My concrete pot progression

I think oil based clear last longer but waterbased doesn't yellow as fast.
UV gets a thought.
For my terrace pot I used a concrete footpath paint for high durability and bitumen below soil level, no clear coats.
 
@0soyoung your pots are absolutely beautiful! I love the tones you're achieving. That first one posted is stunning. A highlight, no doubt.

You have a way of maintaining a natural seeming or "rough" surface and form that is subtle, but powerful. It's a great contrast on some of those thinner sections.

Thanks for sharing! I'd love to see more if you care to share. Whether that's now or later, new pots, updates on old ones, transplants, etc.


The tones I'm seeing from the dye/colorant is pretty much exactly what I was hoping to jump off with. I've gotta procure some soon.
 
I think oil based clear last longer but waterbased doesn't yellow as fast.
UV gets a thought.
Ooooof, yeah, I hadn't put any thought into the UV damage. Good call, that's a sizeable factor to play with.

On an aside @Weta, is there a major amount of surface prep when you're painting? The minor prep items I assume would be ensuring the surface is free of grit/dust/dirt, any oils, and likely roughed up slightly if otherwise smooth.

The instructions to the weatherproofing product I've tried states to etch the surface prior to application and highlights something like a desired texture of 150 grit sandpaper. Those instructions are also not for this application and a ~3/4" thick concrete pot will behave differently than a poured slab floor, or otherwise (which I assume the directions are targeting).

Regardless, I've had good results so far. I'm not ready to write that on my gravestone, but I'm going to take a win. For now...
My budget prep is water rinse followed by heaps of layers with very thinned down paint allowing maximum soakage.
I only use sandpaper to shape / tidy up while concrete is setting.
 
My budget prep is water rinse followed by heaps of layers with very thinned down paint allowing maximum soakage.
I only use sandpaper to shape / tidy up while concrete is setting.
I like your style :cool:
 
Concrete Pot #7 ditched the perlite mix out of fluidity/workability frustrations and went back to the play sand as aggregate.

This was the point that I tested out a different way of stabilizing my forms when throwing. Previously I had used a center post as my guide but it had various issues, namely being unstable. I could retrofit things and mount the post a bit better, but that only solved for one item. Another large desire I had was to create non-circular and more dynamic shapes. That center post wouldn't lend well there, either.

I opted to instead utilize the platen or base that the pot is thrown on as my reference/guide for the forms, and it worked really well.

Lastly, this was one of the first pots that I put some polish/finish work into. I kept it rough, as I really like the chaotic natural patterning, but refined the shape and think it turned out really nice. I was pushed to think critically when seeing the flak/defects in the lip/rim of the pot. The design was suppose to have a gently curving, smooth sided rim. Due to some technical difficulties in how my base plate mated with the form, I was left with a large raised, almost double edge. Initially this was unsightly, but with a very minor amount of shaping and refinement, It turned out to be a highlight of the piece (in my eyes). A happy accident!


Here's some pics from the day of throwing
1699021308755.png
1699021685357.png
1699021709746.png
1699021737254.png

Here's some day after throwing
1699021790147.png
1699021832327.png
1699021870767.png
1699021901482.png

A pic ~30 days cured - the foreground are a different batch, the leftmost pot in the background is the one shown above.
1699022035238.png

And the final result after some minor sanding and clean up. I love how things turned out!
1699022108008.png
1699022140665.png
 
Back
Top Bottom