My concrete pot progression

DonielDoom

Yamadori
Messages
93
Reaction score
336
Location
Portland, OR, USA
USDA Zone
8b
Hey all!

Semi-recently I threw some attention towards making my own pottery. As I'm a bit intimidated by the complexities of the fired-clay process, namely the glazing and firing aspects, I opted to try something that seemed more forgiving or 'entry level'. This landed me with a bag of portland cement and some sand, among other things. A crude wheel from a lazy susan bearing, some wood, and a sawhorse would round things out.

I've made about a dozen at this point and think I've got some pretty neat designs and a lot to work on for the level of quality I seek. I think I could really get into this kind of thing... Regardless, I'm enjoying the process and have been learning a ton!

Anyways... I figured I'd get some feedback and share a bit. Let me know what you think and what you'd enjoy seeing. I'll keep throwing my project pics up until I get to current.
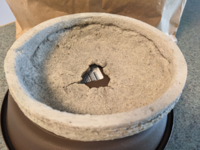
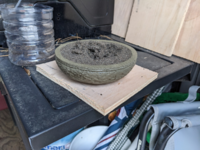
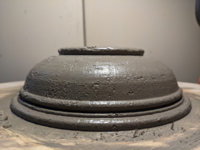
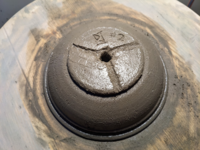
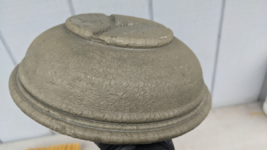
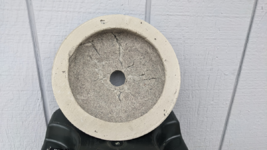
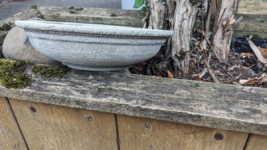
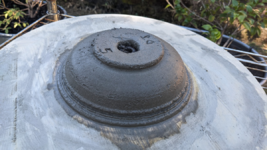
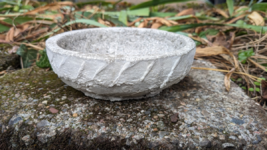
Here's Cement Pot #1!

Fully cured
1698275926631.png
Fully cured
1698275952369.png
Fully cured
1698275969809.png
Fully cured
1698276019664.png
Freshly thrown
1698276073125.png
Day after being thrown
1698276091960.png
Day after being thrown
1698276115221.png
 
I've been mucking around with concrete pots and have been using fibreglass instead of any steel reinforcing as it will just rust eventually and split.
The use of bitumen as a multi purpose material to line pots and attach feet etc has been useful.
 
I've been mucking around with concrete pots and have been using fibreglass instead of any steel reinforcing as it will just rust eventually and split.
The use of bitumen as a multi purpose material to line pots and attach feet etc has been useful.
You know, I hadn't thought about the end of life for a metal reinforcement. That's a solid nugget to be aware of.

My first few have no reinforcement and are likely going to be short-lived in the grand scheme. I then moved to try poly fiber and need to spend some time dialing in my mix rates. I need to use less to get back some workability. Overall though, I think they're going to be near magical in effect for the effort required. Idk why you'd mess with wire/mesh when you don't need to!

I'd love to see what you've got, if you're at all interested in showing.
 
So far, these were made with a 3:1 (portland cement : play sand) ratio with as little water as possible to achieve workability. A hand drill with a stainless mixing bit is utilized to ensure a homogeneous mixture. No reinforcements were used, though, I later use poly fibers. These early ones will likely crumble and turn into a 'fun easter egg' for me to find one day in the garden. A lot of lessons were learned through these initial attempts!

I let the pot harden for ~24 hours before pulling it off the platen (flip upside down, set on surface, tap platen with hammer, and profit) and cleaning the sand mold out. I reuse that sand with good results so far.

The pot then gets a shower with the hose, and submerged in water for ~7 days. The water is changed daily during this period. I'm not 100% on the conceptual factors occurring here and am wary to recommend or encourage this practice without further research from a skeptical perspective. Please do your own research because I haven't finished mine! The concept(s) I'm currently grasping to are: 1) the chemical process occuring in the concrete requires, or is driven by water, and 2) the lime/base minerals in the mix will leech into the water during this phase, and hopefully reduce the potential to leech into soil substrates at a later point.

After that 7 day soak, I let them sit in ambient indoor conditions (approximately 70f +/- 5, and 25-60% RH) for another ~25-30 days. This is to allow the concrete to fully set prior to further processing.

The finishing portion of the process is one I haven't spent much time in yet, and am eager to experiment in. The only coating I've tried at this point is a weather proofing product (product spec attached). It's worked well so far and has a clear coat, no real luster or finish, so it retains that original concrete grey.

I'll keep posting up more details and photos as I dig them up and articulate myself.
 

Attachments

Food for thought
Fascinating! You know, this has gotten the bug in me. Great share. Very much appreciated.

Worth a watch regardless of your interest in pots or bonsai - That concrete is a cornerstone of civilization!

I had the massive opportunity to spend some time in Italy this past summer (prior to the heatwave(s) thankfully). It was beyond inspiring, to say the least.
 
In this installment, you'll find a view of my shaping tools and first wheel setup.

Molds (left is the inner mold for the sand, right is the outer mold for the profile of the pot)
1698419462800.png

Here they are on top of eachother in effort to show the wall thickness.
1698419541704.png

And another to show the profile in it's 'correct' orientation.
1698419586261.png


Concrete Pot #3 was a repeat of the prior in almost all ways, except I replaced my play sand aggregate with fine sifted perlite dust. It handled much differently and I had some difficulties. I was trying out a thought of lighter aggregates in addition to the potential color difference when compared to sand.

The perlite blends I've shelved for the moment. I felt I was reinventing the wheel on try 3 and realized I wanted to focus on the other core skill improvements that impact the process.

*of note: the centerpost method for anchoring my tools was somewhat short-lived! I moved to another approach later.

Sand mold is done. This is a good work space shot, I thought. A beautiful day!
1698419701969.png
1698419777379.png
1698419844827.png
1698419862407.png


Less than desirable results as I learn my working window and how to form the concrete. This is the day after throwing.
1698419986891.png
Here it is fully cured after ~30 days
1698420052179.png
1698420063848.png
 

Attachments

  • 1698419896530.png
    1698419896530.png
    541.2 KB · Views: 10
Last edited:
When I was doing my coffee check in and write up this morning, I glazed over your name @Weta, I love your works!

I haven't dug into your profile/past threads a whole lot from here, but I have stumbled upon them from various other searches. Some inspiring stuff you've got.

Namely, your terraced pots make my eyes light up. Those are beautiful.

Of course, it'd be a travesty to not mention that thermal pool! Holy hell! Was able to observe Yellowstone this year in all the glory. You absolutely nailed it!

For those unaware of the beauty, do check it out! Weta's Pots
 
I really like how you are finishing the pots and the texture on the outside. Won't be long until you are playing with concrete dyes.

If you are having trouble with cracking, don't forget to slow down the drying. Concrete gets its structural integrity by curing so you want your pots to cure BEFORE they dry. The longer concrete maintains moisture as it cures, the stronger the final product. You see this all the time with construction crews spraying down concrete slabs with water on warm, dry days, and covering the slabs with plastic to hold in moisture. You could keep your pots wet for days and they would be stronger for it when you finally allowed them to dry. Concrete can cure even when completely under water.

Also, concrete is going to be naturally alkaline. Soak your pots in a mixture of 1/4 cup vinegar to 1 gallon of water for about 30 minutes. Then rinse them off and let them soak in clean fresh water for a several days (replacing with freshwater every now and then) so that you leach out the alkalinity and the pot is neutralized.
 
@DonielDoom - very nice pots, well done.
@Weta - your pots are very nice too. Well done. I really like your terraced project. The "grand prismatic spring" is really neat artistic project too.

The video posted by @Weta is really interesting, though not really "new news" in the concrete industry. I had seen more in depth tech articles some 15 or 20 years ago covering Roman empire concrete. A point the video glossed over, is that the volcanic ash the Romans used was still anhydrous, had not yet been saturated by water from rain or groundwater. So in addition to the quick lime, calcium oxide, the volcanic ash, which is composed of various silicates, had a pozzolanic reaction which helped to create a stronger finished concrete. There is a city, near Naples, Italy, that dates to Roman era, named Pozzolana. The yellow volcanic ash quarried there is the main ingredient in much of the Roman concrete of the old Roman empire and the name of the city was used to name the chemical reaction that is the "hardening of concrete process" , a pozzolanic reaction.

Definitions -
Cement is the fine gray powder, which when moistens becomes the paste that holds the sand and aggregate together in a concrete mix. This paste undergoes a hydration reaction that forms amorphous crystal latices that bond the grains in the paste together. The amount of water needed for the chemical reaction is very low. Excess water is often added to make a smooth easy to place & work paste. The excess water bleeds out leaving micro-channels behind which later become the week points where water re-enters the concrete and become the source of freeze-thaw cracking. The less water used to make a plastic, workable mix the strong the final concrete will be.

Portland Cement is cement made by a process developed in UK, Germany and finally USA documented thru a series of patents from 1824 thru 1859. Portland cement name comes from the resemblance of finished concrete to stone quarried from the Isle of Portland, Dorset UK. Today the term portland refers to a process so does not need to be capitalized, though my spell check often automatically does capitalize it. William Aspdin is usually credited with inventing portland cement, though other engineers and inventors appeared on various patents related. It was not until the continuous feed rotary kiln was invented that portland cement became a universal building material. F Ransome 1885 and 1886 patented the rotary kiln, which is the real launch of widely available portland cement. Portland cement is primarily anhydrous calcium alumino-silicates.

Concrete is the mixture of cement, sand, aggregate (gravel), water, and chemicals used to create a plastic (workable) concrete mix. Concrete is the finished product. Cement is the gray powder retailed in bags. We walk on concrete sidewalks. We mix cement with sand and aggregate to make concrete.

Mortar is cement with fine aggregates only, sand essentially. Most "Concrete pots" are made with a Portland cement mortar mix rather than a road bed worthy concrete mix. Its all about the size of the stone. Not really an issue worth picking nits over. Mortars can also be made with non-Portland cements, such as LaFarge Ciment Fondue, which is a non-Portland, refractory use cement that is high in aluminum and lower in silica. Ciment Fondue is used often in smelting and high temperature furnaces, but also in art projects, it has a much longer set time. Giving the artist much more time to work and rework the finish. Ciment Fondue will take 12 to 24 hours to "set" where portland cement typically takes 2 to 4 hours to set.

Additives for concrete. If you want to slow the set up of portland cement, sugar is the additive of choice. You can extend set up from 2 hours to 8 hours or a little more by adding 0.12 pounds of sugar to 50 pounds of portland cement. Corn syrup and or molasses can be substituted for granular sugar, but remember using the alternatives adds water too.

More later
 
concrete is going to be naturally alkaline. Soak your pots in a mixture of 1/4 cup vinegar to 1 gallon of water for about 30 minutes. Then rinse them off and let them soak in clean fresh water for a several days (replacing with freshwater every now and then) so that you leach out the alkalinity and the pot is neutralize
I prefer to coat the plot/slab with polyurethane as it also makes the item more durable.
 
It's been a busy few days, and boy howdy do I have catching up to do!

@Leo in N E Illinois I appreciate the hell out of you sharing! I've got to absorb a bit more, and I'll jump back with any specific thoughts. I feel, with that nugget of knowledge, I am more than capable of really honing in on some really beautiful, and more importantly, lasting pieces. Time for me to get back at it!

I'll come back around with another pot in the series a bit later.

Thank you to all that have jumped in this thread! Looking forward to further discussion.
 
I prefer to coat the plot/slab with polyurethane as it also makes the item more durable.
That's awesome. You know, I've been curious about this. Not specific to polyurethane, but some type of liquid resin to coat and soak into all the pores. The damage from water/air throughout the seasons seems like quite the oppressive force. Naturally blocking it out from entering with some kind of coating/treatment has crossed my mind.

Can I ask what your results look like? How has that worked for ya? I'd love to see/hear more!
 
Yeah, I’ve been doing cast ones instead of wheeled ones. I have another couple ideas that I want to implement. Definitely going to use reinforcing fibers for my next ones.

Post
 
Yeah, I’ve been doing cast ones instead of wheeled ones
Nice! Now I'm even more eager to see/hear more of your works! I'm hoping to play around with casting once I get some solid/proven designs on the wheel. So many little pros/cons for each technique and material. It's a delight to see how they all come together or clash.


Here's another update in my journey...
Concrete Pot #4 doesn't exist. I just simple forgot that the number 4 came between 3 and 5. My creativity know no bounds and adheres to no traditional sequencing. (heavy sarcasm on that last sentence)

On with Concrete Pot #5! Another perlite blend (the second attempt) before I go back to sand aggregates. No major changes to the blend except a higher water content, as a texture plasticity/workability test for the perlite mix, and a double batch, to allow more material to play with. I really struggled previously with how much stickier the perlite mix is compared to sand, but wasn't sure if it was user error or otherwise. Adjusting the water content seemed to be a very simple way of experimenting with the blend and it's handling. Adding more water than needed for this has likely worked against the integrity, but it was in the pursuit of knowledge and experience, and otherwise shruggable as a hobbyist maker.

I compared the fully cured weight of a sand blend vs a perlite dust blend, in final form, and present those below. (same mold type trying to minimize variables, but know there are far too many to be fully accurate)
- Traditional sand mix (3 : 1 portland cement : play sand) weighed 1186g/2.61lb (Concrete Pot #2)
- Perlite dust mix (3 : 1 portland cement : sifted perlite dust) weighed 856g/1.89lb (Concrete Pot #3)
- Perlite dust mix (3 : 1 portland cement : sifted perlite dust) weighed 877g/1.93lb (Concrete Pot #5)
-- That's a large difference, to me. Something to revisit when my proficiency rises --

You can really see the grit in the wet pictures of #5

With the extra mix I made a second, more freeform pot, which you will know as #6. For what it's worth (which is little) I mucked up the numbers again. Technically #6 is #5, and the other way, but I guess I got excited. Oh well, there are worse things...

Wet (day of/day after mix)
1698765928716.png
1698765948862.png
1698765973454.png

And some more 'finished' or cured pics.

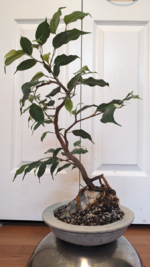
Here it is on the day that I (shouldn't have, but did, naively and impatiently) threw an F. benjamina into it.
1698766071097.png

And a couple of the freeform #6 pot. You may be able to tell, but my mix had too much water in it! /shrug
1698766168975.png
1698766185871.png
 
Interesting idea to use the perlite. I was thinking about using pumice as a way to save some weight, though my pots haven’t been all that large to date.
 
That's awesome. You know, I've been curious about this. Not specific to polyurethane, but some type of liquid resin to coat and soak into all the pores. The damage from water/air throughout the seasons seems like quite the oppressive force. Naturally blocking it out from entering with some kind of coating/treatment has crossed my mind.

Can I ask what your results look like? How has that worked for ya? I'd love to see/hear more!
Oops! I've been using clear matt/flat acrylic sealers, not polyurethane. The principle difference, though, is that acrylics are water based whereas PU is oil based (nevertheless, lots of noxious volatiles are released as they cure, so one sprays/glops it on outdoors - I've been spraying). Acrylic paints work well on concrete, though I've not been particularly pleased with my results. IMO, this is the best I've done. PXL_20220620_181127586.jpg
This tray was my primary test bed (I liked my results so much that I covered them with the planting! PXL_20220620_181535400.jpg


I've been happier with the results using dye/colorants in the concrete mix instead of painting the end result.
Brown in the case of this free-form slab (I'm having a disagreement with the birds over who owns the pumice and moss in it = hence the wire mesh tied over things) PXL_20231031_214339103.jpg
Red and black in the case of these two wide rimmed square pots PXL_20231031_214555342.jpg PXL_20230313_234816740.jpg and a red rim on a black body PXL_20221005_222021248.MP.jpg .

I've made all these on hardware cloth 'frames'. So, they are all pretty strong and yet light weight.
Lastly, all of these are now entering only their second winter.
 
Back
Top Bottom