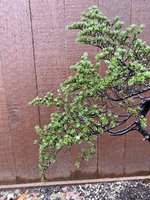
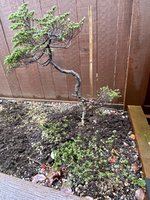
I would let collected trees recover for a year or two, at least before any work is done. when you see nice strong new growth, you can proceed carefully with root work, or top work. When doing root work, I would not mess with more than half of the root ball at a time, with a few years of recovery in between the halves
John the first picture was taken in a place familiar to you I am sure. I recall when Michael started working with Hemlock after returning from Japan and moving to the Portland area, we typically left the top roots alone in the beginning and worked the lower portion first. The advice at that time was approximately 1/3 of the root ball at a time with recovery between sessions. Since that time I have kept to that approach with success!
This is with respect to an already acclimated tree after collection but no native soil removed, just supplemented with some pumice and sea soil around the original rootball.
This approach was based on Hemlock being very reliant on surface feeder roots, thus allowing the weaker areas to be strengthened before reducing the strong areas for sizing in pots or adjustment for planting angles. We used this approach when dealing with my first twin trunk Hemlock straight from the nursery pot when purchased from Anton. The overall process for root work was staged for smaller amounts at key times beneficial for root recovery. Basically spring and fall. ( early enough in the fall to allow root repair before hard freeze)
Some advantages to working the lower portion first with Hemlock is the ability to rejuvenate the core under the trunk early on, thus providing a strong central area as the overall root ball is reduced over time for Bonsai purposes in refinement. The other advantage is faster removal of thick anchor roots to enable planting in shallower containers as development progresses. The advantage to working 1/3 of the root ball at a time is the faster recovery and ability to reduce the timing between repotting. ( provided the tree does well)
Once the lower portions were strengthened it was easy to work down in stages to remove top roots and reveal the full base for better design and planting angle choices. I typically allow a minimum of three to five years for recovery after collection and basic root work to remove native soil along with developing a strong basic root foundation for Bonsai. One extra step I have discovered with adaptation of collected Hemlock is to plant them a bit deeper in the grow box or Anderson flat when first collected. The extra soil on the surface roots is easy to remove later but encourages better surface root survival and acclimatization for the tree during recovery.
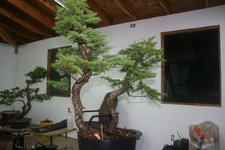
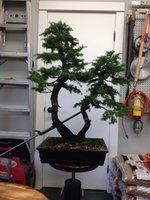
Here is my example, twin trunk in nursery pot for preliminary pruning and rough design with Michael and Bobby November 2014. ( first picture) After that one session with Michael and Bobby in Milwaukee, I began the root work to remove native soil and develop a proper root base beginning in march 2015 at home. Rivers Edge Bonsai.
Stage one March 2015 ( bottom layer and central core) place in Anderson flat
Stage two Sept 2015 ( 1/3 rootball) divided in segments like pie, three weakest sections done first.
Stage three March 2016 ( 1/3 rootball) three additional segments.
Stage four September 2016 ( final 1/3 ) last three segments ( placed in maintenance pot)
Stage five March to Sept 2017 reduced from top layer to expose more of the base and nebari.
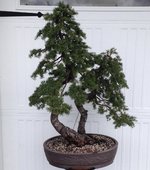
March 2018 transferred to show pot with minor repot
Approximately 2 1/2 years for root work and transition from nursery pot to maintenance pot to Bonsai Pot. During this time the weakest areas were dealt with first to allow the strong areas to keep the tree as healthy as possible for faster recovery to the next stage. Each session involved removal of native soil, dead roots, cut back overly strong roots and carefully replace native soil with bonsai mix.
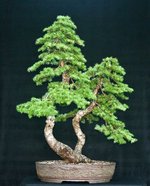
The first three pictures below track the progress from nursery pot to show pot. The last picture shows the current progress towards refinement.
Note: using this slower repotting process allowed me to prune, wire, bend and develop the tree during the same time frame.
Over that time frame I received valued long distance advice from my sensei Boon, early assistance from visiting artists Matt Reel ( Reelbonsai ) , Bobby Curttright ( Cascadia Bonsai) and Bob King ( particularly with wiring and design tips) and lots of additional suggestions from my fellow members in the notorious Tailgate Bonsai Study group. The Tree has been completely wired, unwired and redone six times since 2014. Fortunately each time I do it now the amount required gets less and less.

