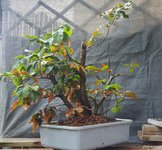
Fagus Sylvatica/Beech

BobbyLane

Imperial Masterpiece
Messages
6,072
Reaction score
17,782
Location
London, England
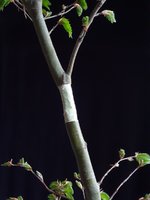
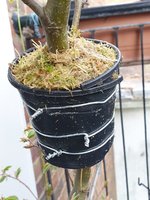
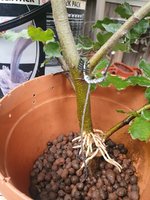
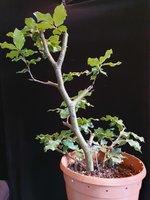
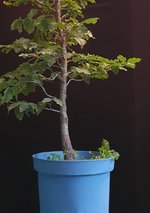
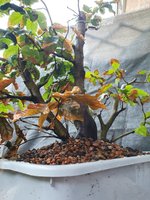
Started a layer on this nursery Beech purchased recently. I like this tree with its subtle angles in the trunk, natural branch placements which is a feature of the species. There are good sized, potential leaders to cut back to and nodes close to the trunk on most branches, with a view to cut back too in time. Ill be checking on those to make sure they dont get shaded out and become weak
On another thread I was talking about trying soil rather than moss for new beech layers, but ive seen first hand so many successful beech layers with just moss since then, so ill stick with the moss...

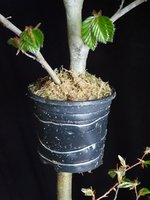
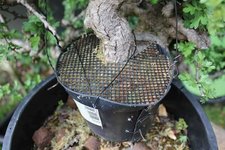
This was cut clean with a new knife and wrapped and packed very tightly, rooting hormone was also applied to the cut, then wet sphagnum.
There is a little window on the pot to check for roots...
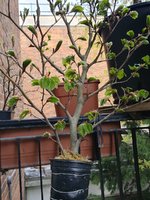
20230502_190523.jpg
 

Attachments

  • 20230502_181737.jpg
    20230502_181737.jpg
    91.7 KB · Views: 73
  • 20230502_190022.jpg
    20230502_190022.jpg
    175.4 KB · Views: 51
  • 20230502_190126.jpg
    20230502_190126.jpg
    194.5 KB · Views: 40
  • 20230502_190159.jpg
    20230502_190159.jpg
    150.1 KB · Views: 51
  • 20230502_190328.jpg
    20230502_190328.jpg
    258.3 KB · Views: 50
  • 20230502_190620.jpg
    20230502_190620.jpg
    226.1 KB · Views: 54
  • 20230502_190658.jpg
    20230502_190658.jpg
    162.5 KB · Views: 63
That layer sure is in the best place.
 
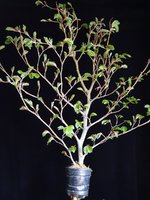
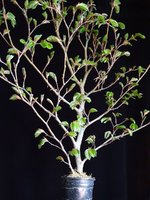
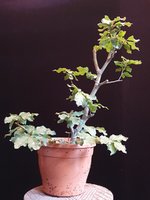
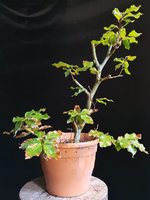
In full leaf now, looking lush. This tree only cost me £15 with my trade card discount
20230508_182927.jpg20230508_182950.jpg
20230508_183438.jpg

Eventually I want to layer off the bottom piece to do a raft or something
 
How is your success with that kind of open top moss layering container vs say a plastic bag?
 
First time trying the open top, but ive had Beech produce some roots with clear bag method. A lot of guys in the UK have good success with the plastic nursery pots, the black plastic absorbs heat which is great for roots, fingers crossed...
some examples ive seen here, Will baddely swears by it
 

Attachments

  • FB_IMG_1683624215583.jpg
    FB_IMG_1683624215583.jpg
    108.1 KB · Views: 46
  • FB_IMG_1683624025917.jpg
    FB_IMG_1683624025917.jpg
    49.1 KB · Views: 50
  • FB_IMG_1683624007699.jpg
    FB_IMG_1683624007699.jpg
    49.6 KB · Views: 51
  • FB_IMG_1683024628319.jpg
    FB_IMG_1683024628319.jpg
    168.8 KB · Views: 53
  • FB_IMG_1683024635529.jpg
    FB_IMG_1683024635529.jpg
    274.8 KB · Views: 54
  • FB_IMG_1683024645619.jpg
    FB_IMG_1683024645619.jpg
    146.2 KB · Views: 55
  • Screenshot_20230413_214504_Facebook.jpg
    Screenshot_20230413_214504_Facebook.jpg
    125.1 KB · Views: 62
I have an Arakawa in the ground with plans to air layer the top this week. I’ll have to try this.
 
I like that you bought a tree knowing what you’ll do with it, what you like about it, what to start on for the next steps and how to accomplish your objectives. That’s a good purchase pattern. Mighty fine!
 
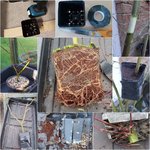
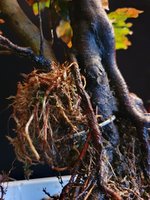
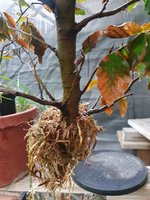
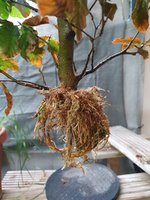
Back on June 30th, I separated this, maybe a little premature as there was just a few delicate roots. I secured it by the trunk and poured some soil into a pot without disturbing the new roots and left it in some shade. It was also cut right back
 

Attachments

  • 20230629_155733.jpg
    20230629_155733.jpg
    150.7 KB · Views: 31
  • 20230629_160730.jpg
    20230629_160730.jpg
    227.1 KB · Views: 29
  • 20230630_140429.jpg
    20230630_140429.jpg
    161.5 KB · Views: 29
  • 20230702_185948.jpg
    20230702_185948.jpg
    182.1 KB · Views: 34
Today its not doing too badly, little bit of leaf burn but I think it will be ok. Theres a root emerging from the drainage holes...
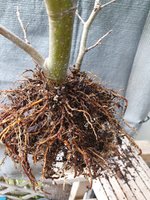
 

Attachments

  • 20230814_164213.jpg
    20230814_164213.jpg
    145.3 KB · Views: 32
  • 20230814_164054.jpg
    20230814_164054.jpg
    98.8 KB · Views: 32
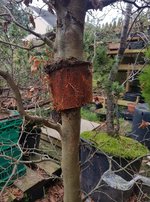
Around that time, I attached another to layer to the same tree, because eventually I may plant the two pieces together..
Suprised to see that this has roots already...20230814_170541.jpg
 

Attachments

  • 20230630_171554.jpg
    20230630_171554.jpg
    145.3 KB · Views: 42
Around that time, I attached another to layer to the same tree, because eventually I may plant the two pieces together..
Suprised to see that this has roots already...View attachment 502831
Same media? My experience with open top vs bags is that the bags retain moisture better. I know a lot of people say that the roots need oxygen to produce, but I think they are under estimating the moisture level.

I'm thinking about starting a few air layers now, kinda late but we don't have a "winter" normally until late JAN to mid FEB, and the weather don't really cool down during the day until mid OCT. If they don't root before that I can leave them on the tree and separate in spring. Really will like to save the top of a few trees that I have plan to chop this spring.
Yep both were done with S moss. Maybe there is the chance that the bags remain more humid, might result in better root conditions, no solid proof really.
 
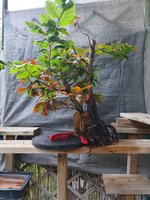
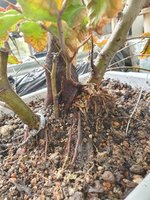
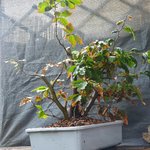
I separated the second layer from this tree and will pair the piece up with the mother tree...
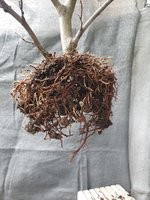
Im contemplating adding the first layer (from the top) to make a three trunked tree...
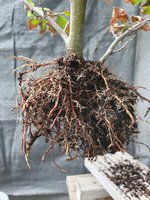
Its currently now a twin trunk, with the two stems wired securely at the base, the roots will definitely merge overtime...
 

Attachments

  • 20230912_184844.jpg
    20230912_184844.jpg
    240.9 KB · Views: 22
  • 20230912_182831.jpg
    20230912_182831.jpg
    204.8 KB · Views: 22
  • 20230912_180947.jpg
    20230912_180947.jpg
    249.6 KB · Views: 23
  • 20230912_180443.jpg
    20230912_180443.jpg
    316.6 KB · Views: 22
  • 20230912_180433.jpg
    20230912_180433.jpg
    242.3 KB · Views: 22
  • 20230912_174812.jpg
    20230912_174812.jpg
    225.9 KB · Views: 23
  • 20230912_174757.jpg
    20230912_174757.jpg
    205.8 KB · Views: 33
Back on June 30th, I separated this, maybe a little premature as there was just a few delicate roots. I secured it by the trunk and poured some soil into a pot without disturbing the new roots and left it in some shade. It was also cut right back
Update on this severed layer...

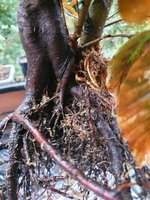
What does 2.5 months of rooth growth look like?
 

Attachments

  • 20230913_140813.jpg
    20230913_140813.jpg
    292.7 KB · Views: 22
  • 20230913_140806.jpg
    20230913_140806.jpg
    228.6 KB · Views: 20
  • 20230913_140757.jpg
    20230913_140757.jpg
    226.3 KB · Views: 24
I wasnt sure if the smallest layer taken from the top was strong enough to be a third trunk, but it looks healthy...
I have inserted it into a gap in the root base and tied it securely to a main root..
 

Attachments

  • 20230913_142701.jpg
    20230913_142701.jpg
    278.7 KB · Views: 17
  • 20230913_150415.jpg
    20230913_150415.jpg
    317.3 KB · Views: 17
  • 20230913_150433.jpg
    20230913_150433.jpg
    268.6 KB · Views: 15
  • 20230913_154255.jpg
    20230913_154255.jpg
    333.1 KB · Views: 17
Its quite possible that side trunks are reduced to thick side branches, will get a better look at leaf drop.
The trunks are all solid in the container so might even do a little light wiring then..
20230913_171733.jpg20230913_171143.jpg20230913_171852.jpg20230913_172012.jpg
 
Back
Top Bottom