Baku's consolidated bougainvilleas progression thread

Baku1875

Shohin
Messages
478
Reaction score
709
Location
Southeast Florida
USDA Zone
10b
Consolidating all my bougies into 1 thread so it's easier to update and easier for people to view and comment on these projects, and so it doesn't look like I'm spamming too much because I'm procuring a lot of bougies in the past few weeks (more to come as well), fast approaching 20! (now around 15 last I checked)...

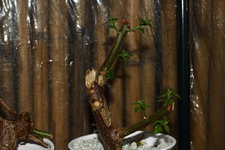
Growbox split trunk purple bougie:
Since the monsoon is picking up, I decided to look for any rot vulnerable bougie branches, and assembled a grow box out of leftover flooring wood and aluminum chicken wire mesh. silky polesaw scored this one today, had a lot of deadwood, and it has a split trunk with good live tissue, I didnt get pics before I put it in the grow box, but it's a lot more interesting and thicker than my others, with a curve.
IMG_0872.JPG
IMG_0873.JPG
Trimmed branches back, defoliated, dumped the remainder of my pumice into the growbox, topped it off with perlite, now it's in the greenhouse shelf. Anticipating new buds in 3-8 weeks.

Updates and compiled progression shots coming soon of my big 25-30 yr old light purple bougie, first successful air layer bougie from last year, white and pink bougies, and the recent dark purple 'fence' bougies. All are destined for bonsai, including the big old one.

Please feel free to comment, critique, suggest anything, thanks everyone.
 
Light purple bougie (air layer wrapped in april from my oldest bougie, air layer harvested in may 2022) this shot is from around June of last year
few months old.JPG
September of last year, I had up potted it already
9-10.JPG
9-10 (3).JPG
Feb 8th 2023, foliage was looking weak, it didn't like the cold snaps (a few nights of ~33-38F in Dec and Jan), but I went ahead and took advantage of the repot window, put it in an unglazed training pot and filled it with Viagrow coarse and chunky perlite and tiny bit of cocopeat for moisture retention, topped it with coarse sand to keep perlite from floating out until the roots grab everything and hold it in place. Didn't prune any of the leggy stuff so it could recover (auxin in the tips signal the root growth!) Afternoon misting to help with recovery.

2-8-23.JPG
One month after the repot, March 8th 2023, it seems to LOVE the coarse perlite, bounced back strong with lots of foliage and blooms. It's thirsty for a bougie in this mix, but growth is vigorous. some Dr. Earth and bonemeal (this was before I started using teabags....)
3-09 (2).JPG
3-09.JPG
IMG_0778.JPG
Last friday, May 19th, looking really dense compared to Feb, resorted to some sphagnum on the top to I wont have to water 3x a day, but I ended up removing a lot once the monsoon began (extreme dry heat up until last wednesday, now it's daily rain...)

Some concerns with the chlorosis/ discoloration, but she's growing fast. I've been hitting it with very diluted miracle grow (blue crystals) every other week, and starting this weekend I began watering with a tablespoon of white vinegar in my watering can (I tested pH of the watering can with hose water and it was 7.5-8 with test strips, and with a tablespoon of white vinegar I got it down to 6.5-7.0)
IMG_0775.JPG
IMG_0779.JPG
Canopy getting dense. Going to do some pruning and light wiring in a few weeks, considering chopping off that straight section in the middle, or keeping the thinnest branch of the top fork in the apex.
 
Alright, recapping my first batch of chunky bougie cuts (~1inch diameter or so)
First chunky bougie cut to root....
April 10th early signs of buds.
20230410_093121.jpg
April 19th, much more leaves
20230419_170241.jpg
May 10th, looking healthy, and out of the greenhouse, into training pot
IMG_0728.JPG
May 16th, more growth
IMG_0751.JPG
May 19th, looking good, teabags on

IMG_0783.JPG
Other angles
IMG_0786.JPG
IMG_0782.JPG
Top canopy doing well
IMG_0787.JPG
Today May 24 after tons of rain last night, today, etc...
IMG_0878.JPG
IMG_0881.JPG
can seee the biggest changes from the top down view of the canopy. This guy is gonna run full speed this summer
Maybe another dose of miracle grow crystals and that's it for the season other than lite sprinkling of vigoro all purpose. I want it loaded with nitrogen, but not overboard....with some clip and grow, I can see some decent movement in this one if i chop the top right branch back and make the thinner branch the new top for taper purposes.
🤞
 
Couple questions for you if you don't mind:

-What mix are you using when you are propagating your cuttings?
-Are you dipping in rooting hormone or just plugging them in the soil?
-I see from post #4, looks like you had the plant in a small container for a bout 6-8 weeks before replanting to a larger container? Do you usually have a lot of root growth in that amount of time?

Thanks!
This season, for my cuttings, I have either been using plastic solo cups filled to the top with cheap vigoro perlite tossed with very little cocopeat, sometimes just cocopeat as top soil, or small nursery pots. A few of my cuttings have been ALL vigoro perlite and they are rooting just fine. For the chunkiest ones that I wanted good results, I poked extra holes in the bottom of the cups or pots, and I used a 1 inch drainage layer of 3/8" pumice.

I always dip in root hormone, I'm using the cheapest bonide brand with the purple cap, I do diagonal cuts and try to make them JUST BELOW a visible node if possible. If there's a nearby branch that I need to remove at the base of the cutting, I will brush some root hormone on there as well.

I saturate my soil first, then dunk the cutting at least 2 inches deep into the container and tamp it down, and use a few medium sized river pebbles to anchor and that's it. Movement kills cuttings. I've seen others wire down their extra large cuttings to be extra secure.

My greenhouse gets 11am-3pm sun, but I am using plastic humidity trays to block the light on the lower 3 shelves, and keeping my younger cuttings on the lower shelves and shaded. As they begin to bud and the first leaves look healthy, I move them to the top floor for two weeks. I try to mist and water each pot thoroughly every other day if it has been very sunny and hot, and a general misting at 11am without saturating the soils to keep the humidity up. I keep the zipper open on my greenhouse.

Yes the roots are progressing very very quickly. I'm about to repot another one of my first chunky ones which is younger than the one I put in a training pot 2 weeks ago, I think it's only 4 weeks old. It could be the environment, combined with the seasonal sweet spot. Last year I repotted my first successful bougie air layer after a few months and it was totally potbound, then when I moved it to the training pot, it was potbound again (the one in the unglazed training pot above with the bigger leaves)

A few of my cuttings had buds on them that I kept on, and they didn't transpire or dry out due to the high humidity in my greenhouse, and that seemed to give them a bit of a head start as they developed into the first healthy hardened off leaves.

Auxin is stored in new buds, so according to my knowledge, buds come first, then that available auxin moves down the stem to help produce roots. Some folks will advice total defoliation, but you can get great results if you keep the cuttings humid with good drainage and some small leaves on top to increase available auxin transport for root production.

Always defoliate larger leaves however to avoid transpiration death, but it's ok to keep a few small leaves near the top. Definitely trim off soft green stems, and I have been using cutpaste on wounds prior to planting the cuttings as well.
 
Couple questions for you if you don't mind:

-What mix are you using when you are propagating your cuttings?
-Are you dipping in rooting hormone or just plugging them in the soil?
-I see from post #4, looks like you had the plant in a small container for a bout 6-8 weeks before replanting to a larger container? Do you usually have a lot of root growth in that amount of time?

Thanks!
Last note! considering that you are in southern cali, and I have waaay more humidity, DEFINITELY consider techniques to increase the humidity on your cuttings.

1)go big, don't cut smaller than 1", do 1.5"+ and look for chunky pieces with branching
2)look for buds. if your tree has fresh buds, then it is prime time to take cuttings. It will be loaded with hormones and ready to root.
3)protect against dry out, don't be afraid of using all perlite so you can mist and water as much as necessary without rotting the cutting. If you plan on using plastic bags over your cuttings, make sure that they are sterile.

Last year, my horrible cutting take rate was due to small cuttings, usage of non sterile bags, not enough drainage holes, not enough perlite, I wasn't using a greenhouse shelf.

Because your climate is intense like mine, you should be able to get phenomenal root growth as long as you optimize your humidity.
Dang I really appreciate all of your feedback here. I'll be coming back to it as I take some more cuttings.

I'm laughing because what your saying hits a little too close to home. I took probably 15+ cuttings last year and used a mixture of sand and perlite (and maybe some other stuff). They were going fine then over the winter we had a ton of rain and I think all but 2-3 of them died due to root rot. The sand seemed like it was suffocating and they stayed wet for probably a month straight. I also just used normal plastic bags to cover them when I first took the clippings and they had really bad mold growth that I had to address so I just took off the bags all together.

I'll follow your advice here and try to take some more this year and see if I have more success with them. I think your strategy using primarily perlite is smart so I'll have to try it again. Thanks again for all the info!
sand is something that is double edged IMO. It's great for anchoring cuttings because of the density, but because the particle size is fine, it has a lot of surface tension and it wont drop excess water.

You are much better off with pure perlite, and use something like gravel or pebbles to anchor your cuttings to the topsoil. oxygen is so important to keep cuttings alive, and Ive been in that boat of losing tons of cuttings.

Last year I had about 50 hibiscus cuttings, and because I used a relatively muddy mix, and we had a tropical storm dump way too much water, I lost them all. They were already rooted and with leaves.

Also, go BIG right now. I made a lot of failed cuttings last year because I got addicted to propagation too late in the summer. It seems that the take rate is so much better right now, the hormones are just right in the trees so cut and dip in hormone and plant as much as you can right now!

If you can build a root system over the summer and migrate your best cuttings to pots before winter, you will be MUCH happier with your outcomes!
 
Last thursday morning. I collected these white bougies from the car crash site on wednesday night
IMG_0759.JPG
In a week and 2 days I have buds popping. This 4 inch dia. terracotta (ace hardware 1.49 each) is a nice starter and because of the weight and moisture leaching, it's effective.

In 3 weeks, this should be very healthy and full of foliage. I have been excited to get my hands on white and pink bougie!

IMG_0920.JPG
 
First buds on the growbox purple bougie!
IMG_0946.JPG
white/pink bougie budding out
IMG_0947.JPG
Roots showing up through drainage holes on my first up potted purple chunkyIMG_0944.JPGOnce it gets roots out to every corner, growth should be off to the races on this one
IMG_0942.JPG
 
Chunky purple bougie up pot process
~8.5in wide training pot, pumice drainage layer
IMG_0951.JPG
Mostly ~1/4 in sifted perlite, some finely chopped fir bark, and a handful of cocopeat, soaked in a bucket so cocopeat expands around perlite, then poured thru sifter
IMG_0952.JPGIMG_0953.JPG
Here's chunky boy, solo cup for scale
IMG_0954.JPG
IMG_0956.JPG
Repot was a little dicey, I had to improvise with some 2in river pebbles to stabilize. Got the roots carefully into a pile of the mix on top of the pumice layer, then poured the rest around and gently pat down.

Back in the greenhouse shelf, nice and humid to protecc against transpiration lossssss. Gonna be a cool tree someday soon!
IMG_0958.JPG
 

Attachments

  • IMG_0955.JPG
    IMG_0955.JPG
    234.9 KB · Views: 7
Did some pruning on the top of 2022 airlayer bougie, thinking about doing a chop much lower to get better taper to that thin branch.
Comparison pic, Feb vs today
FEB TO JUN1.jpg
 
Messing with my Carl Zeiss 35mm flektogon from East Germany (it does 2:1 macro)
The top shoots of 'car crash bougie' white and pink cutting
IMG_0981.JPG
 
Wired branches on the right further to the right to set this up for a new front for next year's repot.

Repurposed some aluminum ground wire that was replaced during an electrical repair on another property of mine, it's not too bad to work with, strong enough to wire loosely and get these branches in place.

should hold position in a few weeks. Going to look into annealing the aluminum in oven or grill to make it easier to work with.IMG_1005.JPGA New shoot below the top on the left looks alright for future top, going to chop when more buds show up. Also that parallel vertical branch off the right branch is going to go as well.

Rear canopy filling out and responding to the wiring.
IMG_1006.JPG
 
Another one doing well, not as big as my 'top 4' (purple gro box chunk, chunky purple 1 in training pot back in May, purple 2 above, purple 3 lagging behind chunky 2 due for up pot in about a week, and white and pink 1.


IMG_1002.JPG
 
CHOP has occurred on 2022 air layer bougie.
IMG_1012.JPG
Future apex looking better, taper improved. Stick placed for future front. That thick 100 degree branch up front that goes to the left is gonna go as well. Put some 4x re-used aluminum wire to give some movement to the new top. 🤣 Economical bonsai!IMG_1013.JPG

New view from the top, in my opinion it is much improved distribution-wise...gonna pluck some of the leaves that are shading the branches on the left as I'm waiting on some back buds...will probably prune those on the left a node or two back and see if it helps.
IMG_1014.JPG

Chunky purple 2 now onto the partial shade pedestals (partial afternoon sun, very light morning sun, noon shade under my lemon and crepe myrtle trees.)


IMG_1017.JPG


Growbox Bougie looking healthier, still a ways to go before I take him out of the greenhouse

IMG_1018.JPG

And another one with a bud, this one took a while to show signs of life, but there's a leaf! A good day!
 
taking a look at progress from chunky purple 2, and chunky purple 3

IMG_1052.JPG

Acclimated to partial sun


Chopped the lower 1/3 of plastic cup and planted it into 6 inch training pot with perlite, cocopeat, pumice. Plan on doing an exposed root, gonna cut the cup out in 6 months. Going to do some deadwood work on the over extensions of hardwood branching there as well when the roots are established.

IMG_1053.JPG
 
Back
Top Bottom