MTM Bald Cypress progression thread

Messages
2,485
Reaction score
7,443
Location
SE Michigan
USDA Zone
6a
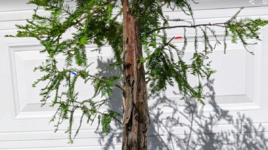
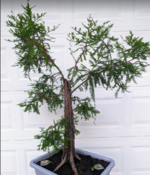
I'm starting a progression thread on the Bald Cypress I bought from @Cajunrider (CR) in early March of 2024. Here's a picture of when it was posted for purchase, I'd already saw the quality BC trees CR was working with, and once I saw this one I had to have it. Fit my size & price range, and looked a thousand times better than the ones around here. :) This is my first time working with any BC. Critiques are welcome.
1719797145502.png
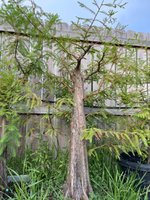
Bought a bus tub and potted it up in the same type of pot it left.
1719797926374.png

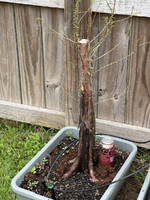
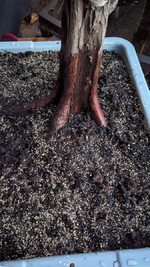
After delivery I repotted it into some Miracle Grow garden soil, pine bark, & some Vermiculite. March 7th 2024. I buried the root flair like CR said to encourage root growth.
1719798277372.png

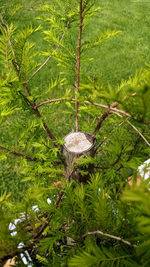
May the 4th be with me, every thing looks healthy, and I'm planning to carve the flat top.
1719799019685.png

Two weeks later May 19th.
1719800322418.png

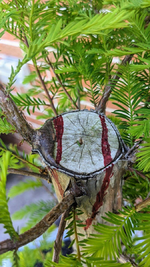
Choose my front & started planning the path to flat top BC. Got the marker out and used CR advice on how to carve this out.
1719800587039.png

The Front.
1719800473709.png

Back.

1719800668066.png

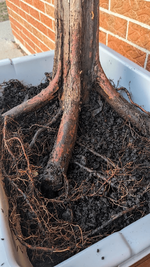
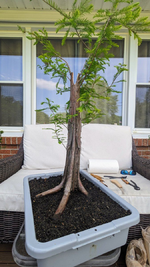
At this point Cajun Rider suggested I clean up the deep soil around the root flare I put it in upon arrival, & CR walked me through the carving process.
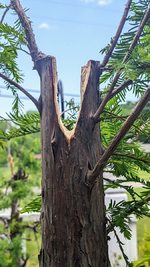
1719800855468.png
1719801074560.png

You can see where I nicked the old scar here.
PXL_20240519_204921199.jpg


Here's most of the tools I used. I tried not to leave big gouges with the carving tools. I used a bigger hand saw & my drill with a wood carving paddle attachment to get started (not pictured)
I carved with the wood handle tools quite a bit, it should look roughed up a bit a guess. Not bad attempt as I've never done that before I'll let it heal a bit and go from there. :)

PXL_20240519_191908611.jpg
.

Right now I'm just gradually working the V shape in. Thunder storms rolled in so I didn't finish the right side at this time.
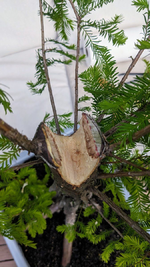
1719803801264.png
Came back in and finished carving the right side a week later.
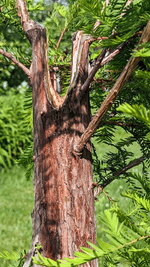
1719804194793.png
 
It's looking really healthy.
  1. I would wire the lower branches to get them horizontal and add some side to side movement now. Your struggle will be the same as mine. The top will grow so fast and the low branches will be so slow. You will have to prune the top often to keep the lower branches growing.
  2. Don't forget to nick the scar line every 3 months during growing season to keep it growing. BCs close wound amazingly fast if you keep nicking the line. Doesn't have to be deep, a tiny sliver with an Exacto knife will do. I think your tree is due one by the end of July. You want the scar line all healed up by the fall.
 
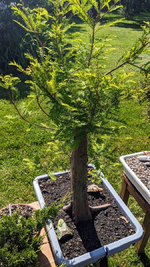
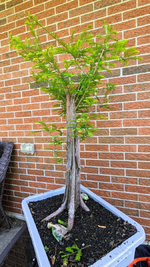
I wanted to post these pictures yesterday when I posted the above, but real life got in the way, and I had to hit submit so I didn't lose what I had. Anyway here's a picture of it today.
1719846173446.png

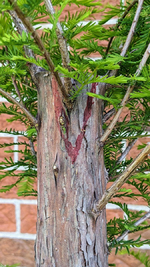
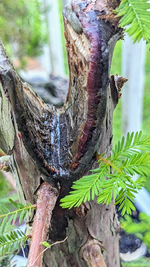
Back side of the carving wound. I'm having a hard time determining if the wound is healing under the cut paste.
1719846291388.png
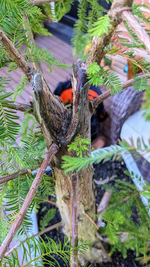
This is the front side of the cut. Should I put cut paste on the inside of the 'V' shape?
1719846990723.png

Thanks @Cajunrider it is really healthy & getting a lot of new growth. I haven't decided what flat top style I want yet so I haven't touched the branches with wire, I do need more practice wiring so maybe I'll do that today. I'll do some top pruning.

Mind if I ask you a bunch of questions for the next five years? :)

I've been bending the limbs down using my thumb & index finger like you explained CR, even broke one small branch off, (marked in red) damaged another (marked in blue), but I think I have the technique down now, & I'm now leaving the younger branches alone. Third times a charm as they say.
1719847543675.png


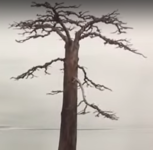
Here are the two looks I'm deciding on.

The first one has no bottom branches & the top is different than mine, but I should be able to make it work.
1719848041014.jpeg

And this one with the bottom branches that looks really good too. Crappy screen grab photo but you get the idea.
1719848126331.png
 
Finger bending get the angle to be horizontal starting when young,but it won't get you the side to side movement. As soon as the lignification starts and the branch starts to have deeper color, wire it so it has side to side movement. Notice the tree on the second picture you post. That's a tree by Johng and he wired it well for side to side movement.
No need for cut paste inside the V on just the bare wood. Any cheap prune sealant to slow down the cracking and allow the tree to grow over it will do. I have used Prune sealant, Titebond III, and even Linseed oil. They all achieve the same thing: keeping the wood from rotting, cracking while waiting for the scar to roll over them.
 
Last edited:
Thanks! I'll wire the bottom branches today to put some movement in them. Impressive that you knew that was a Johng BC, from a screen grab from his you tube video. :)
 
The first tree in your inspiration trees looks awesome but looks like you will need to remove one side of the v-chop to pull that off. I like that one than the second one.
 
The first tree in your inspiration trees looks awesome but looks like you will need to remove one side of the v-chop to pull that off. I like that one than the second one.
For sure I'd have to chop it different. Imagine what the first one would look like with better flutes & flair.
 
Quick update.

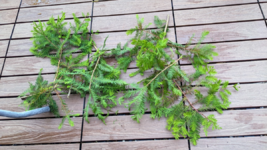
Wired four of the bottom branches, I'm not sure if I'm going to keep all of them, but I need as much practice as I can get. I also pruned five of the top branches off to thin it out & allow sun to hit the bottom branches. Applied cut paste. I still want to prune the huge top pigtail branches back a & work more on carving the "V" down a bit farther, the wound appears to be healing nicely. I left some branches I want to prune off around the carve to help with the future wound healing.
1720748838503.png
1720749205294.png
1720749348841.png

I'll let it rest up, while I ponder some more. :) What do you think Uncle C? I enjoy your wisdom.

Edit: I just realized I didn't take wiring pics.
 
Quick update.

Wired four of the bottom branches, I'm not sure if I'm going to keep all of them, but I need as much practice as I can get. I also pruned five of the top branches off to thin it out & allow sun to hit the bottom branches. Applied cut paste. I still want to prune the huge top pigtail branches back a & work more on carving the "V" down a bit farther, the wound appears to be healing nicely. I left some branches I want to prune off around the carve to help with the future wound healing.
View attachment 557294
View attachment 557295
View attachment 557296

I'll let it rest up, while I ponder some more. :) What do you think Uncle C? I enjoy your wisdom.

Edit: I just realized I didn't take wiring pics.
Looking great.
I would wire the top branches up to 6” from the trunk to get some movement. As they grow bigger, the movement will be subtle but I think it will be pleasing. Just don’t let the wire bite.
 
Looking great.
I would wire the top branches up to 6” from the trunk to get some movement. As they grow bigger, the movement will be subtle but I think it will be pleasing. Just don’t let the wire bite.
TY I will do that, I'm like puddy in your hand... until you ask me to help you move. ;) Should I prune the top branches back too?
 
TY I will do that, I'm like puddy in your hand... until you ask me to help you move. ;) Should I prune the top branches back too?
Not until next spring. You want them a bit bigger to form a pleasing line to the V cut. Look at the Rock below. While the tree is far from finished, at least, even when viewed from the flat side of the V cut, the top branches do not have the abrupt reduction.
IMG_2858.jpeg
 
Last edited:
Another reason not to prune off much of the top is it will slow the rollover of the cambium at the edges of your carving. All that photosynthetic breen stuff provides the energy to create the growth you need. Plus when you cut back later it will give you the desired taper in the branches. Coming along well for the first year.
 
I'm starting a progression thread on the Bald Cypress I bought from @Cajunrider (CR) in early March of 2024. Here's a picture of when it was posted for purchase, I'd already saw the quality BC trees CR was working with, and once I saw this one I had to have it. Fit my size & price range, and looked a thousand times better than the ones around here. :) This is my first time working with any BC. Critiques are welcome.

View attachment 555149
Bought a bus tub and potted it up in the same type of pot it left.

View attachment 555150

After delivery I repotted it into some Miracle Grow garden soil, pine bark, & some Vermiculite. March 7th 2024. I buried the root flair like CR said to encourage root growth.

View attachment 555151

May the 4th be with me, every thing looks healthy, and I'm planning to carve the flat top.

View attachment 555154

Two weeks later May 19th.
View attachment 555156

Choose my front & started planning the path to flat top BC. Got the marker out and used CR advice on how to carve this out.
View attachment 555158

The Front.
View attachment 555157

Back.

View attachment 555159

At this point Cajun Rider suggested I clean up the deep soil around the root flare I put it in upon arrival, & CR walked me through the carving process.

View attachment 555160
View attachment 555161

You can see where I nicked the old scar here.
PXL_20240519_204921199.jpg


Here's most of the tools I used. I tried not to leave big gouges with the carving tools. I used a bigger hand saw & my drill with a wood carving paddle attachment to get started (not pictured)
I carved with the wood handle tools quite a bit, it should look roughed up a bit a guess. Not bad attempt as I've never done that before I'll let it heal a bit and go from there. :)

PXL_20240519_191908611.jpg
.

Right now I'm just gradually working the V shape in. Thunder storms rolled in so I didn't finish the right side at this time.

View attachment 555162
Came back in and finished carving the right side a week later.

View attachment 555163
I did that and fused it together with a zip tie.
 
I did that and fused it together with a zip tie.
Zip tie is a good idea, I broke a branch I was trying to wire a week ago, and I just put some wire on it. Wasn't a bad break, but enough for me to quit wiring that branch until next year. I took a class in May of this year and the instructor mentioned he uses electrical tape wrapped sticky side up instead of raffia, so all kinds of methods to help with a branch break. Love it! :)

The branch I broke, is somewhat important to the design.

1721613896186.png
 
Don't forget to nick the scar line every 3 months during growing season to keep it growing. BCs close wound amazingly fast if you keep nicking the line. Doesn't have to be deep, a tiny sliver with an Exacto knife will do. I think your tree is due one by the end of July. You want the scar line all healed up by the fall.
Tomorrow is nick the scar day. Just to be clear, a 2 or 3 millimeter cut will work? The left side doesn't seem to be healing as well as the right side. I'll take another look in the morning.

This is a pic from two weeks ago.
1722132563851.png
 
Tomorrow is nick the scar day. Just to be clear, a 2 or 3 millimeter cut will work? The left side doesn't seem to be healing as well as the right side. I'll take another look in the morning.

This is a pic from two weeks ago.
View attachment 559971
Looks good. The side with more growth will heal faster. If you want to encourage the other side, foliar spray is the answer.
 
Back
Top Bottom