Grow pots

markyscott

Imperial Masterpiece
Messages
6,127
Reaction score
21,430
Location
Delaplane VA
USDA Zone
6B
Thank you for sharing, Scott! Very detailed post with great pics.

Do you find the drainage to be enough on these with just the space in between? I would be inclined to drill a few holes in the bottom to give it some extra help.

Also I like the idea for drilling handles on the side. Extra money, but probably pretty reusable over the years if purchasing one with the right material.

Cheers!

It's been ok for me. But if you want more it's nothing that a hole saw won't fix. Just tape it over with the drywall tape and you're good to go. You'll need to make feet though - I'd just put three pieces of 1x2 across the bottom to lift it off the ground.

Scott
 

coh

Imperial Masterpiece
Messages
5,782
Reaction score
6,825
Location
Rochester, NY
USDA Zone
6
Scott, you mentioned that you run the bottom boards in the "long direction". I usually run mine the other way. Have you found that your way works better for you for some reason? Oh, I forgot to mention that I do add "handles" to each side, just screw an extra piece of wood along the top. Does make the boxes easier to handle.

Chris
 

markyscott

Imperial Masterpiece
Messages
6,127
Reaction score
21,430
Location
Delaplane VA
USDA Zone
6B
Hi Chris - I probably worded it poorly. All I meant was that if your making boxes the size I made in this example, you'll need 2 20" and 2 21" pieces for the sides. The 21" pieces go on the outside of the 20" pieces making for a square 20" opening. The pieces on the bottom will need to be 21" also to span the length of the grow pot.

So for the 21" boxes I used 2 20" pieces and 4 21" pieces of cedar fencing. I also used 4 6" 1x2's.

Scott
 

markyscott

Imperial Masterpiece
Messages
6,127
Reaction score
21,430
Location
Delaplane VA
USDA Zone
6B
Excellent thread and the idea is great.
Suppose I could use old wood pallets too.

May give this a go at some point.


That one on the bottom left is mislabeled however, it's clearly Universal Tape.

Hi Starfox. Believe it or not, I have tried old pallets before. But they're harder to pull apart than you would guess and the pine deteriorates more quickly than you would think in the pot. The cedar is inexpensive and tends to hold up pretty well in my experience.

Scott
 

Anthony

Imperial Masterpiece
Messages
6,290
Reaction score
8,389
Location
West Indies [ Caribbean ]
USDA Zone
13
Mark,

a little of our experience.
When ground growing and placing a tile under the root, the tree stays shallow rooted.
Normally 4" is enough depth when removed from the ground.
6" of internal pot depth, means 2" of soil, which is more than enough to continue refinement on branchlets.

So we abandoned the deeper pots, which we made out of local cedar [ Cedrula sp, ] some years ago.

A few of our local trees have the ability to trunk thicken in 1" of soil, and others have to be ground grown.
The large boxes didn't make a great deal of sense.
Which is why you see a lot of plastic over sized Bonsai pots for refining in my images.

Maybe our mistakes will help you progress at a faster rate than we did.
Good Day
Anthony
 

ghues

Omono
Messages
1,554
Reaction score
3,141
Location
Campbell River BC Canada
USDA Zone
7b
Hi there Scott,
I've been using these types of grow pots (with decent success) for a number of years as I didn't have any more room in the small grow bed .......and I had a lot of material after I had to replace one whole side of the yards fence panels which around here are almost all made out of (old growth) western red cedar. Living along the PNW "wet coast"(not a typo)..... I drilled large holes for more drainage (using a door handle hole drill bit). My yamadori go into them (mix of pumice, lava and sifted bark) for at least two years......here's an example.
Cheers
Graham
 

Attachments

  • image.jpg
    image.jpg
    305.3 KB · Views: 129

markyscott

Imperial Masterpiece
Messages
6,127
Reaction score
21,430
Location
Delaplane VA
USDA Zone
6B
Mark,

a little of our experience.
When ground growing and placing a tile under the root, the tree stays shallow rooted.
Normally 4" is enough depth when removed from the ground.
6" of internal pot depth, means 2" of soil, which is more than enough to continue refinement on branchlets.

So we abandoned the deeper pots, which we made out of local cedar [ Cedrula sp, ] some years ago.

A few of our local trees have the ability to trunk thicken in 1" of soil, and others have to be ground grown.
The large boxes didn't make a great deal of sense.
Which is why you see a lot of plastic over sized Bonsai pots for refining in my images.

Maybe our mistakes will help you progress at a faster rate than we did.
Good Day
Anthony

Thanks Anthony. When working on nebari and trunk development or when working with collected trees, I like a deeper pot. With these it's easy to adjust the soil level for whatever my tree or purpose. Just don't fill it up!

Thanks for the advice.

Scott
 

markyscott

Imperial Masterpiece
Messages
6,127
Reaction score
21,430
Location
Delaplane VA
USDA Zone
6B
Hi there Scott,
I've been using these types of grow pots (with decent success) for a number of years as I didn't have any more room in the small grow bed .......and I had a lot of material after I had to replace one whole side of the yards fence panels which around here are almost all made out of (old growth) western red cedar. Living along the PNW "wet coast"(not a typo)..... I drilled large holes for more drainage (using a door handle hole drill bit). My yamadori go into them (mix of pumice, lava and sifted bark) for at least two years......here's an example.
Cheers
Graham

You need the good drainage there! I lived in Seattle for many years and remember clearly getting weeks of consecutive days with rain. On one occasion we hit 40 straight days - the proverbial flood indeed! I think I made my first grow box when I was living there 20 years ago. Didn't look as good as yours does, though.

Here in Houston we get a lot of rain too. In terms of inches, it's more than Seattle by a lot. It just comes down all at once. We had several days this year with rainfall totals in excess of 10". That's 1/3 of Seattle's rainfall in a single day! The spaces have seemed to be ok so far, but I don't think adding some drainholes would hurt either. Maybe I'll add then.

Thanks
Scott
 

CWTurner

Omono
Messages
1,266
Reaction score
1,732
Location
Philadelphia PA
USDA Zone
7a
If I need a big grow box I just buy a "bus tub" from my local restaurant supply co, drill a bunch of holes in the bottom and line the whole thing with window screen before adding soil.
tub.jpg

First grow box that I made, I unthinkingly used plywood for the base and in a couple of weeks it delaminated and fell apart. Duh!
You could also use longer corner braces that would serve as legs, and also allow you to reach under and move the box that way (better drainage, longer lasting bottoms, no added handle needed). Just make the corner braces extend above the sides an inch or so as you build the box. You would need to notch the bottom boards in this area though.
Thanks for the tutorial!
CW
 

wireme

Masterpiece
Messages
3,671
Reaction score
8,239
Location
Kootenays, British Columbia
USDA Zone
3
..and I had a lot of material after I had to replace one whole side of the yards fence panels

Other way around for me, I had to replace fence boards because I robbed the fence of them to build boxes!
I make them pretty much the same, lodgepole pine usually, lasts about 4 years here where the decay season is short. I'd love to use cedar but it's a bit harder to find a cedar stick to mill up, well not that hard but I'd have to borrow a trailer and drive for it. I've got beetlekill pine close enough to the mill to drop them and drag by hand if needed.
 

wireme

Masterpiece
Messages
3,671
Reaction score
8,239
Location
Kootenays, British Columbia
USDA Zone
3
Here's the finished product.

View attachment 90490

I made 3 21" boxes and 5 16" boxes. Total cost was less than $10 per box. They are generally good for around 4-5 growing seasons, but check it each winter to make sure it's still up for another growing season.

They are great at repotting time. You just unscrew the sides and the side of the rootball is exposed - no need to pull the tee out of the pot.

Try it - these only took me a couple of hours to make, including the trip to the big box store.

Scott
When I'm boxing up freshly collected trees I usually just make sure I have all the needed materials then build custom size for the trees, actually the first go I usually measure off the wrapped tree, for first repot I clean the roots then if there is no pot that fits I measure and build very fast. It's fun to buzz one out under pressure of time actually, can you guys get Robertson screw heads down there? I kinda hate the Phillips.
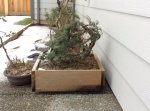
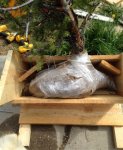
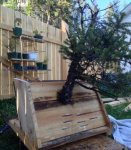
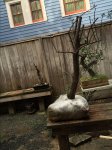
Here's one of my funkier creations, came out looking like something that should be sent down a ski jump!image.jpgimage.jpgimage.jpgimage.jpg
 

markyscott

Imperial Masterpiece
Messages
6,127
Reaction score
21,430
Location
Delaplane VA
USDA Zone
6B
When I'm boxing up freshly collected trees I usually just make sure I have all the needed materials then build custom size for the trees, actually the first go I usually measure off the wrapped tree, for first repot I clean the roots then if there is no pot that fits I measure and build very fast. It's fun to buzz one out under pressure of time actually, can you guys get Robertson screw heads down there? I kinda hate the Phillips.
Here's one of my funkier creations, came out looking like something that should be sent down a ski jump!View attachment 90565View attachment 90566View attachment 90567View attachment 90568

Very need nice wireme. I love the craftsmanship. But why the ski jump? I've always used a kickstand. Is there somethings nag about the wall that is preferable?

Scott
 

markyscott

Imperial Masterpiece
Messages
6,127
Reaction score
21,430
Location
Delaplane VA
USDA Zone
6B
Never mind - I get it. The first picture says it all. Very cool way to change the planting angle.

Thanks

Scott
 

markyscott

Imperial Masterpiece
Messages
6,127
Reaction score
21,430
Location
Delaplane VA
USDA Zone
6B
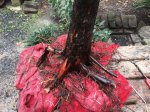
OK - putting them to use. Here's a bald cypress. I collected it back in October on a collecting trip with some friends. I balled rootball in packing stretch wrap during collection and left it that way until the tree was fully dormant. Here's the tree:

IMG_5149.JPG IMG_5150.JPG

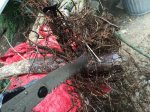
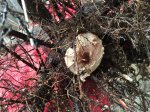
I bare rooted the tree and cut back what was left of the tap root.

IMG_5156.JPG IMG_5161.JPG IMG_5163.JPG

Scott
 

markyscott

Imperial Masterpiece
Messages
6,127
Reaction score
21,430
Location
Delaplane VA
USDA Zone
6B
Here's the tree after cutting back the roots, ready to pot up. Lot's of feeders still there - and it's already got some root growth. This should do great in the spring.

IMG_5172.JPG

Scott
 

markyscott

Imperial Masterpiece
Messages
6,127
Reaction score
21,430
Location
Delaplane VA
USDA Zone
6B
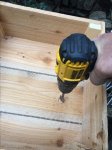
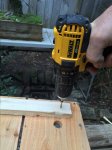
Some folks suggested adding drain holes to the box - I figured what the heck. I had some extra wood and more drainage couldn't hurt. So I added some drain holes and feet.

IMG_5175.JPG IMG_5176.JPG IMG_5177.JPG IMG_5179.JPG IMG_5180.JPG

Scott
 
Last edited:

coh

Imperial Masterpiece
Messages
5,782
Reaction score
6,825
Location
Rochester, NY
USDA Zone
6
Need to get one of them drill bits! That's what mine are missing.
 

markyscott

Imperial Masterpiece
Messages
6,127
Reaction score
21,430
Location
Delaplane VA
USDA Zone
6B
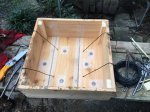
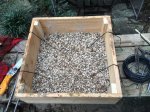
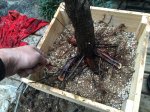
Next, I drilled four holes for the tie-down wire. Then a drainage layer and a mound of soil. Then I used the tie down wire to secure the tree tightly in the pot.

IMG_5181.JPG IMG_5185.JPG IMG_5186.JPG IMG_5189.JPG

Scott
 
Top Bottom